In my day to day I do cloud foundations work helping companies with their Azure governance and management. On projects we will develop a tagging strategy. A tagging strategy is only good if it is actually used. One way to ensure that tags are used is by using Azure Policy to require tags on resource groups or resources.
In the past I have used the deny effect in an Azure Policy to require tags upon resource creation. I basically use the template as previously blogged about here: https://www.buchatech.com/2019/03/requiring-many-tags-on-resource-groups-via-azure-policy. This policy works but can be a problem because the error that is given when denied during deployment is not clear about what tags are required. Also, folks think it is a pain and slows down the provisioning process.
I set out to require tags using a different method. The idea was to use the effect append vs deny so that resources without the proper tags would be flagged as non-compliant and the policy would add the required tags with generic values. Someone from the cloud team could then go put in the proper values for the tags bringing the resources into compliance. Th end result was that the effect append does work remediating with a single tag but falls down when trying to remediate using multiple tags.
I discovered that this behavior was intended and that the append effect only supports one remediation action (i.e. one tag). On 9-20-19 Microsoft updated the modify effect so that Modify can handle multiple ‘operations’ – where each operation specifies what needs to be remediated.
Now let’s walk through using the modify effect in an Azure Policy to add multiple tags on a resource group.
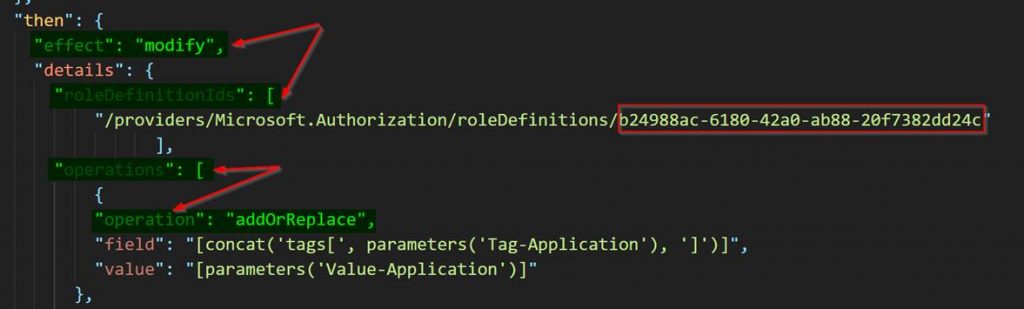
You will need to start off by coding your Azure Policy definition template. There are three important parts you need to ensure you have in template. You need to have modify effect for the proper effect, roleDefinitionIds as this is the role that will be used by the managed identity set as contributor, and operations to tell Azure policy what to do when remediation out of compliance resources.
"effect": "modify",and
"roleDefinitionIds": [
            "/providers/Microsoft.Authorization/roleDefinitions/b24988ac-6180-42a0-ab88-20f7382dd24c"
and
 "operations": [
            {
            "operation": "addOrReplace",
Here is a screenshot of the template.
You can get the full Azure Policy definition ARM Template on my GitHub here:
Required Tags Azure Policy Modify Effect.json
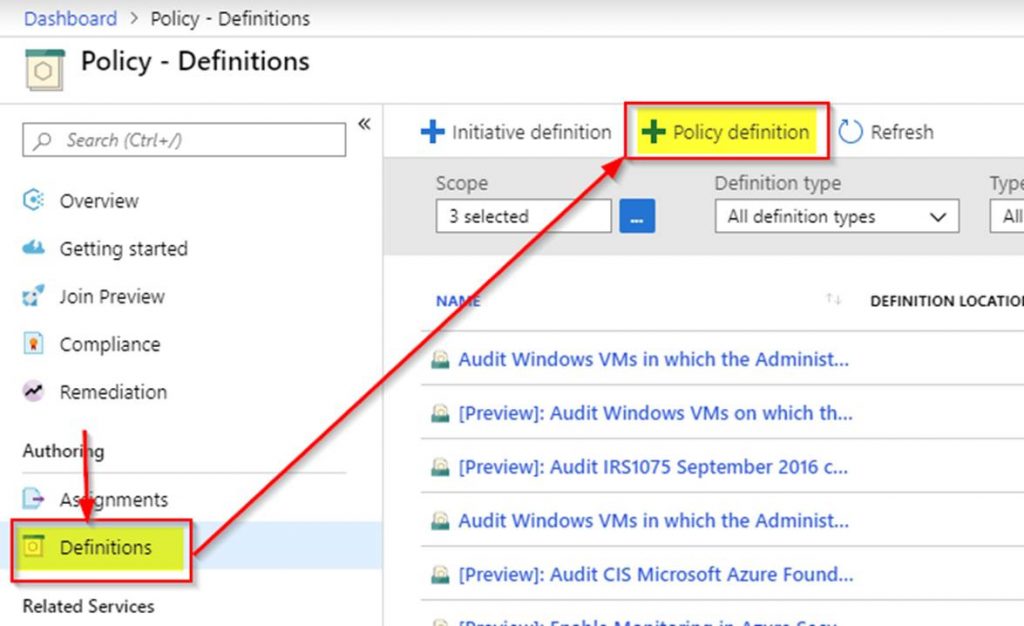
Add the ARM template as a new policy definition in the Azure portal.
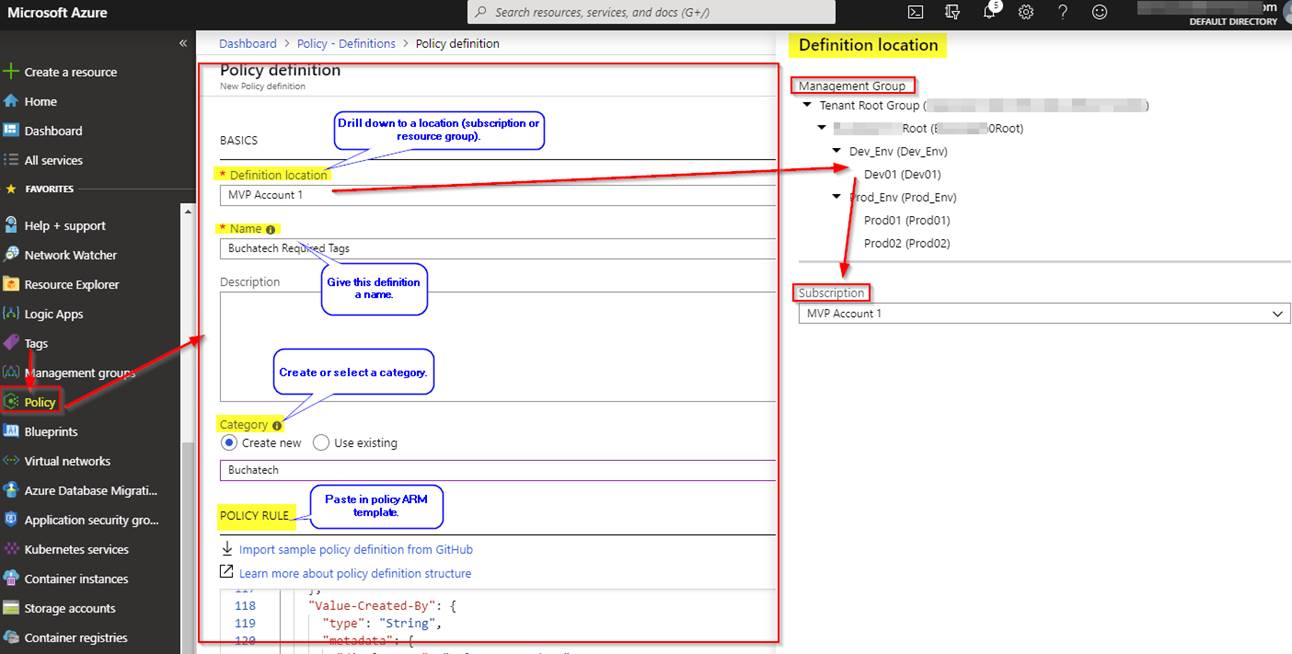
See the following screenshot to complete your Azure policy definition.
You will then see your new Azure policy definition.

Next, you need to assign the Azure policy definition. To do this click on Assignments.
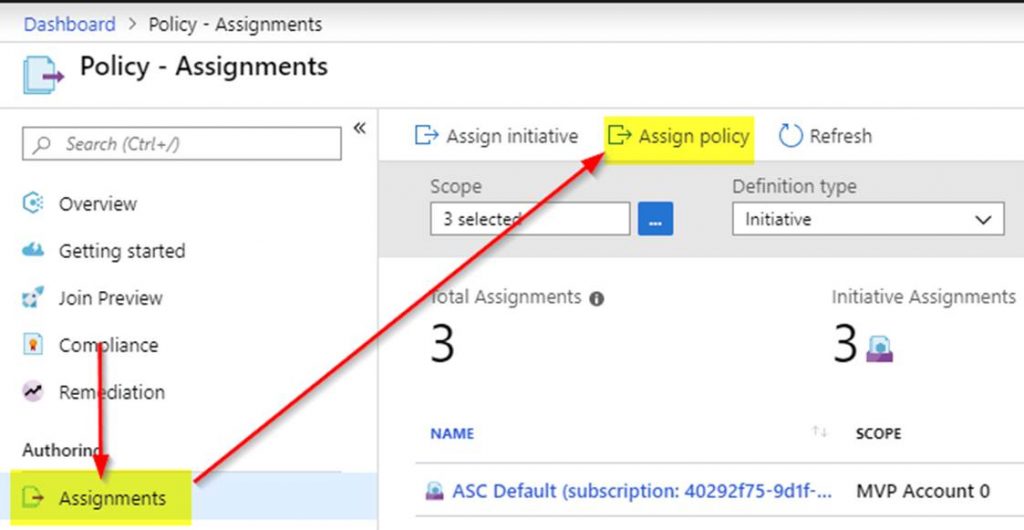
See the following screenshot to complete your Azure policy assignment.
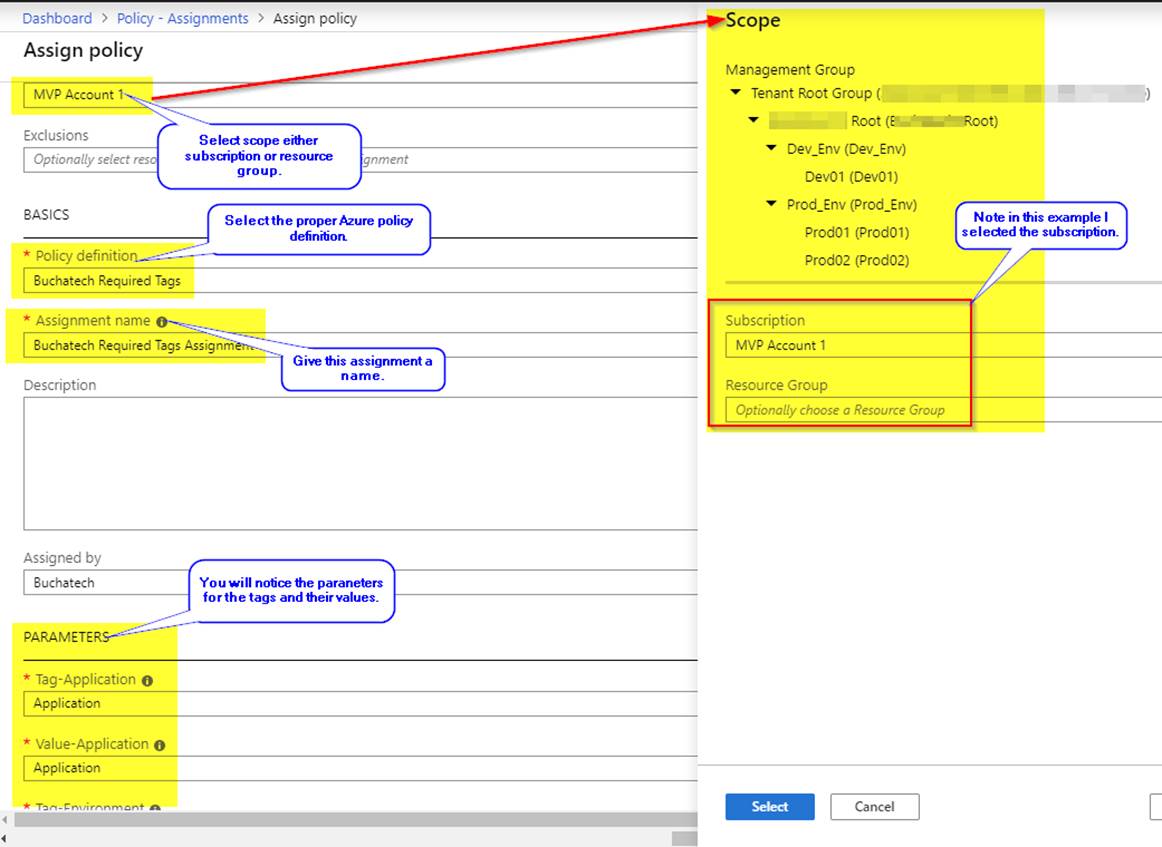
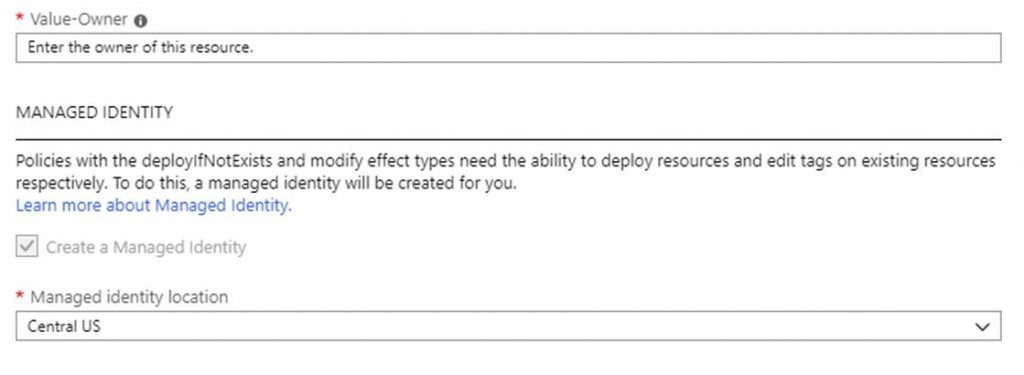
Note that this policy assignment will create a managed identity so that the policy has the ability to edit tags on existing resources.
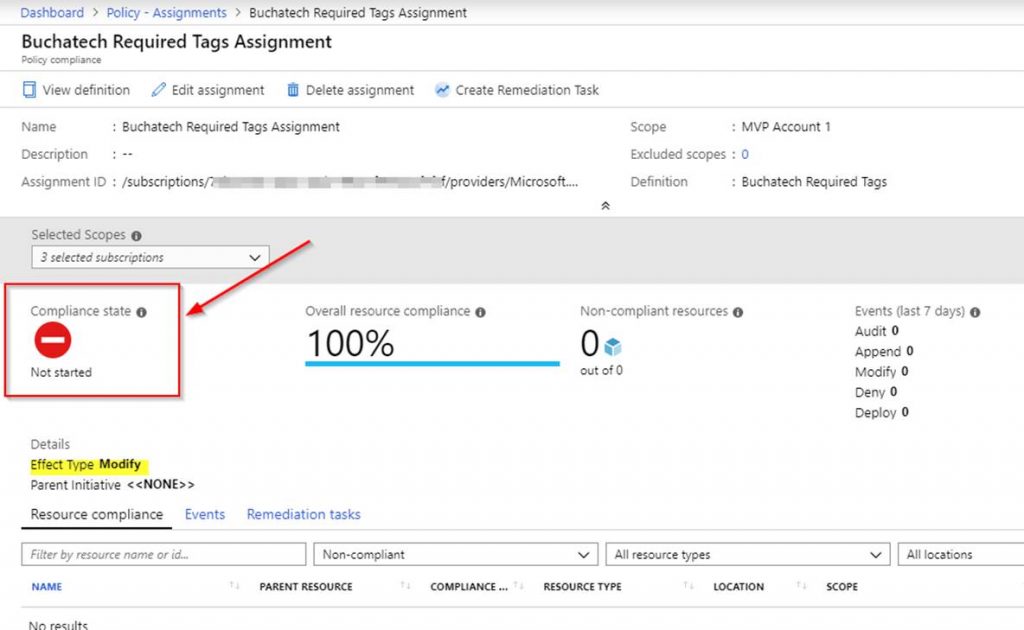
The assignment will now be created but the evaluation has not happened so the compliance state will be set to not started as shown in the following screenshot.
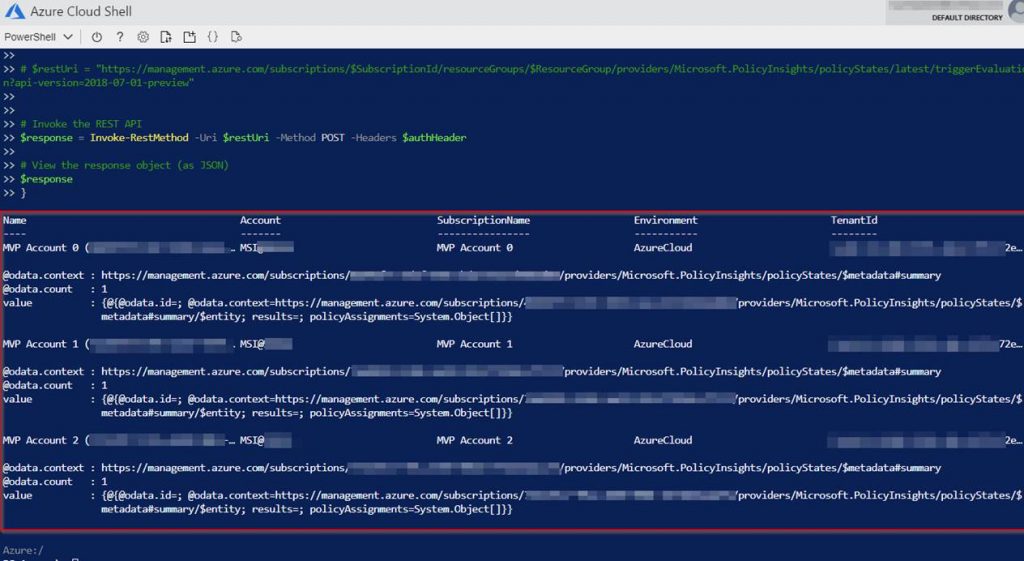
The policy evaluation will need to run for the compliance state to update. You can run the policy evaluation on-demand using the following PowerShell script in Azure Cloud Shell at https://shell.azure.com/.
You can get the policy evaluation trigger script on my GitHub here:
Az Policy evaluation Trigger v1.ps1
The response should look similar to:
After the policy evaluation is done go to policy assignments and check the compliance on your assignment.
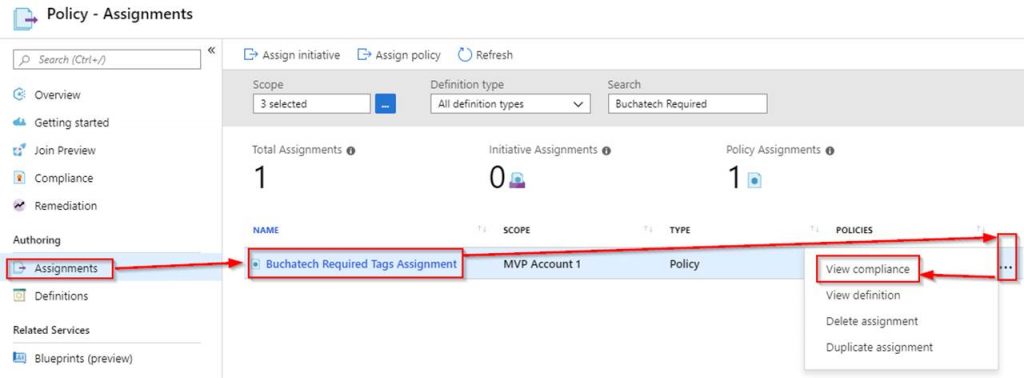
If the policy is working properly you will see non-compliant resources as shown in the following screenshot.
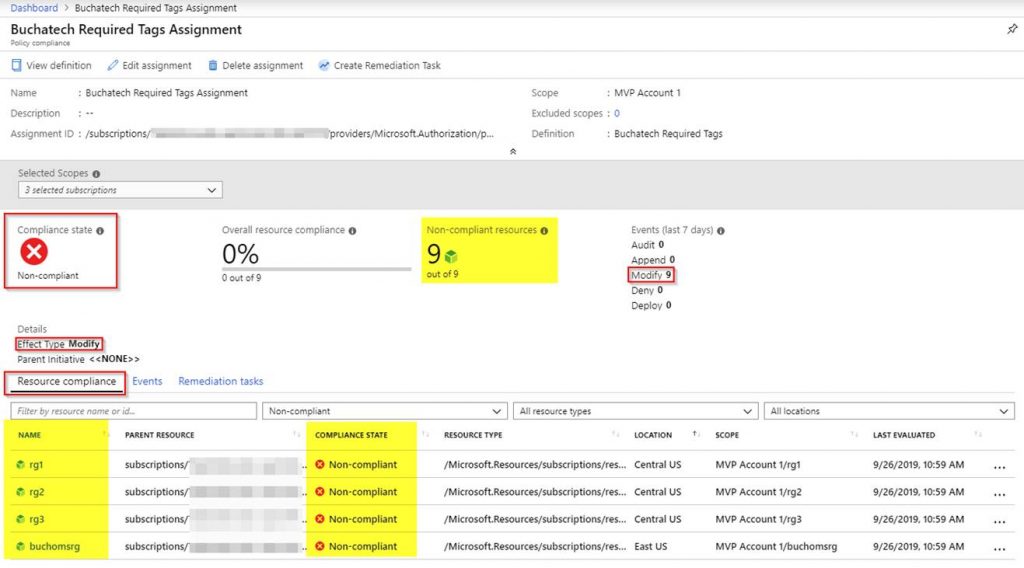
Note that any resources created in the policy scope (i.e. subscription or resource group) will automatically get the required tags with the generic values. Any existing resources that do not have the tags will be marked as non-compliant and we need to run a remediation task to add the tags. Within the compliance, screen click on Create Remediation Task.

You will be brought to a new screen listing the non-compliant resources. Here you can target specific resources based on scope or location as shown in the following screenshot. When you are ready click on remediate.

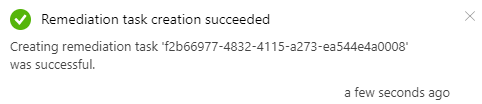
The remediation will start. You can also view the remediation activity in the Azure activity log. Note that Azure policy is using the managed identity to perform the remediation.
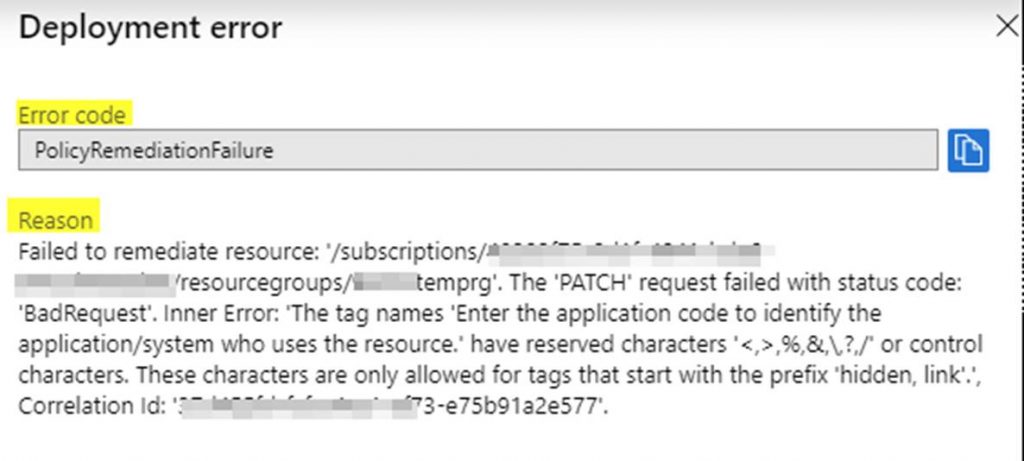
If the remediation is not successful it will show a status of failed on the compliance screen.
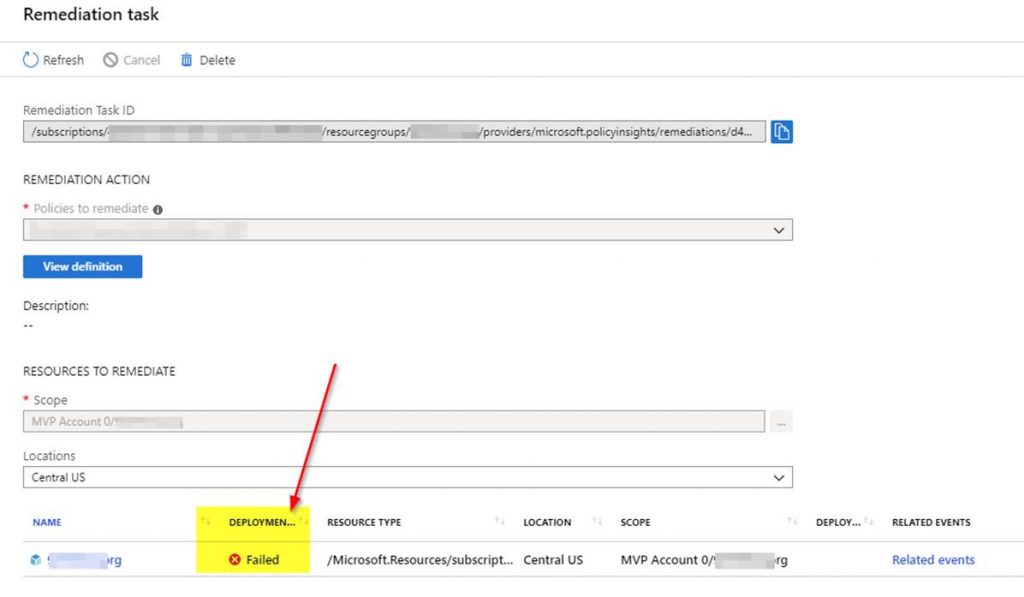
You can click on related events to see the error details to resolve. An example error is shown in the following screenshot.
Once the remediation task is done the resources compliance status will be changed to compliant like in the following screenshot.

Well, that wraps up this blog post. As you can see the updates to the modify effect in Azure Policy are very useful in helping enforce your tagging strategy. I continue to be impressed with the work on the Azure management teams at Microsoft. Keep the new features coming. Check back here soon for more Azure and Azure management blogs.
Shout out to Liz Kim at Microsoft for insight on the modify effect!

1 thought on “Walk-through: use Azure Policy modify effect to require tags”