This will be a short
post and this one is mostly for me so I can easily find this information in the
future when I need it again. 🙂
Recently I was
containerizing some PHP websites that use Composer. If you are not familiar
with Composer but you are working with PHP, you will run across it at some
point. Composer is a dependency package manager for PHP. Composer manages
(install/update) any required libraries and dependencies needed for your PHP
site.
To use Composer you must first declare the libraries and dependencies in a composer.json file in your site directory and then you would run Composer and it will do its magic. For more information on Composer visit: https://getcomposer.org/doc/00-intro.md
Back to my task, I
needed to install Composer in the containers I was building and run it to
install all the dependencies. I needed these actions in the Dockerfile so it
would all happen during the container build. After some research on Composer I
was able to pull something together. Here is the syntax that I ended up putting
in the Dockerfile:
# Install Composer
RUN curl -sS https://getcomposer.org/installer | php -- --install-dir=/usr/local/bin --filename=composer

# Set working directory for composer (Contains the composer.json file)
WORKDIR /var/www/html/sitename

# Run Composer
RUN composer install
Note: I placed the above code at the end of the
Dockerfile ensuring Apache, PHP etc was all in place first.
Lately I have been hearing a lot about a solution named Rancher in the Kubernetes space. Rancher is an open source Kubernetes Multi-Cluster Operations and Workload Management solution. You can learn more about Rancher here: https://www.rancher.com.
In short you can use
Rancher to deploy and manage Kubernetes clusters deployed to Azure, AWS, GCP
their managed Kubernetes offerings like GCE, EKS, AKS or even if you rolled
your own. Rancher also integrates with a bunch of 3rd party solutions for
things like authentication such as Active Directory, Azure Active Directory,
Github, and Ping and logging solutions such as Splunk, Elasticsearch, or a
Syslog endpoint.
Recently training
opened up for some Rancher/Kubernetes/Docker training so I decided to go. The
primary focus was on Rancher while also covering some good info on Docker and
Kubernetes. This was really good training with a lot of hands on time, however
there was one problem with the labs. The labs had instructions and setup
scripts ready to go to run Rancher local on your laptop or on AWS via
Terraform. There was nothing for Azure.
I ended up getting
my Rancher environment running on Azure but it would have been nice to have
some scripts or templates ready to go to spin up Rancher on Azure. I did find
some ARM templates to spin up Rancher but they deployed an old version and it
was not clear in the templates on where they could be updated to deploy the new
version of Rancher. I decided to spend some time building out a couple of ARM
templates that can be used to quickly deploy Rancher on Azure and add a
Kubernetes host to Rancher. In the ARM template I pulled together it pulls the
Rancher container from Docker Hub so it will always deploy the latest version.
In this blog post I will spell out the steps to get your Rancher up and running
in under 15 minutes.
The repository consists of ARM templates for deploying Rancher and a host VM for Kubernetes. NOTE: These templates are intended for labs to learn Rancher. They are not intended for use in production.
In the repo ARM Template #1 named RancherNode.JSON will deploy an Ubuntu VM with Docker and the latest version of Rancher (https://hub.docker.com/r/rancher/rancher) from Docker Hub. ARM Template #2 named RancherHost.JSON will deploy an Ubuntu VM with Docker to be used as a Kubernetes host in Rancher.
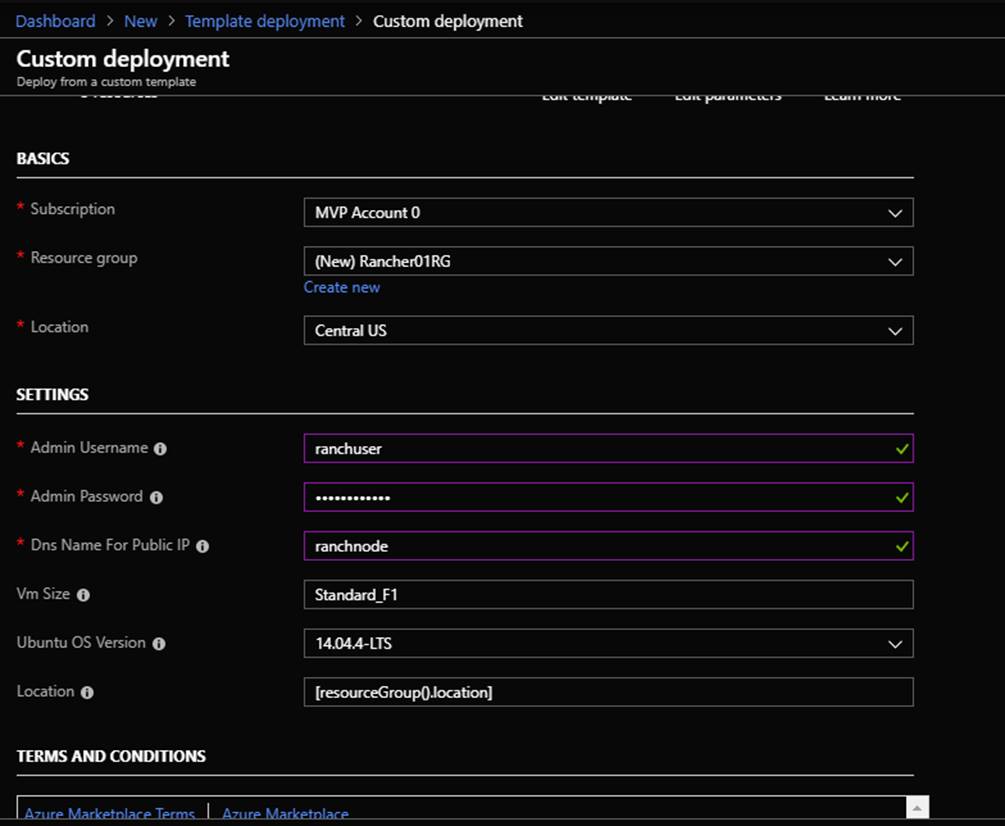
Node Deployment
Deploy the
RancherNode.JSON ARM template to your Azure subscription through “Template
Deployment” or other deployment method. You will be prompted for the
following info shown in the screenshot:
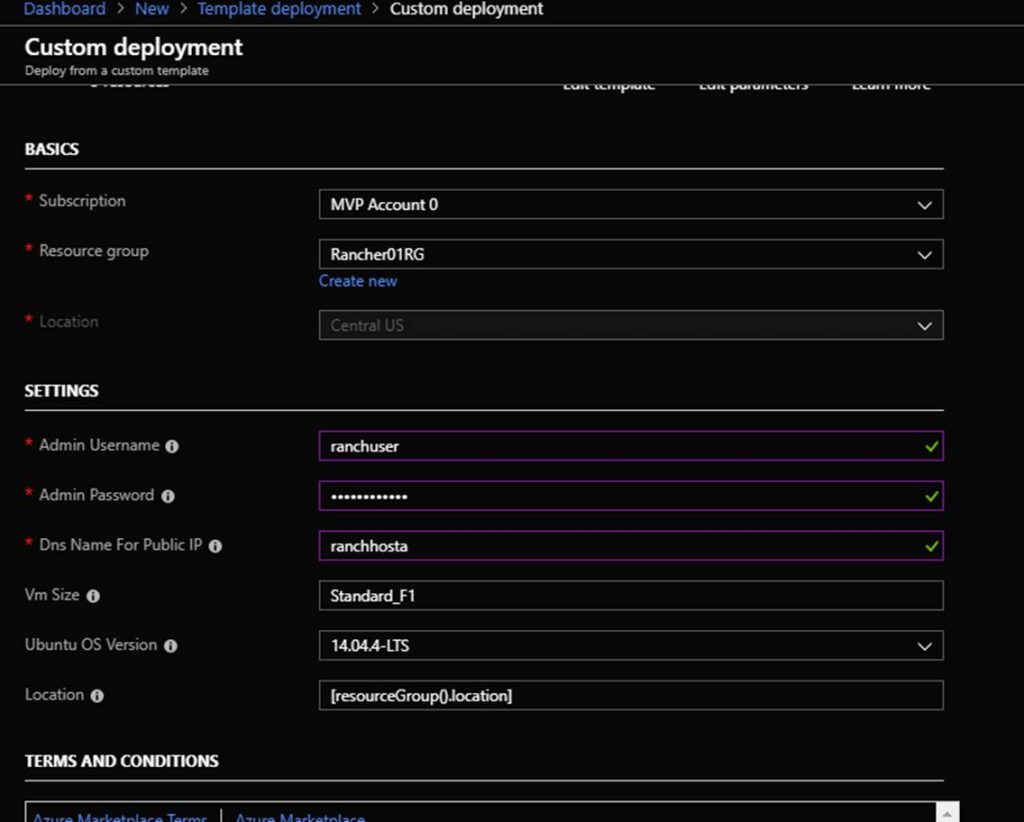
Host Deployment
Deploy the
RancherHost.JSON ARM template to your Azure subscription through “Template
Deployment” or other deployment method. Note that that should deploy this
into the same Resource Group that you deployed the Rancher Node ARM template
into. You will be prompted for the following info shown in the screenshot:
After the Rancher
Node and Rancher Host ARM templates are deployed you should see the following
resources in the new Resource Group:
Name
Type
RancherVNet
Virtual
network
RancherHost
Virtual
machine
RancherNode
Virtual
machine
RancherHostPublicIP
Public
IP address
RancherNodePublicIP
Public
IP address
RancherHostNic
Network
interface
RancherNodeNic
Network
interface
RancherHost_OSDisk
Disk
RancherNode_OSDisk
Disk
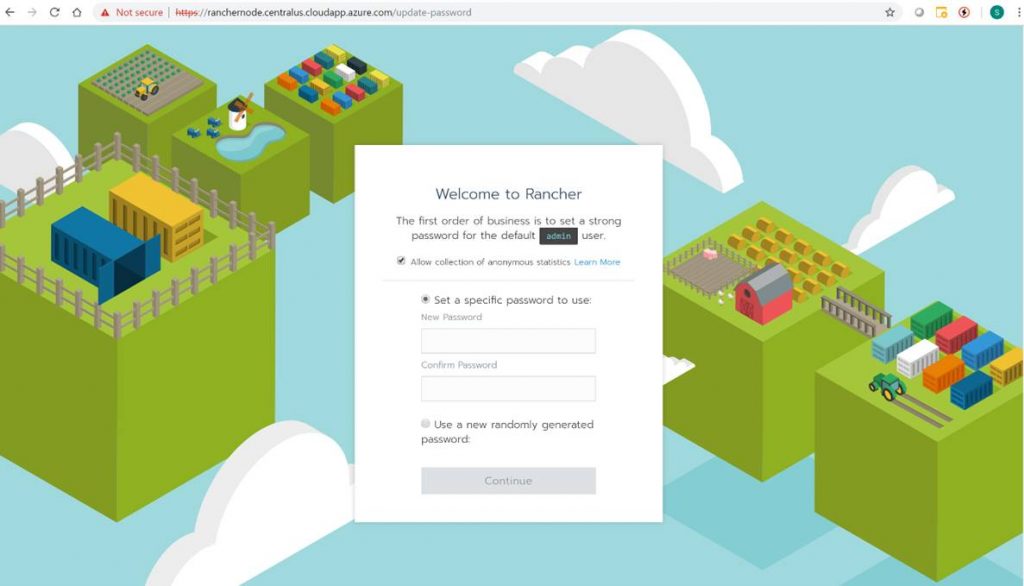
Next navigate the
Rancher portal in the web browser. The URL is the DNS name of the Rancher Node
VM. You can find the DNS name by clicking on the Rancher Node VM in the Azure
portal on the overview page. Here is an example of the URL:
The Rancher portal
will prompt you to set a password. This is shown in the following screenshot.
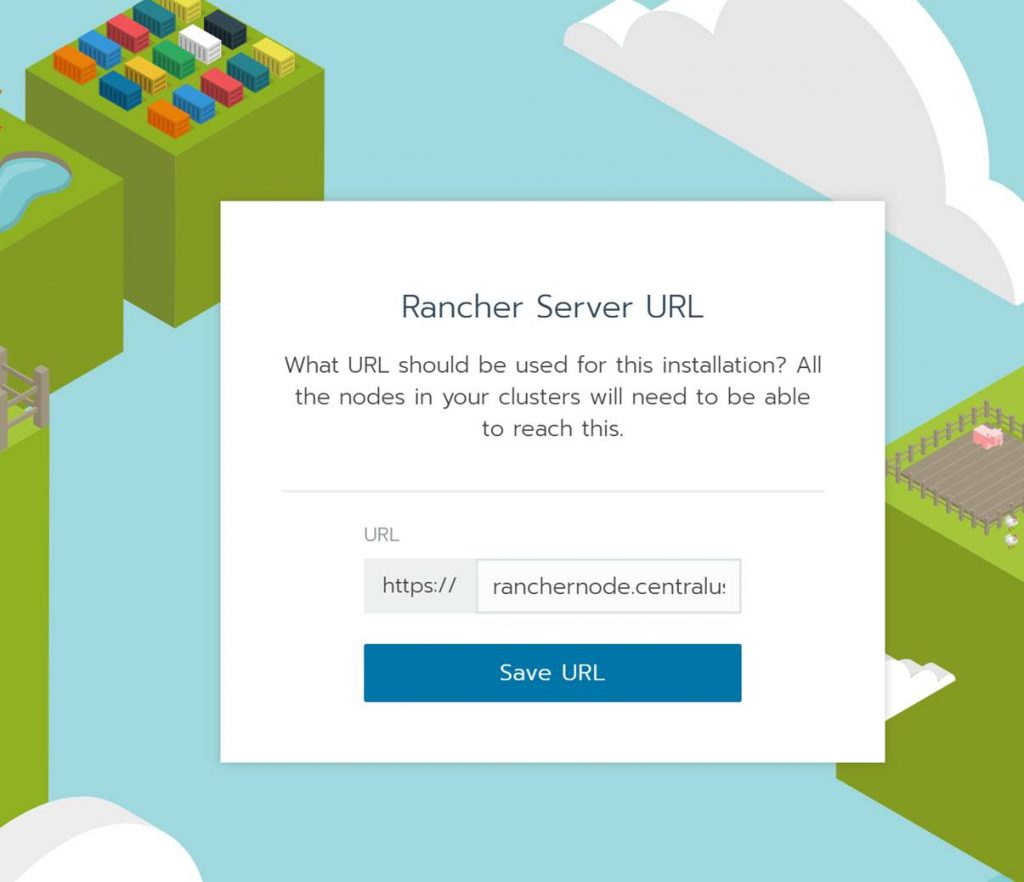
After setting the
password the Rancher portal will prompt you for the correct Rancher Server URL.
This will automatically be the Rancher Node VM DNS name. Click Save URL.
You will then be
logged into the Rancher portal. You will see the cluster page. From here you
will want to add a cluster. Doing this is how you add a new Kubernetes cluster
to Rancher. In this post I will show you how to add a cluster to the Rancher
Host VM. When it’s all said and done Rancher will have successfully deployed
Kubernetes to the Rancher Host VM. Note that you could add a managed Kubernetes
such as AKS but we won’t do that in this blog. I will save that for a future
blog post!
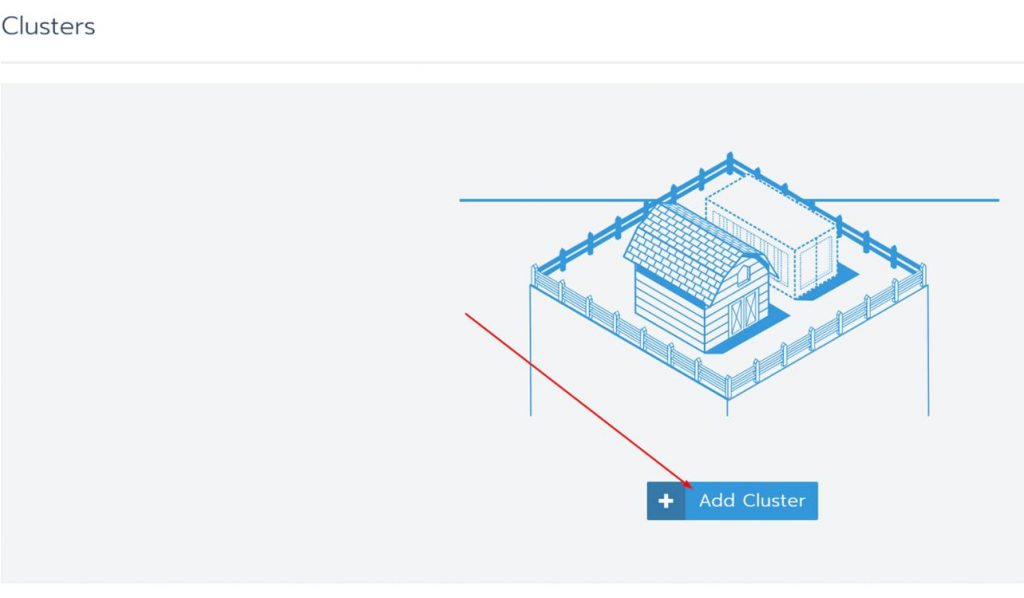
Click on Add Cluster
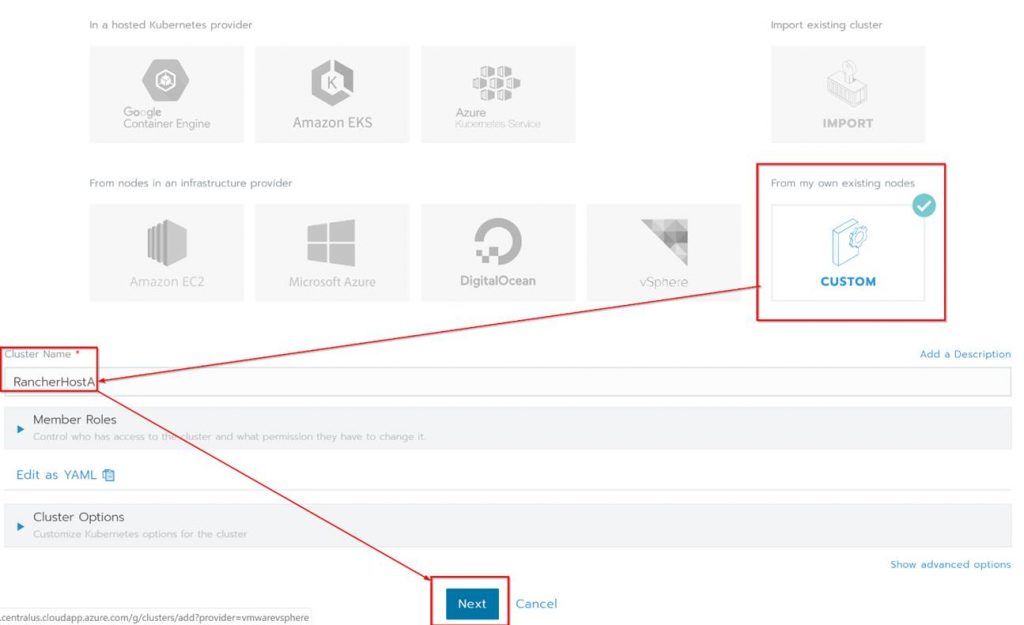
Under “From my
own existing nodes” Click on custom, give the cluster a name and click
Next.
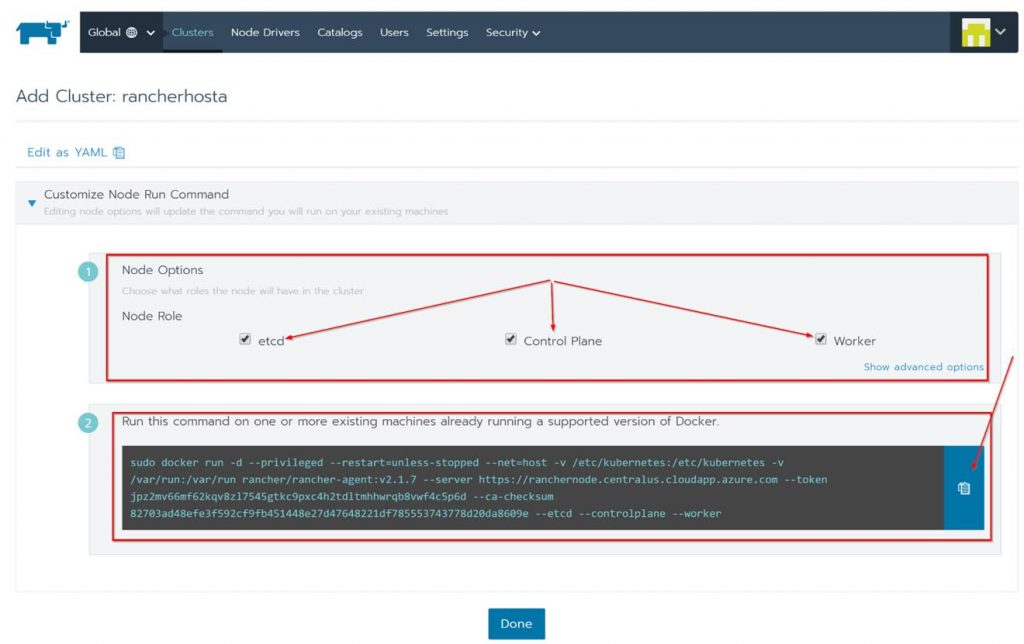
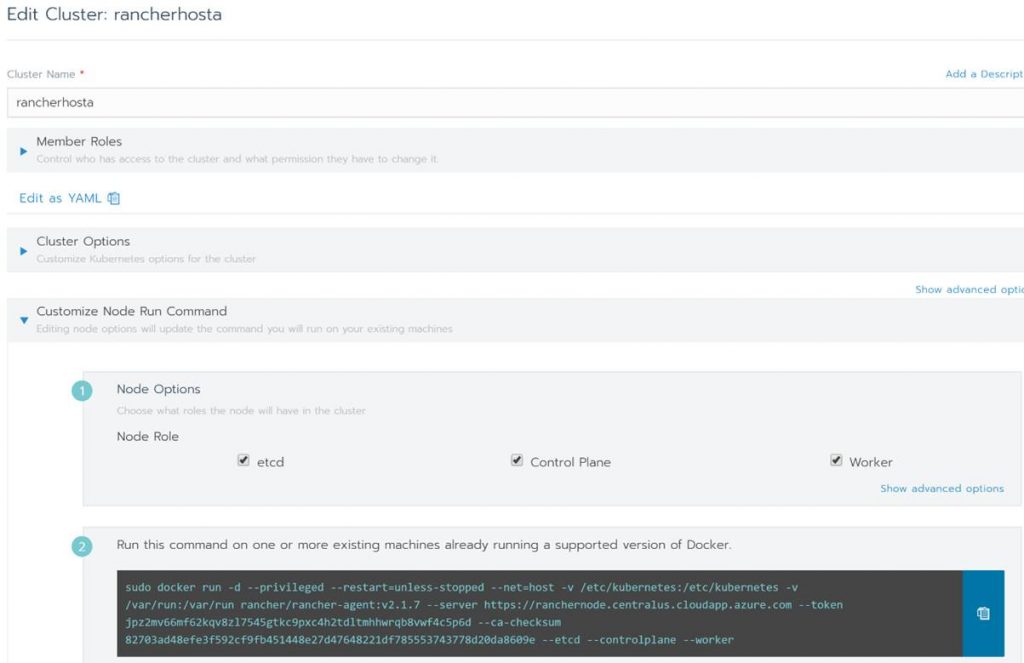
Next check all the
boxes for the Node Options since all the roles will be on a single Kubernetes
cluster. Copy the code shown at the bottom of the page, click done and run the
code on the Rancher Host.
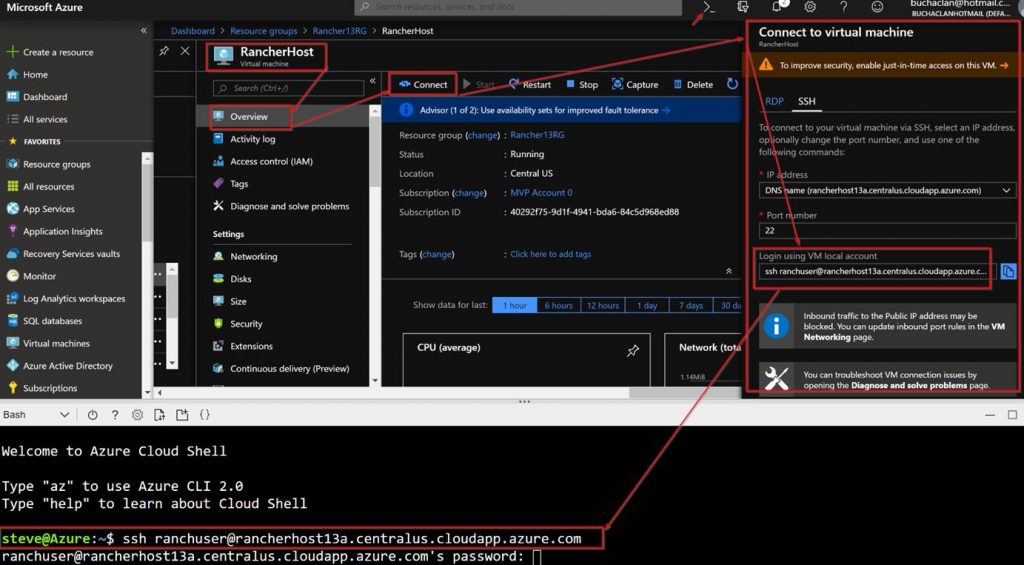
In order to run the
code on the Rancher Host you need to SSH in and run it from there. To do this
follow these steps:
In the Azure Portal, from within the resource group click on the Rancher Host VM.
On the Overview page click on Connect.
Copy “ssh ranchuser@rancherhost.centralus.cloudapp.azure.com” from the Connect to virtual machine pop up screen.
Open a terminal in either Azure cloud shell or with something like a terminal via VS Code and past the “ssh ranchuser@rancherhost.centralus.cloudapp.azure.com” in.
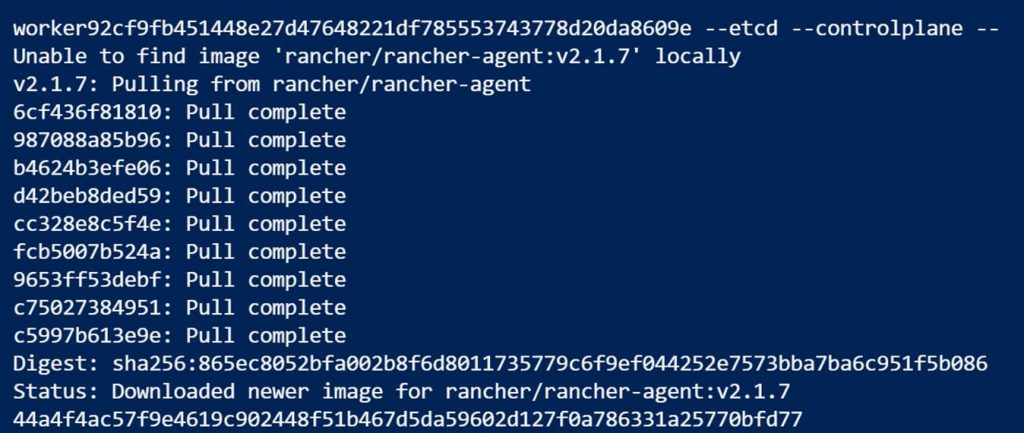
Running the code
will look like this:
When done you can
run Docker PS to see that the Rancher agent containers are running.
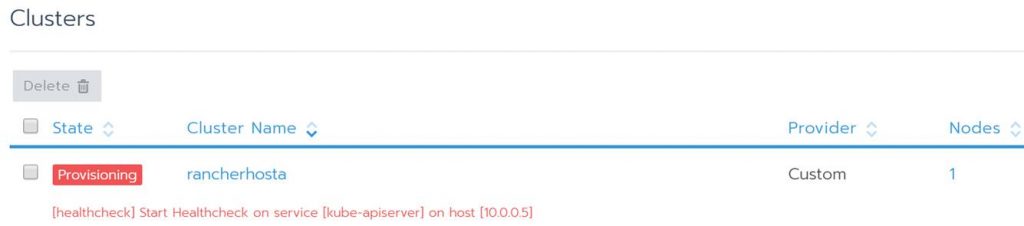
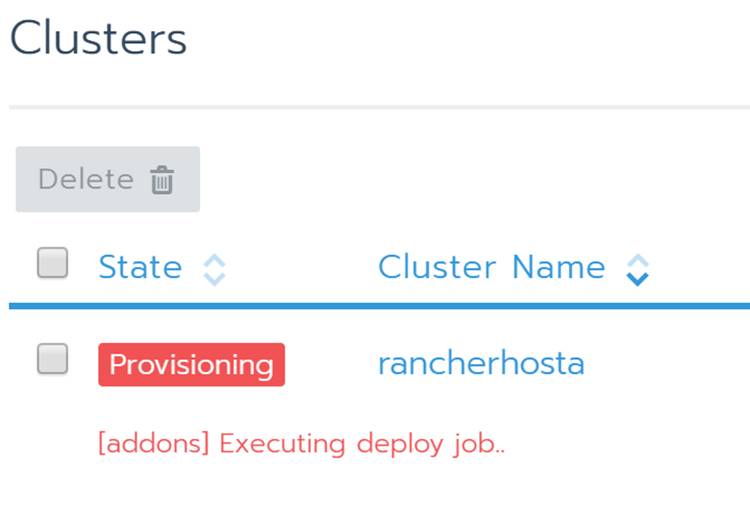
In the Rancher
portal under clusters you will see the Rancher host being provisioned
The status will
change as Kubernetes is deployed.
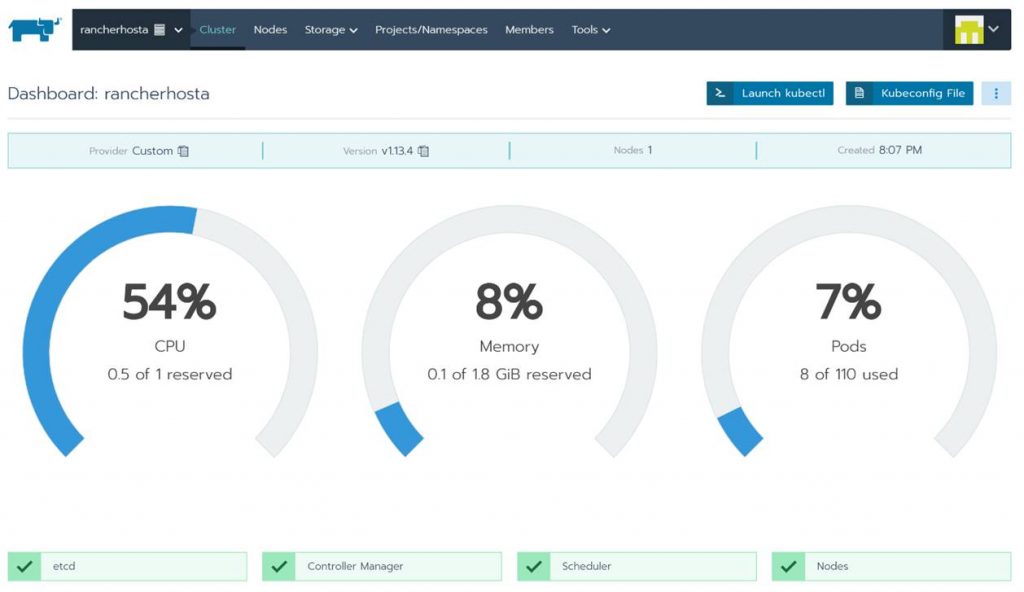
Once it’s done
provisioning you will see your Kubernetes cluster as Active.
From here you can
see a bunch of info about your new Kubernetes cluster. Also notice that you
could even launch Kubectl right from hereand start running commands! Take some
time to click around to see all the familiar stuff you are used to working with
in Kubernetes. This is pretty cool and simplifies the management experience for
Kubernetes.
If you want to add
more nodes or need the configuration code again just click the ellipsis button
and edit.
In Edit Cluster you
can change the cluster name, get and change settings and copy the code to add
more VMs to the cluster.
That’s the end of
this post. Thanks for reading. Check back for more Azure, Kubernetes, and
Rancher blog posts.
In this blog post I am going to walk through the steps for deploying WordPress to Azure Kubernetes Service (AKS) using MySQL and WordPress Docker images. Note that using the way I will show you is one way. Another way to deploy WordPress to AKS would be using a Helm Chart. Here is a link to the WordPress Helm Chart by Bitnami https://bitnami.com/stack/wordpress/helm. Here are the images we will use in this blog post:
The first thing we need to do is save these files as mysql-deployment.yaml and wordpress-deployment.yaml respectively.
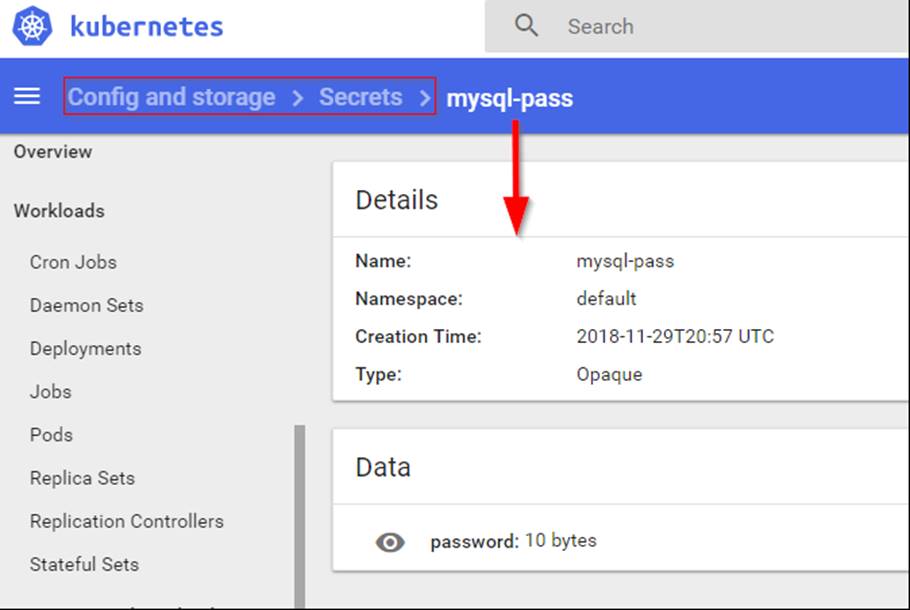
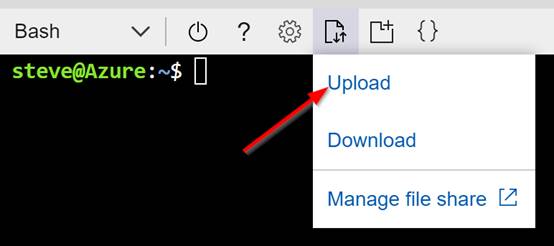
Next, we need to setup a password for our MySQL DB. We will do this by creating a secret on our K8s cluster. To do this launch the bash or PowerShell in Azure cloud shell like in the following screenshot and run the following syntax:
NOTE: You could use kubectl create /home/steve/mysql-deployment.yaml instead of apply to create the MySQL pod and service. I use apply because I typically use the declarative object configuration approach. kubectl apply essentially equals kubectl create + kubectl replace. In order to update an object after it has been created using kubectl create you would need to run kubectl replace.
There are pros and cons to using each and it is more of a preference for example when using the declarative approach there is no audit trail associated with changes. For more information on the multiple Kubernetes Object Management approaches go here: https://kubernetes.io/docs/concepts/overview/object-management-kubectl/overview.
Note that in the mysql yaml file it has syntax to create a persistent volume. This is needed so that the database stays in tact even if the pod fails, is moved etc. You can check to ensure the persistent volume was created by running the following syntax:
kubectl get pvc
Also, you can run the following syntax to verify the mysql pod is running:
kubectl get pods
Deploying the WordPress Pod and service is the same process. Use the following syntax to create the WordPress pod and service:
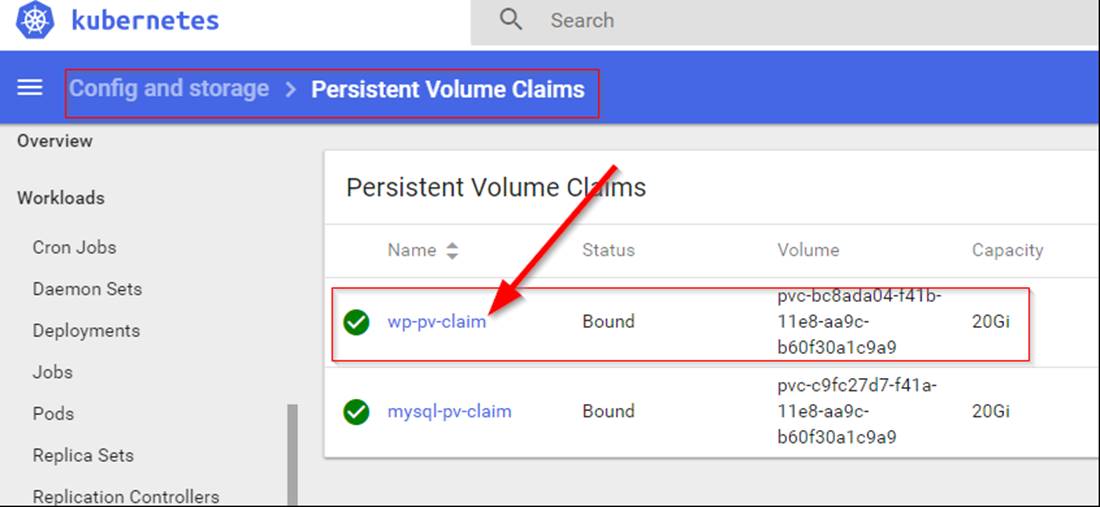
Again, check to ensure the persistent volume was created. Use the following syntax:
kubectl get pvc
NOTE: When checking right after you created the persistent volume it may be in a pending status for a while like shown in the following screenshot:
You can also check the persistent volume using the K8s dashboard as shown in the following screenshot:
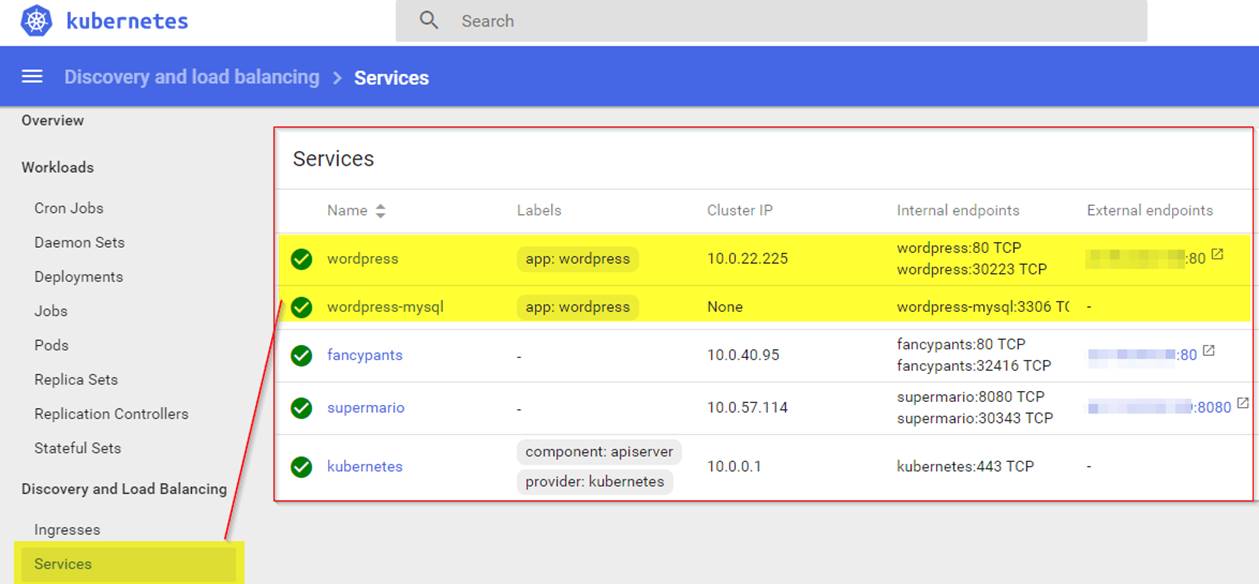
With the deployment of MySQL and WordPress we created 2 services. The MySQL service has a clusterip that can only be accessed internally. The WordPress service has an external IP that is also attached to an Azure Load Balancer for external access. I am not going to expand on what Kubernetes services are in this blog post but know that they are typically used as an abstracted layer in K8s used for access to Pods on the backend and follow the Pods regardless of the node they are running on. For more information about Kubernetes services visit this link: https://kubernetes.io/docs/concepts/services-networking/service.
In order to see that the services are running properly and find out the external IP you can run the following syntax:
kubectl get services (to see all services)
or
kubectl get services wordpress (to see just the WordPress service)
You also can view the services in the K8s dashboard as shown in the following screenshot:
Well now that we have verified the pods and the services are running let’s check out our new WordPress instance by going to the external IP in a web browser.
Thanks for checking out this blog post. I hope this was an easy to use guide to get WordPress up and running on your Azure Kubernetes Service cluster. Check back soon for more Azure and Kubernetes/Container content.
I looked for an existing ARM template that would create multiple Linux VM’s. I found only one that creates some in a scale set. The use case I was working with did not call for a scale set so I needed a different template.
I found a simple ARM template for creating multiple Windows VM’s on Azure here. It had exactly what I needed for my use case but did not cover Linux.
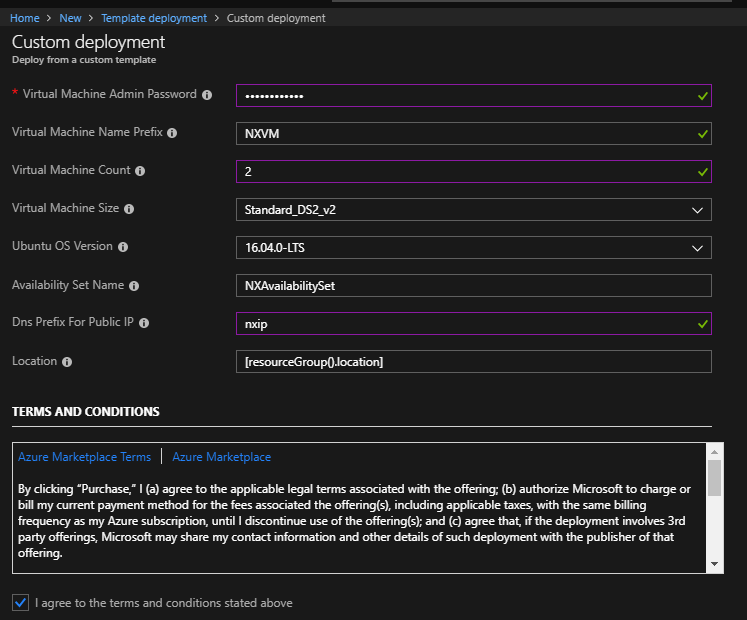
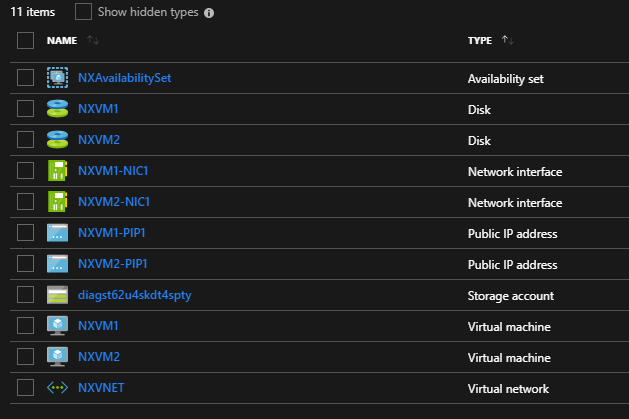
I modified the template and uploaded to Github in case this is helpful to anyone else. The repo has two templates. There is one for Ubuntu and one for SUSE. When you deploy the template it will need the following parameters:
The ARM template will create an availability set (AS) with N number of VM’s put in that AS, network interfaces, and public IP’s for each VM along with a VNet and Subnet as shown in the following screenshot:
In Azure Stack you can publish your own images essentially virtual machines that can be used when deploying a new virtual machine. This is handy for publishing servers that need to be pre-configured in a certain way for consumers of your cloud. In order for your published images to show up as an option in compute within Azure Stack the images need to be added to the Platform Image Repository (PIR) within the Compute Resource Provider (CRP).
SUSE has recently published a pre-built SUSE Linux Enterprise Server 12 SP1 image that has been prepped specifically for Azure Stack. This image is ready to go and can be published to the CRP’s PIR without any needed prep of the virtual machine. In this blog post I am going to walk through the steps I took to add this image to my Azure Stack.
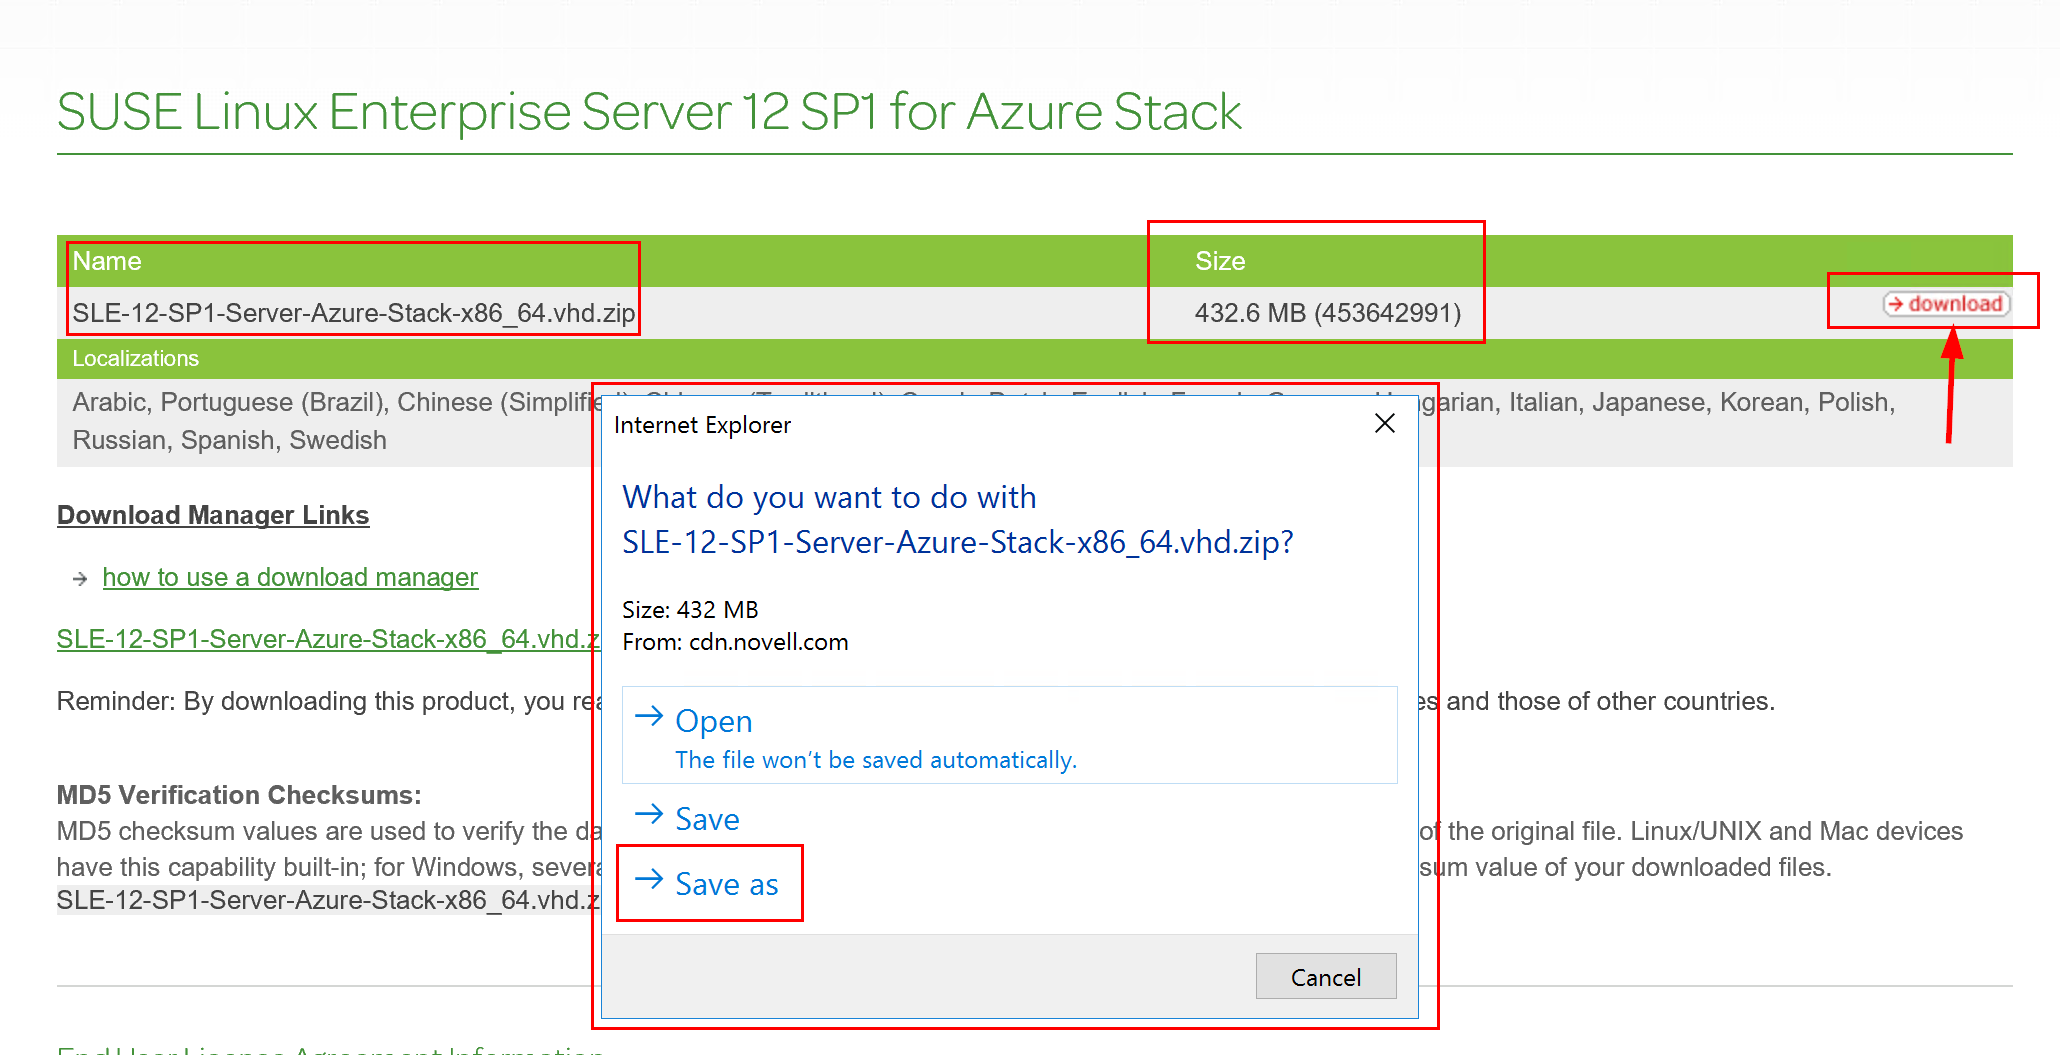
SUSE already has an image out there for Azure. The SUSE image used on Azure does not work right now on Azure Stack. As of right now Azure and Azure Stack have different “initialization code”. In the future I would expect these to be the same. The SUSE image also includes SUSE/azurectl a command line tool that helps you manage SUSE updates from a Linux VM hosted on Azure. More info on this here: https://github.com/SUSE/azurectl. To download the SUSE Azure Stack image go to https://download.suse.com and complete the fields as show in the following screenshot.
You will be brought to a login page to access the download. If you do not have a SUSE account sign up for one and login. You will see the actual download at that point. Go ahead and download it onto your Azure Stack Host.
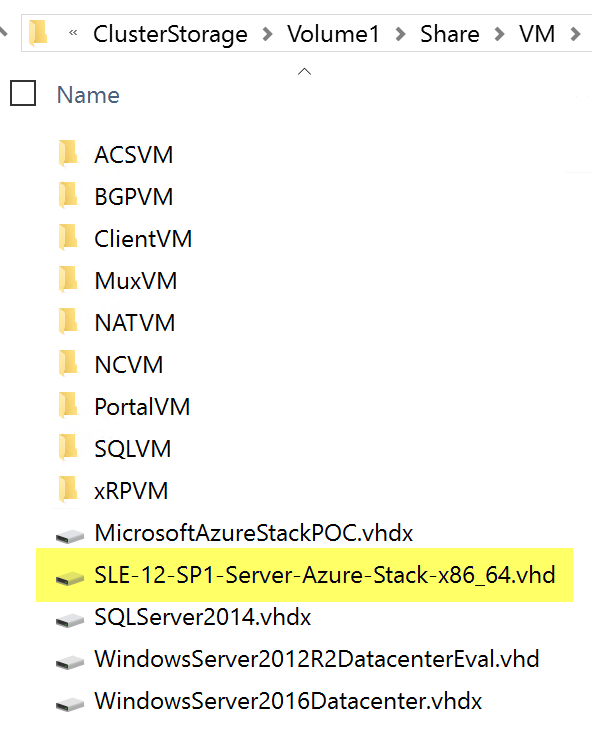
Extract the SLE-12-SP1-Server-Azure-Stack-x86_64.vhd and copy it to C:\ClusterStorage\Volume1\Share\VM.
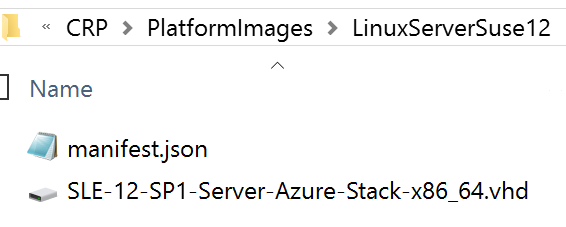
Microsoft has the steps for adding images to Azure Stack’s Platform Image Repository (PIR). The process is essentially running a PowerShell script. The script is included with Azure Stack. The script creates the image directory needed in C:\ClusterStorage\Volume1\Share\CRP\PlatformImages, the JSON file in that directory, and makes a copy of the VHD in that directory. The JSON file contains the meta data about the image that shows in the Azure Stack Portal. Here is the link to the Microsoft document: https://azure.microsoft.com/en-us/documentation/articles/azure-stack-add-image-pir/
As long as the script worked you should have the following as an end result in C:\ClusterStorage\Volume1\Share\CRP\PlatformImages:
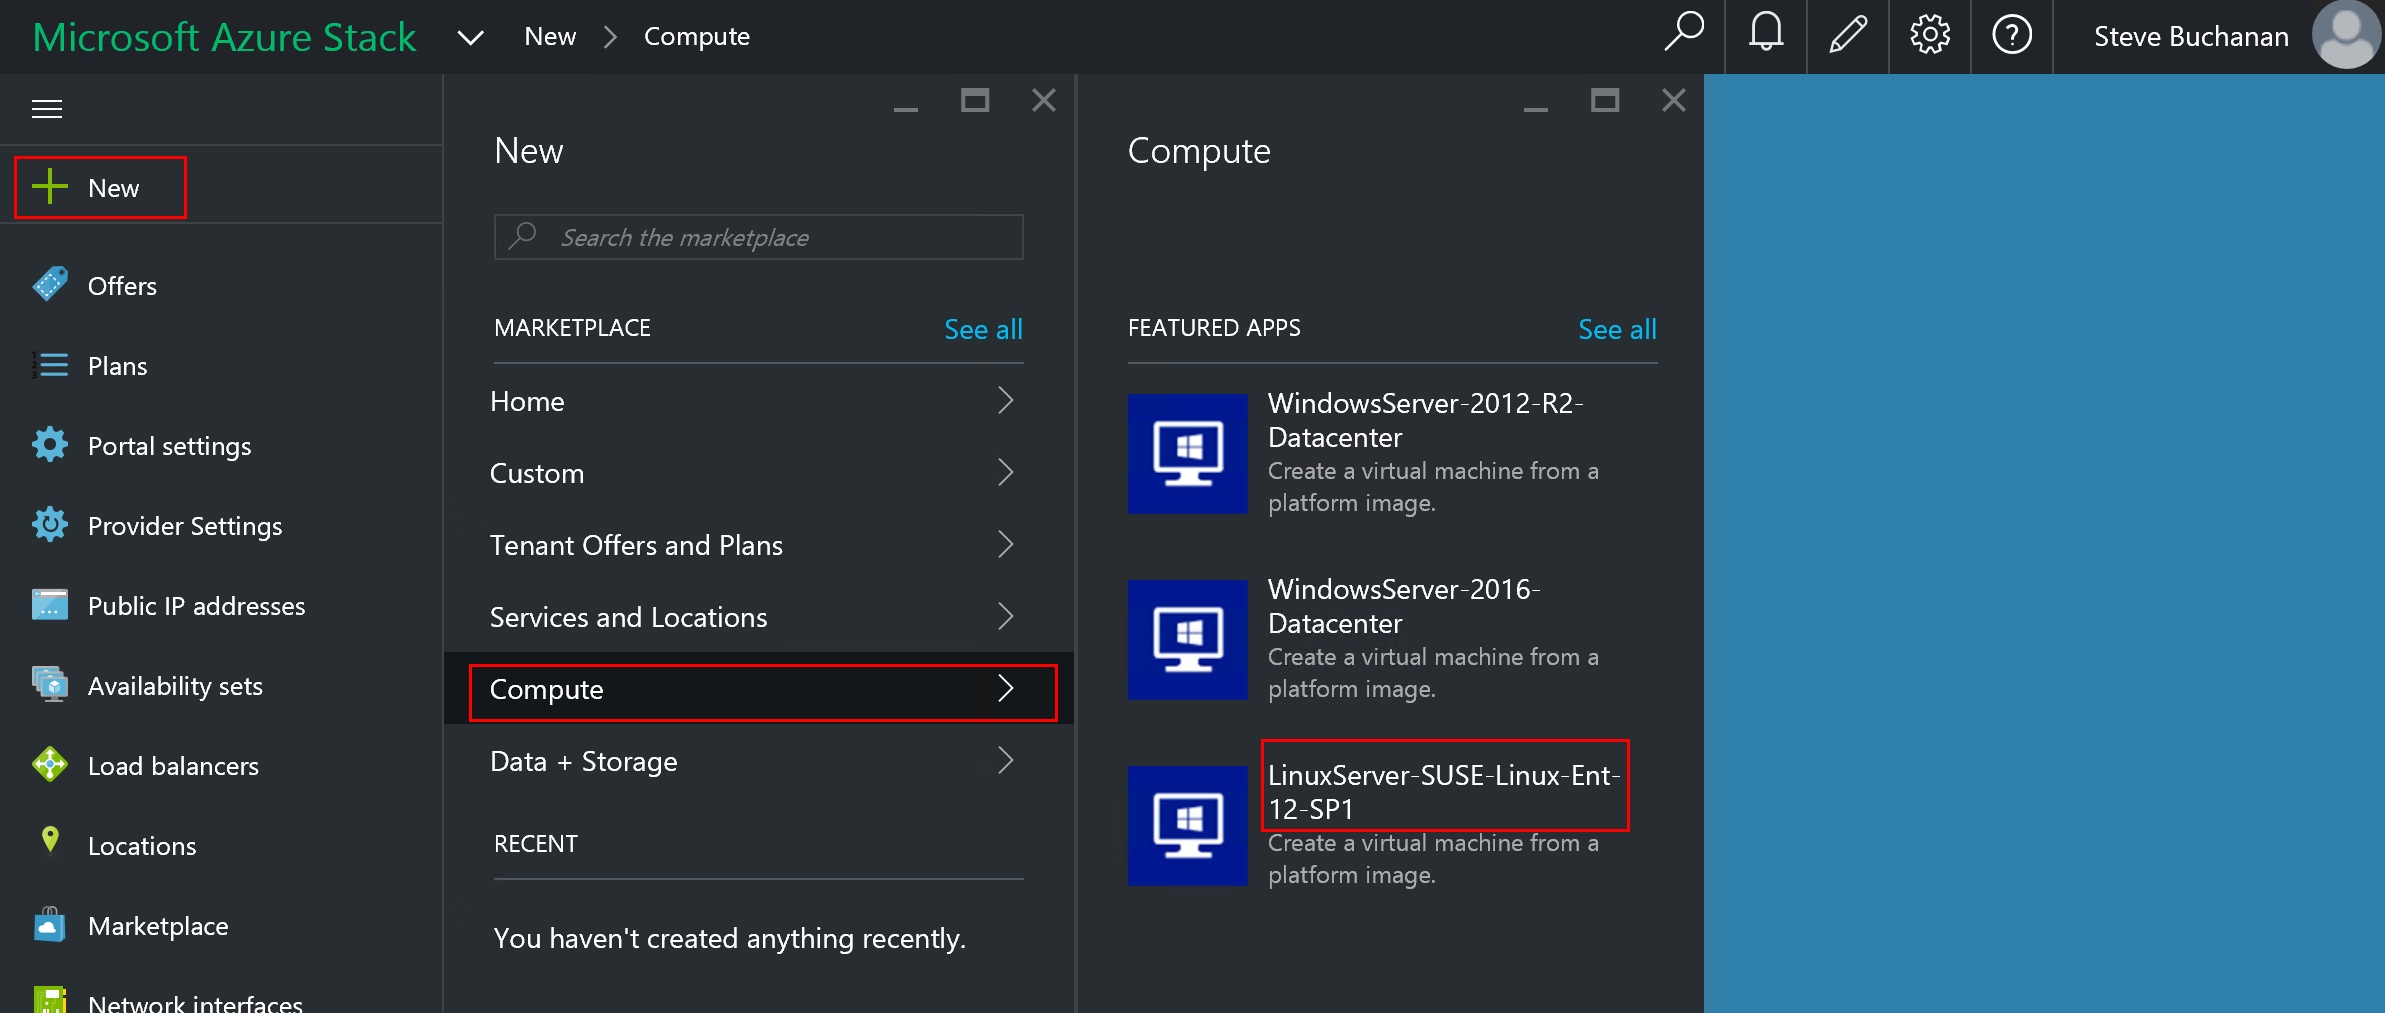
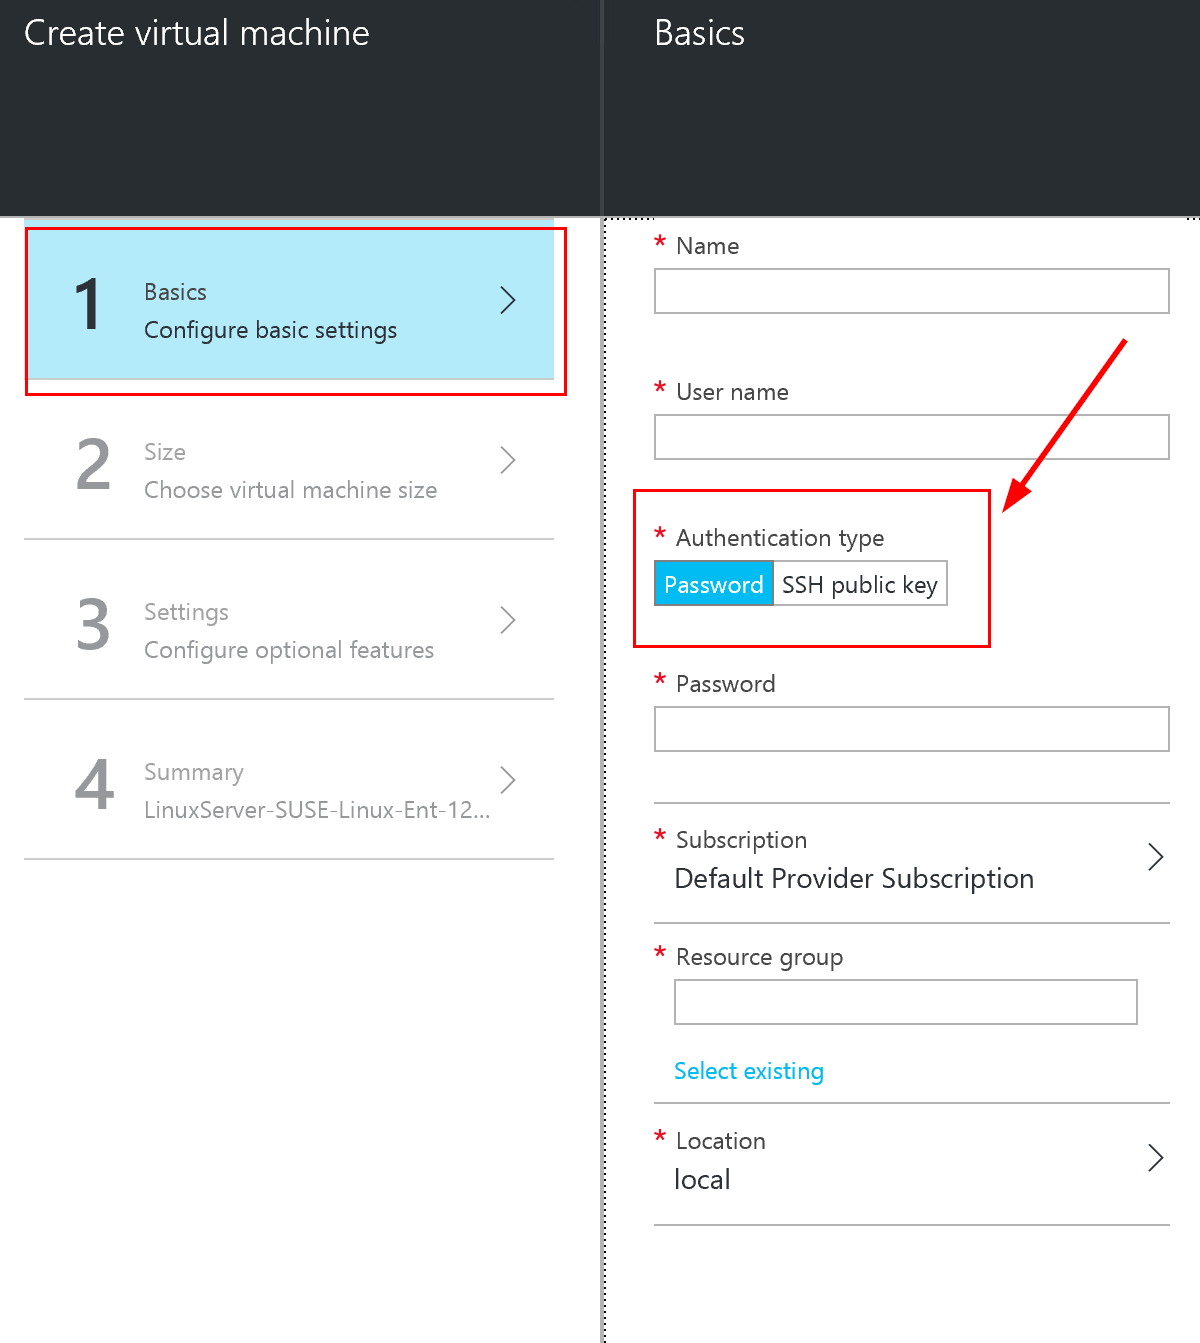
If you have the Azure Stack portal open close out of the browser and go back in. It should be listed as an available image in Compute as shown in the following screenshot.
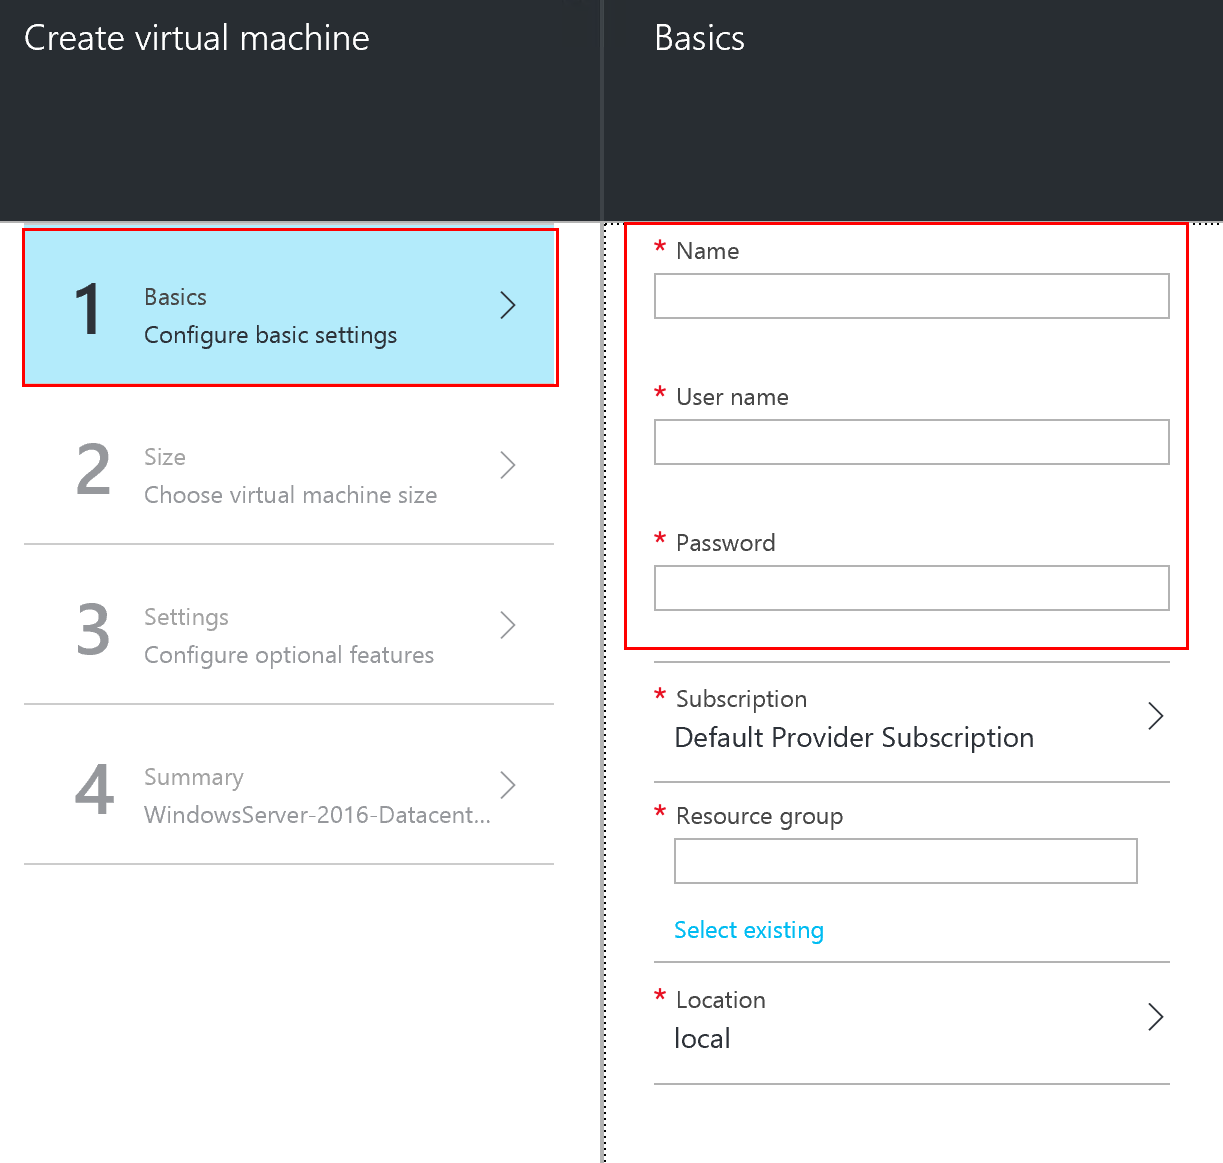
Notice the difference between a Windows image and a Linux image. The Linux image gives you an authentication option of Password or SSH Key.
I was getting an error message when I accessed phpMyAdmin. The error was: "The mbstring PHP extension was not found and you seem to be using a multibyte charset. Without the mbstring extension phpMyAdmin is unable to split strings correctly and it may result in unexpected results. " This error means that mbstring PHP extension … Read more
Microsoft officially supports CentOS on Hyper-V now. This is great news because CentOS is the flavor of Linux i prefer to use. I will go back to running this instead of SUSE on Hyper-V. Here is a great blog post about installing the integration for CentOS running on Hyper-V: http://www.ms4u.info/2011/05/centos-added-as-supported-guest.html Here is a link on … Read more
I am currently studying for the Linux + certification. I work with Linux alot becuase of my web site work. This is typically all command shell through SSH, Webmin, or WHM. I am forcing myself to use Linux on a daily basis as my workstation so I will learn it even more. The flavor of Linux I am using is CentOS. One of the tools I use is Skype. Skype does not have a RPM package for CentOS. This application has to be installed manually. I had to figure out how to get this installed. Here are the steps I took to install this and configure it.
INSTALL:
Skype only comes in 32 bit so if you have a 64 bit machine you need to run the following to install 32 bit libraries. This is required to run the 32 bit Skype application.
I needed to backup a couple of MySQL databaes automatically. Here is what I did to accomplish this. I created a folder called mysqlbackup. I then created a script called “mysqldbbackup.sh” and put this script file in the mysqlbackup folder. It contains “rm /mysqlbackup/DBNAME_backup.sql mysqldump -u USERNAME -pPASSWORD DBNAME > /mysqlbackup/DBNAME_backup.sql” I used the “rm” command to … Read more
So I was trying to copy one folder to another location and kept getting this error: cp: omitting directory and it would not copy the directory over. This is the command I was running cp FOLDER /root/DRIVE I am fairly new to Linux so I did not know what I was doing wrong. After looking … Read more