Within the Azure App Service is something called WebJobs that enables developers to run a script or program in the background within the same context as a web app, API app, or mobile app. Wejobs are included in app service with no extra cost. Webjobs are often used to run regular jobs and batch work as background services. Webjobs exist to make it easier to develop, run background tasks, and scale your web applications.
Webjobs have been around for a while and are considered a part of the serverless computing available on Azure. Today Azure Functions another newer and improved serveless technology service the evolution of WebJobs. When developers need serverless today Azure Functions is typically chosen over webjobs. There are certain cases and scenarios when webjobs are still used instead of Azure Functions and I will not be diving into that topic in this blog post. For more information on when to use what serverless technology on Azure check out the following links:
– A comparison between WebJobs and Functions: Choose between Flow, Logic Apps, Functions, and WebJobs.
– Minnesota’s Azure user group meeting from December 2017 covered comparing the various serverless technologies in Azure. It was presented by Joe Koletar. The meeting notes and PowerPoint download can be found here:
For more information on Azure WebJobs check out these two links:
– Run Background tasks with WebJobs in Azure App Service
https://docs.microsoft.com/en-us/azure/app-service/web-sites-create-web-jobs
– Develop and deploy WebJobs using Visual Studio – Azure App Service
https://docs.microsoft.com/en-us/azure/app-service/websites-dotnet-deploy-webjobs
I recently needed to setup monitoring for Azure webjobs status. In this environment there was a mix of continuous webjobs along with some triggered webjobs. Monitoring WebJobs is different compared to monitoring other Azure App Services such as web apps. Web apps can easily be monitored for up/down status and performance for things like in/out traffic, usage, and errors. Background services like WebJobs does not have a defined start or end to the work they do. WebJobs either run continuously or for short amounts of time to perform a task. In this case performance was not a concern but the status of the WebJobs was needed. You can see the status of the WebJobs in the Azure portal as shown in the following screenshot.
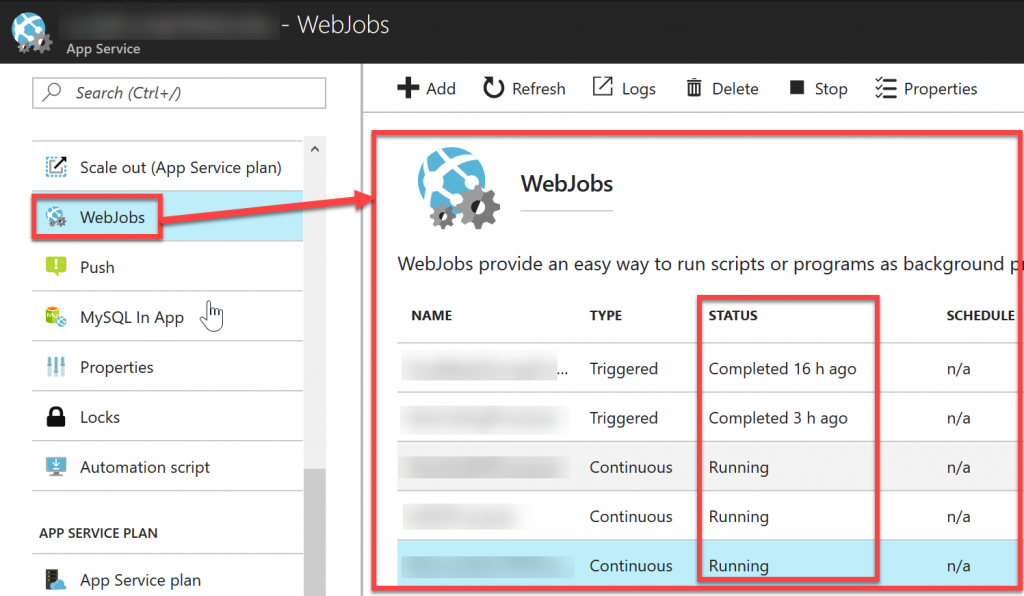
The problem here is this is not on a monitoring dashboard, you have to navigate here to see it, you need to click the refresh button for an update, and there is no alert setup when the status is in a non-desired state.
WebJobs does come with a logs website that shows the status of all of your WebJobs and more. This logs site is shown in the following screenshot:
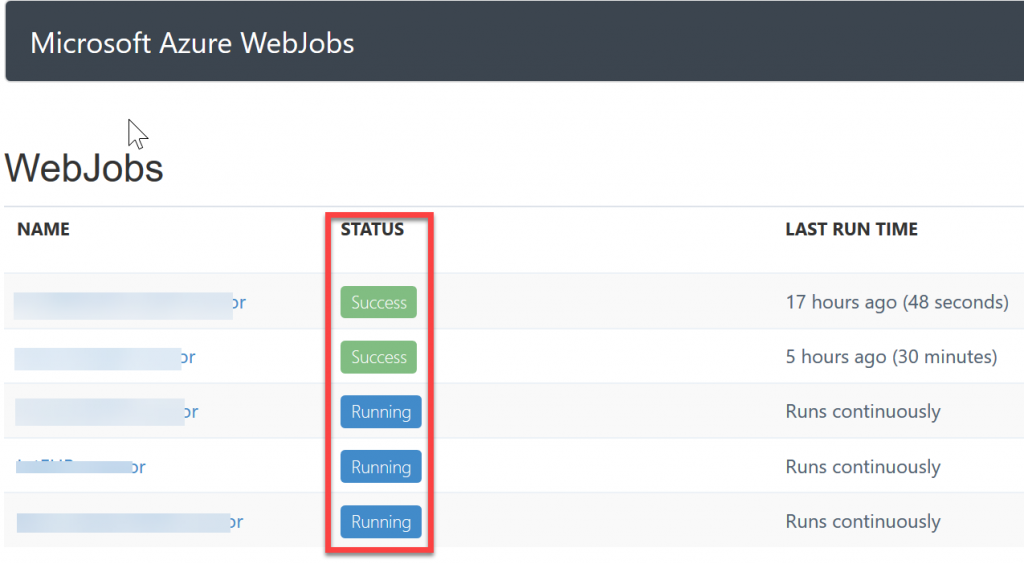
The logs site is nice but the issue with it is that you have to be on the site to see the status of the WebJobs along with the previously mentioned issues viewing the status in the Azure portal. A good solution for monitoring the WebJobs would be a way to check the heartbeat of the WebJobs, the status, and alert you if one of the WebJobs is in a non-desired state. The good news is that this can be accomplished utilizing Application Insights. This is not new but does take some effort to setup. I am going to detail how to set this up. Here is a summary of what needs to be done.
- Need an instance of Application Insights
- Need an authorization header from the WebJobs REST API.
- Need to create a webtest manually or using Visual Studio enterprise.
- Create a multi-step availability test in the Application Insights instance utilizing the webtest file.
- Create an alert on the availability test to notify when a WebJob is in a non-desired state.
- Add the results of the WebJobs availability test to a dashboard in Azure.
Let’s get started.
Step 1 – Need an instance of Application Insights
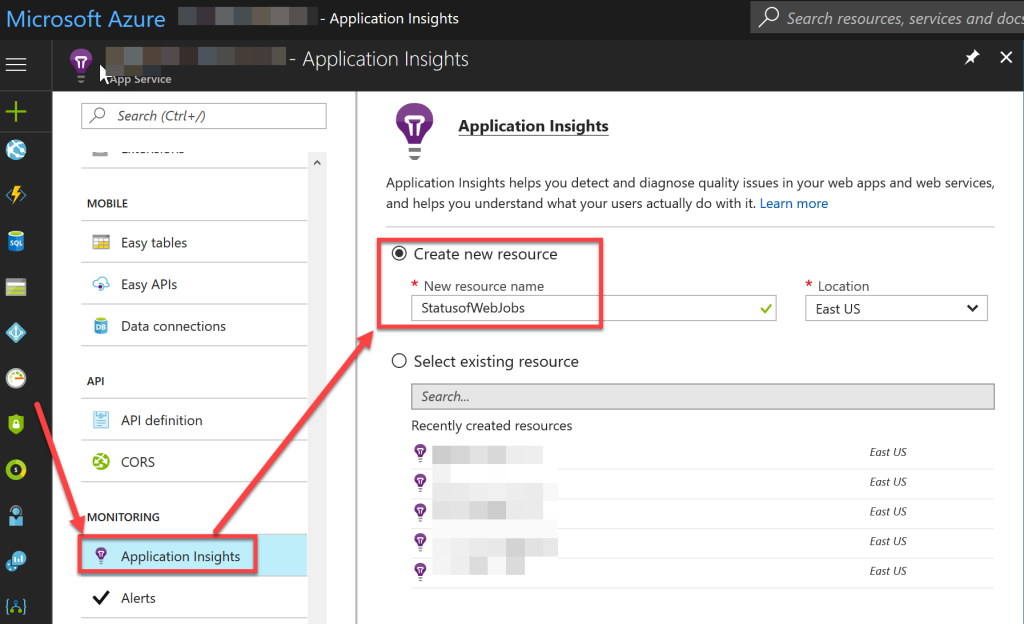
From within the web app that contains the WebJobs create a new Application Insights instance as shown in the following screenshot.
Step 2 – Need an authorization header from the WebJobs REST API
Each WebJob status can be retrieved via it’s Kudu WebJob API endpoint. Authorization is needed in order to access these endpoint API’s. You can get the authorization header from the Kudu WebJobs API and include this in the webtests we will create later. To get the authorization header we need 2 things. These are:
– #1 Get the Publishing Profile Credentials from the WebJobs Web App.
– #2 Use the Publishing Profile Credentials to get the Kudu REST API Authorization header and encode in Base64.
I have built a PowerShell script to do this in one shot. So to get the authorization header run this PowerShell script. The PowerShell script is GetWebAppKuduAPIAuthHeader.ps1. It can be found here: https://github.com/Buchatech/GetWebAppKuduAPIAuthHeader. Here are the steps to running the PowerShell script:
Download the script.
Open an elevated PowerShell window and navigate to the directory hosting the downloaded script (Note: Run this from PowerShell not ISE)
Run .\GetWebAppKuduAPIAuthHeader.ps1. The following screenshot shows the script and authorization output.
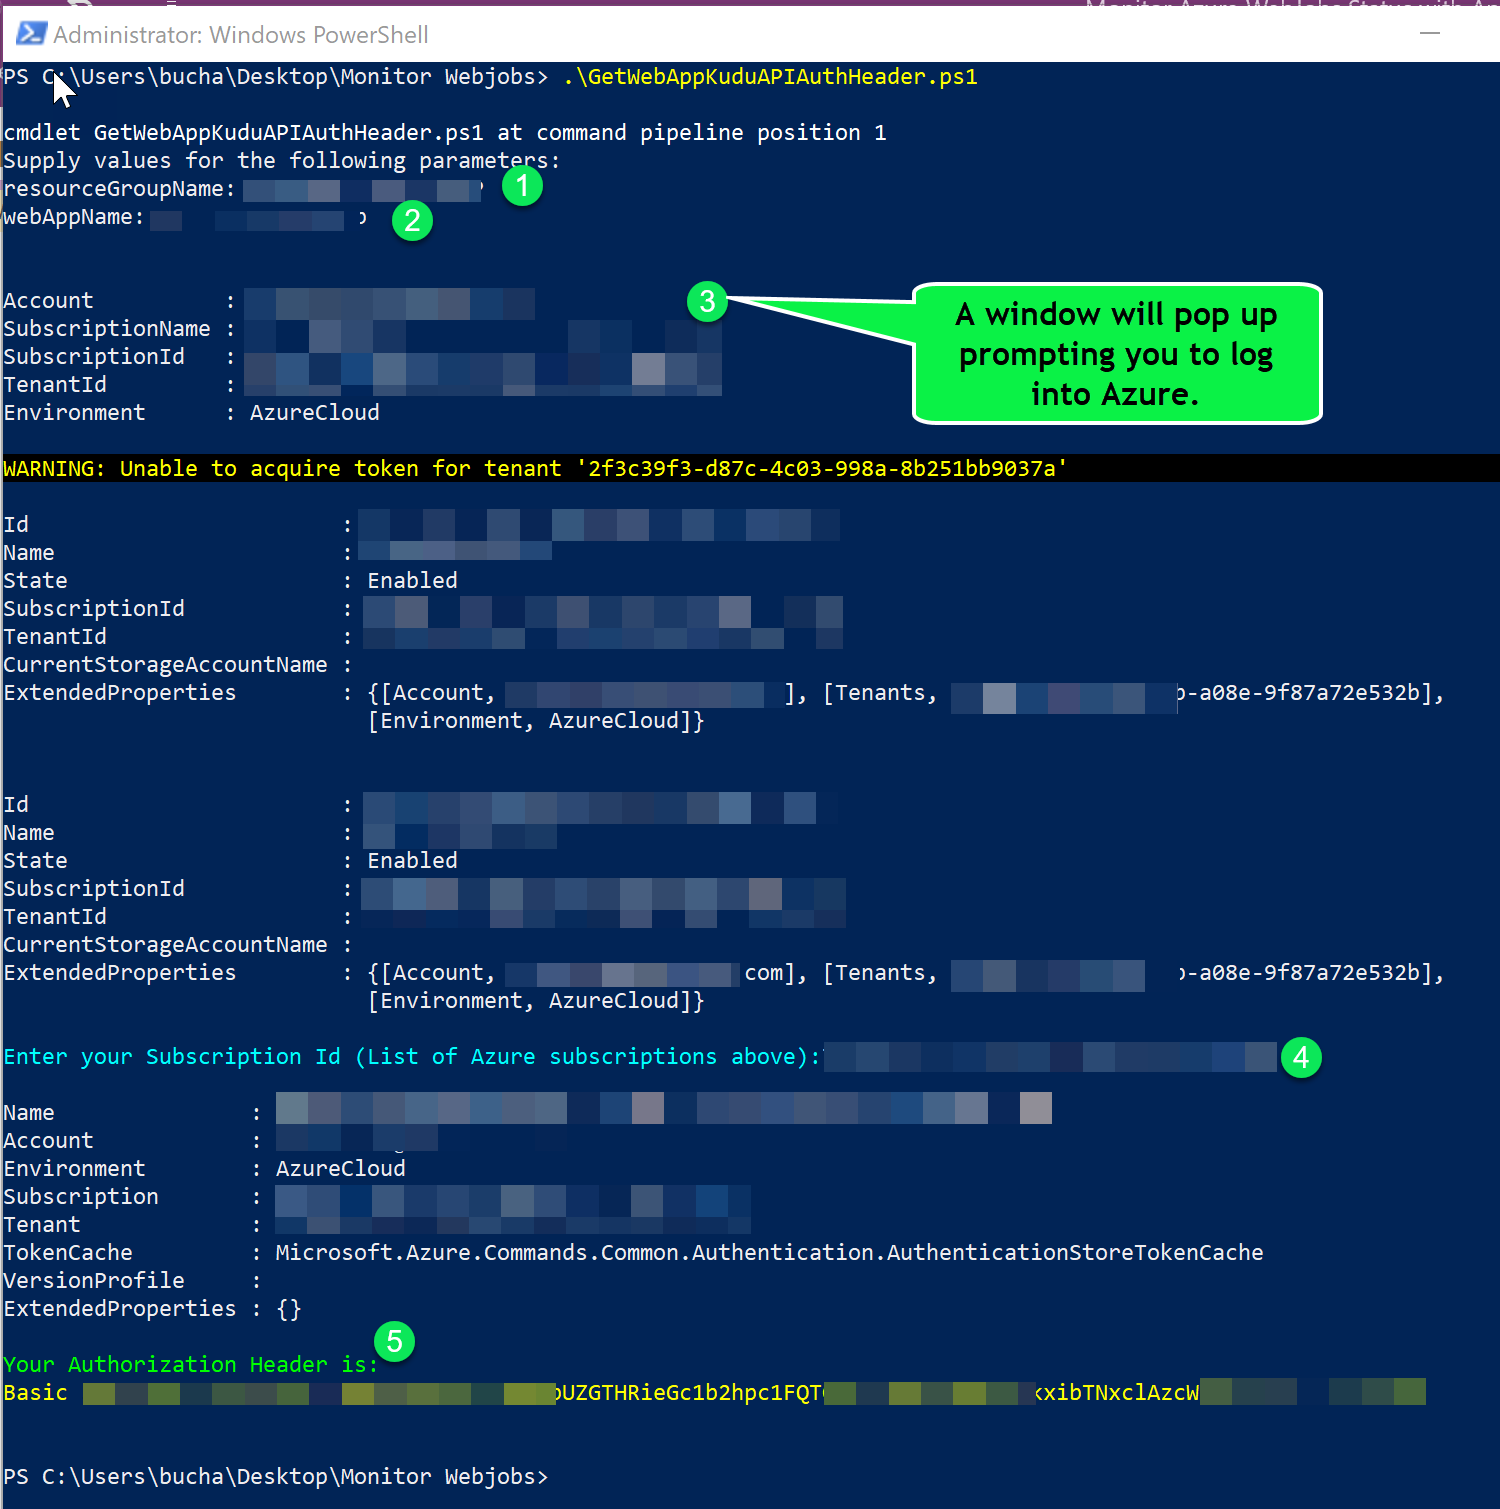
Make sure you copy the authorization header as you will need it later on.
Step 3 – Need to create a webtest manually or using Visual Studio enterprise.
I am using Visual Studio 2017 enterprise in this example. You will need to use the URLS’s of your WebJobs. These are the corresponding Kudu WebJob API’s and show the WebJobs statuses. These URL’s will have the following format:
For triggered jobs
https://webappname.scm.azurewebsites.net/api/triggeredwebjobs/WEBJOB1
For continuous jobs
https://webappname.scm.azurewebsites.net/api/continuouswebjobs/WEBJOB2
In the WebJobs URL’s change “webappname” and “WEBJOB1” to the names of yours.
Next open Visual Studio 2017 Enterprise. In Visual Studio create a new web performance test like shown in the following screenshot.
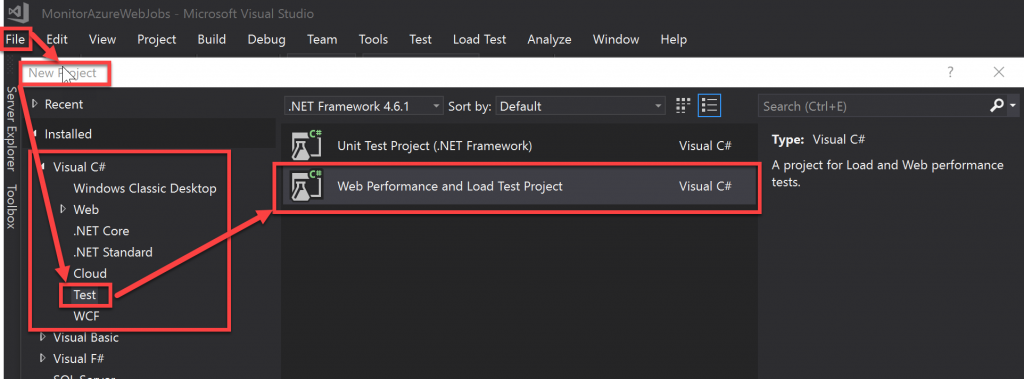
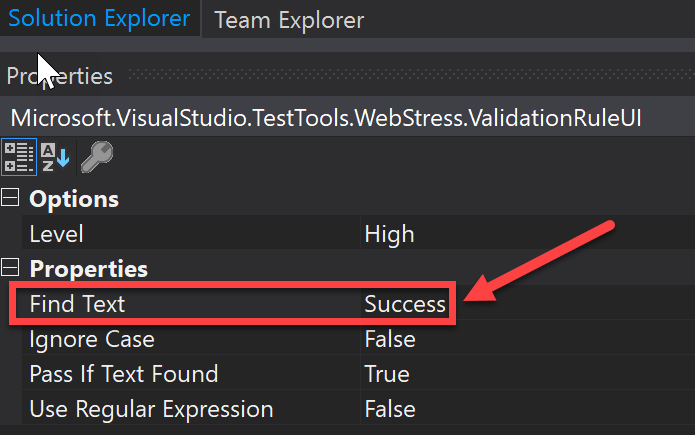
Next right click on the new WebTest and add a new “Request” add an “Authorization Header” add a “Validation Rule”.
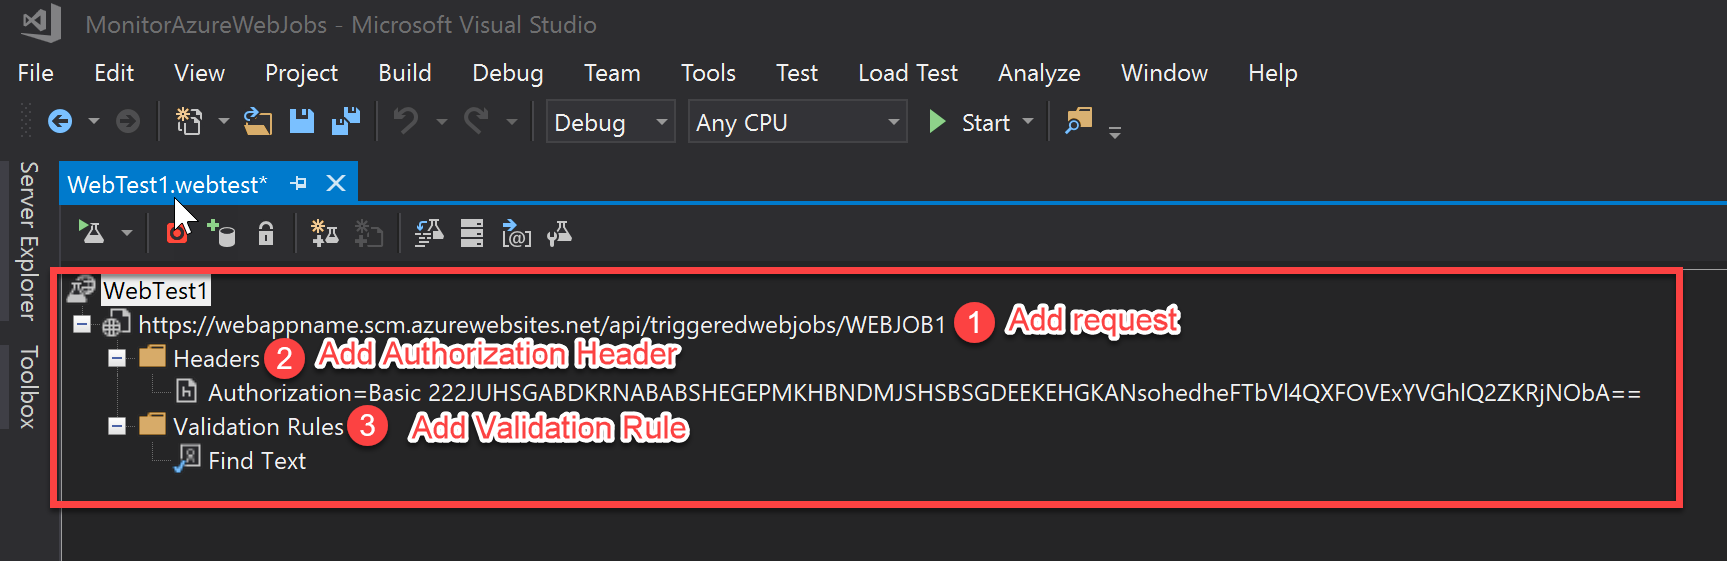
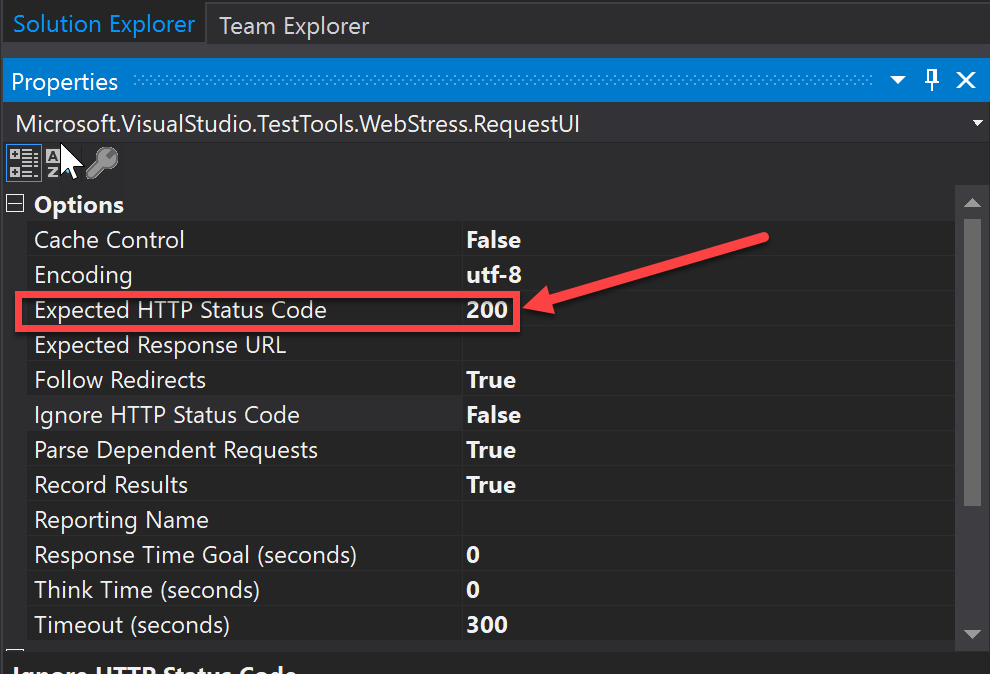
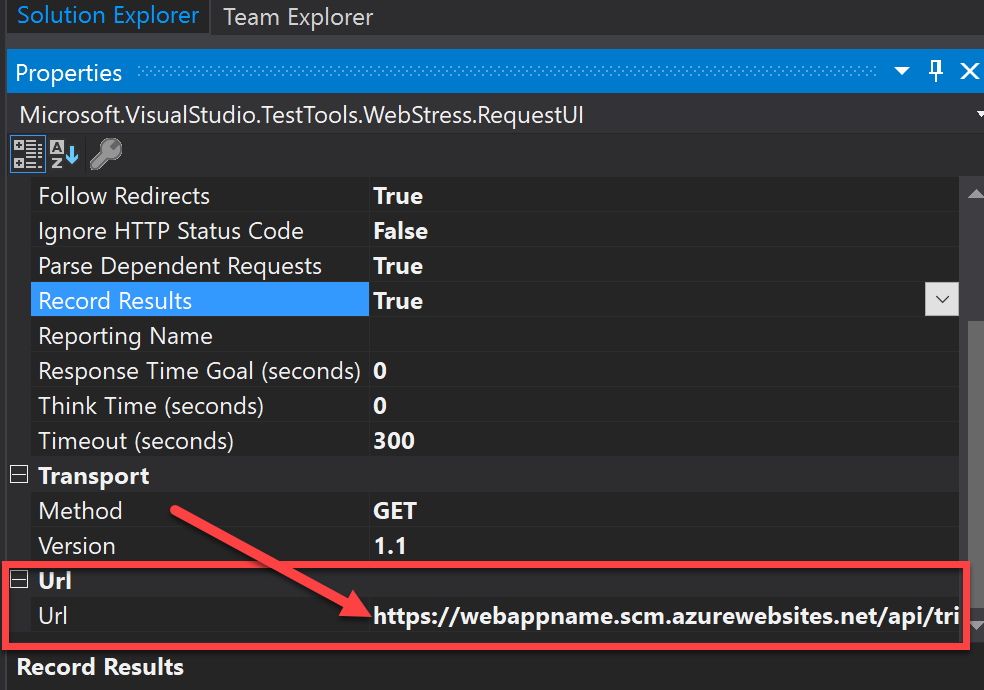
For the “Request”, “Authorization Header”, and “Validation Rule” add the property settings for each as shown in the following screenshots.
# Request
# Authorization Header

# Validation Rule
Step 4 and 5 – Create a multi-step availability test in the Application Insights instance utilizing the webtest file and an alert on the availability test to notify when a WebJob is in a non-desired state.
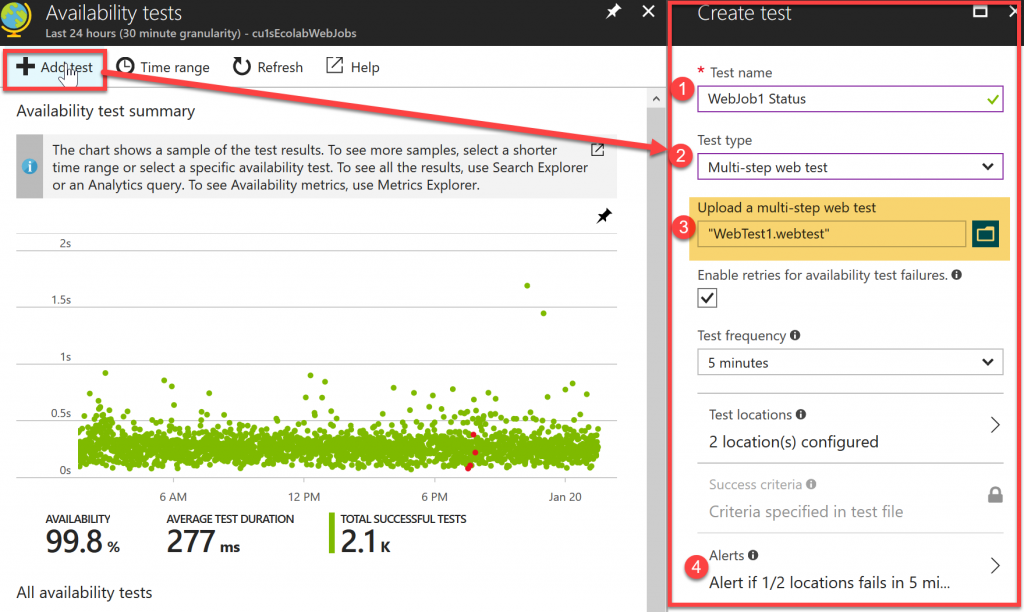
Within Application Insights click on Availability and then click on the Add tests button.
#1 Add a name, #2 change the test type to multi-step web test, #3 upload the webtest file that we created in Visual Studio, change the test frequency if you want to, change the test locations if you want to, #4 modify the alerts with the proper information.
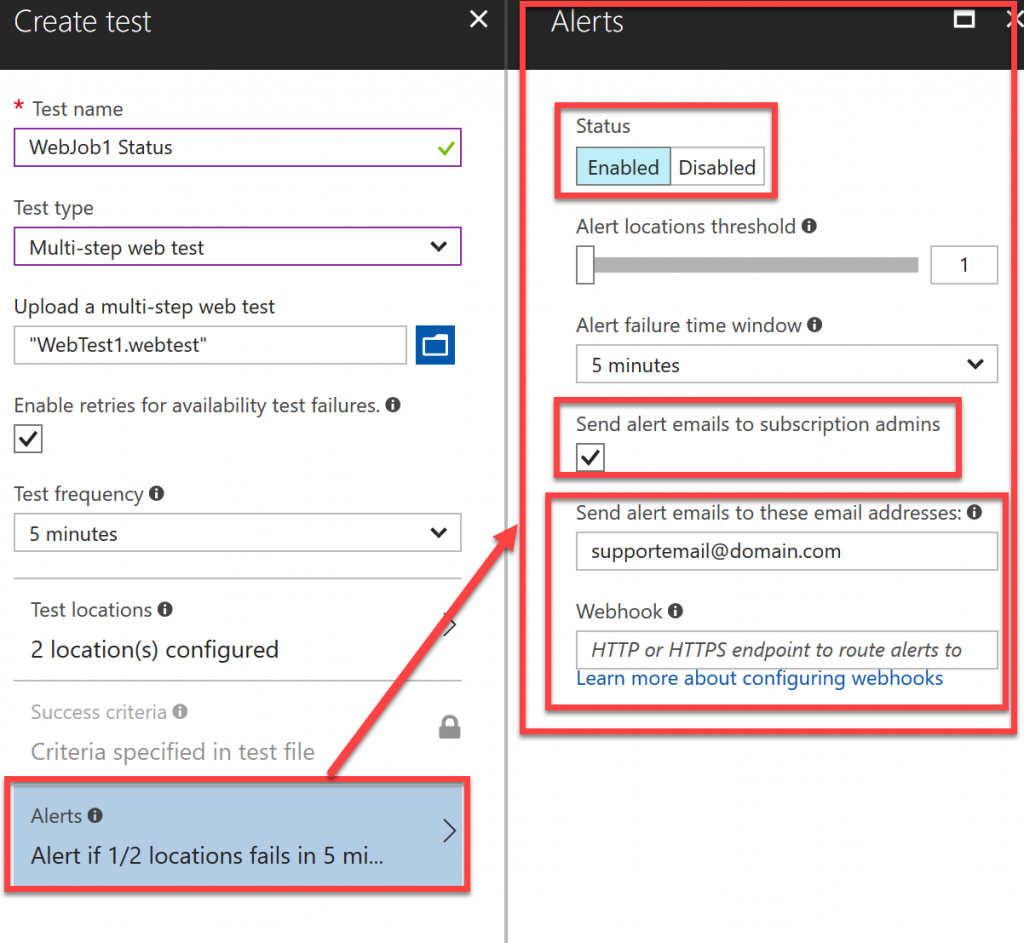
#4 To setup the alert complete the following settings like in the following screenshot. Note that you also could have the alert connect to a webhook to fire off some sort of automated remediation.
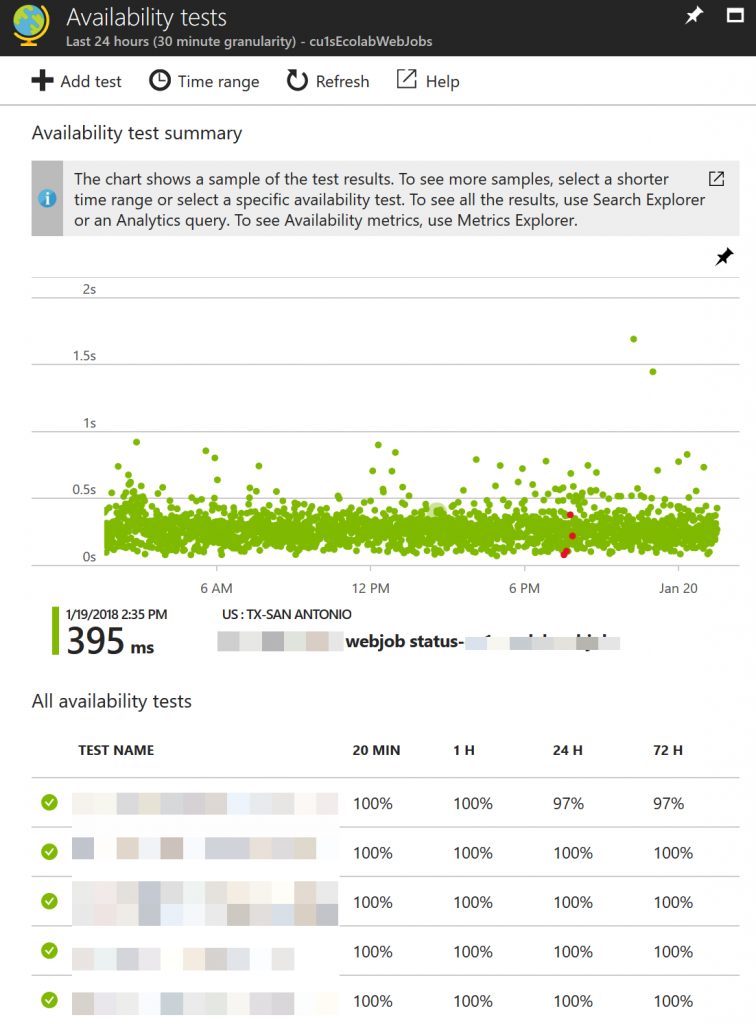
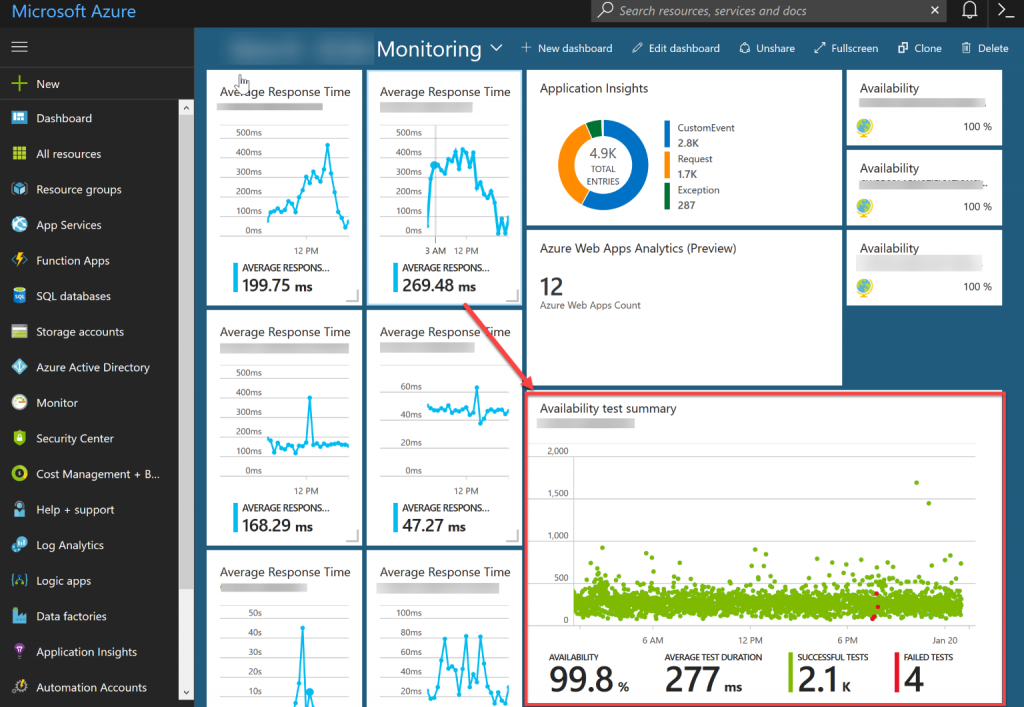
You will need to setup an availability test in your Application Insights instance for each one of your webjobs. When it’s all said and done your webjobs will each have a multi-step availability test that will ping the webjob and look for a specific job status. The results are shown in the following screenshot.
Step 6 – Add the results of the WebJobs availability test to a dashboard in Azure
Thanks for reading this blog post! Stay tuned for more.
