A while back I posted a blog titled “Surviving the future of IT as an IT pro”. In that blog post I set out to share my opinion on where IT is headed and what you should focus on as an IT pro going forward. I guess this post could be considered part 2 however in this post I will focus more on where things are heading as a whole.
So what is this blog really about? It is about “the Transition from ITOPS & ITSM to CloudOps via Azure Stack (Hybrid Cloud) powering DevOps and becoming core to the Digital Transformation of business” that is happening. Whew…..Ok, a lot was said in that previous sentence. J Let’s break it down.
Transition from ITOPS & ITSM to CloudOps
There has been this transition in IT for a while to increase the density in data centers. This was started with the wide adoption of the hypervisor (VMWare, Hyper-V, Citrix Xen etc…). The goal is to get more out of existing and less physical hardware. Think about 1 physical server hosting hundreds of virtual servers. Things have since accelerated at a fast pace. We now have containers, PaaS, and serverless. With these newer technologies, the density is even greater.
The real power behind cloud is software defined everything. With software, defined environments AKA cloud a new skillet and a different way of thinking about managing operations is needed. This new skillset and new way of thinking for the operationalization of cloud is known as CloudOps. IT Operations and IT Service Management do not go away with CloudOps. The evolution of ITOPS and ITSM become CloudOps. The best parts of ITOPS and ITSM (ITIL) funnel into CloudOps used for operating clouds.
Hybrid Cloud (Azure Stack)
Hybrid Cloud is going to be a huge part of cloud initiatives in many organizations for years to come. You can see this on the Gartner reports(http://www.gartner.com/newsroom/id/3354117), Right Scale reports (http://www.rightscale.com/blog/cloud-industry-insights/cloud-computing-trends-2017-state-cloud-survey) and based on the investments the major cloud players are making to build the best Hybrid Cloud solutions.
Hybrid Cloud Is the Preferred Enterprise Strategy, but Private Cloud Adoption Fell
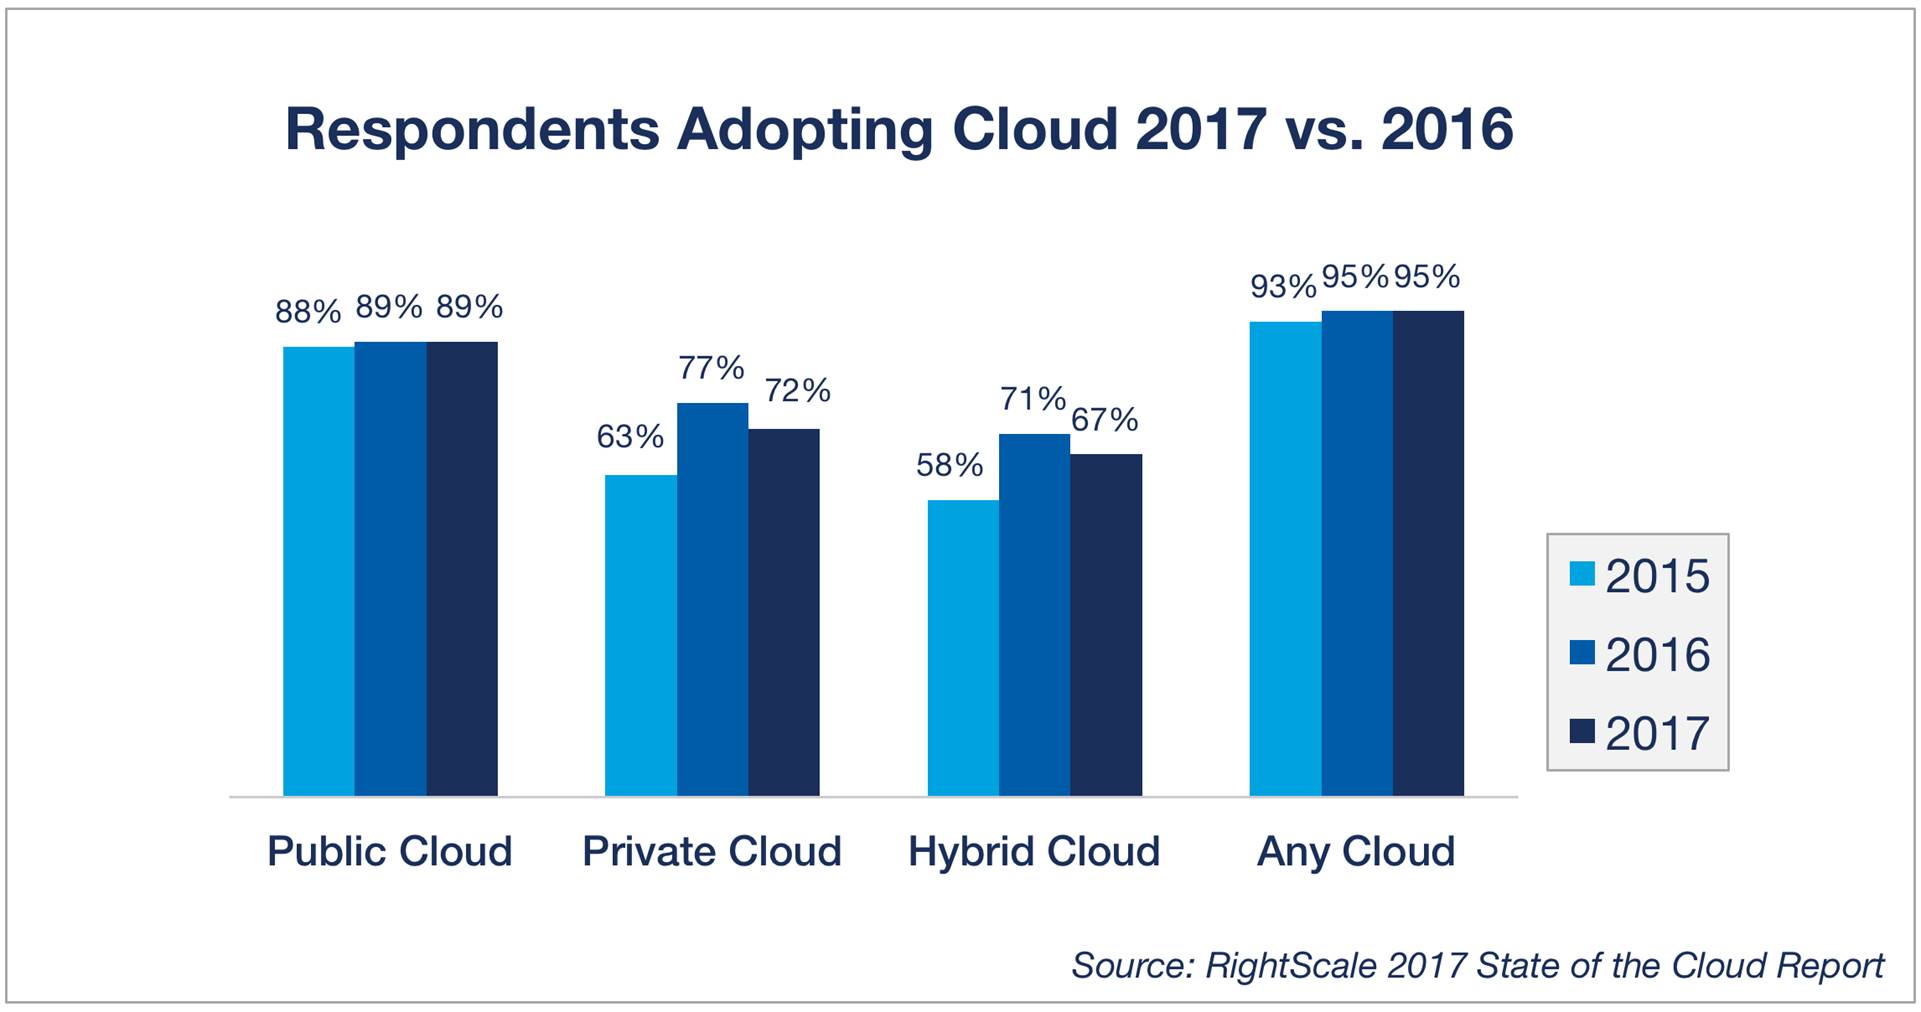
From Rightscale “Cloud Computing Trends: 2017 State of the Cloud Survey” Report:
http://www.rightscale.com/blog/cloud-industry-insights/cloud-computing-trends-2017-state-cloud-survey#hybrid-cloud
Recently IBM and Red Hat announced their launch into the Hybrid Cloud space.
(http://www.networkworld.com/article/3182989/cloud-computing/ibm-red-hat-an-open-source-hybrid-cloud.html)
A while back Amazon and VMWare announced their launch into the Hybrid Cloud space.
(http://www.businesswire.com/news/home/20161013006574/en/VMware-AWS-Announce-Hybrid-Cloud-Service-%E2%80%9CVMware>)
Microsoft was the first to jump into the Hybrid Cloud space and is the only company that has a 100% true Hybrid Cloud solution. Both VMWare/Amazon and IBM/Red Hat have solutions that run private cloud on public cloud. The private cloud solutions are being retrofitted to run in public cloud as the framework for their Hybrid Cloud solutions. These are not consistent cloud platforms running the same exact bits on bare metal on-premises and in the cloud like Microsoft’s Azure Stack solution. Azure Stack is the same bits in the public cloud and on-premises down to the bare metal.
IBM and Amazon jumping into the Hybrid Cloud space is more proof this will be a large area of growth in IT for years to come. I wonder if Google will decide to jump into the Hybrid Cloud space at some point and what their strategy will be.
DevOps powered by Azure Stack and CloudOps
Azure Stack serves as a catalyst to help move DevOps initiatives forward within organizations. With Azure Stack’s comes the native ability to run the environment using Infrastructure as code, continuous integration, continuous delivery, microservices, integration with source control systems, and more. All of the aforementioned are a part of DevOps.
Along with Azure Stack is the need to run the environment using a CloudOps model. Here is a list of concepts that drive CloudOps:
- Extreme Hardware Standardization
- Software Defined Everything
- Extreme Automation
- Focus on Zero Downtime
- Self Service
- Measured Service
- Multitenancy
CloudOps is overall focused on business applications critical for running the business through the continuous operations of clouds. CloudOps leaves business unit projects to DevOps. CloudOps instead focuses on the delivery of the the cloud infrastructure to support self-service leveraged by DevOps teams.
David Armour of Microsoft often shares great information on CloudOps and what it means. You can follow him on twitter here: https://twitter.com/Darmour_MSFT
CloudOps supports DevOps and DevOps is core to Digital Transformation
Digital Transformation is the accelerating transformation of the way businesses do business from traditional ways often brick and mortar to the digital front through the use of digital technologies. Businesses are shifting to meet their customers and employees where they are today on digital platforms. In the business world, today it is well known that you must innovate and grow through the use of technology or become obsolete and left in the wake of disruptive companies that are leveraging technology to meet their customers on the digital front.
Examples of digitally transformed company’s vs non-digitally transformed companies are:
- Netflix vs Blockbuster
- Amazon vs Target, Best Buy, Macy’s
- Airbnb vs Wyndom hotels
- Uber vs Taxi Companies
Digital Transformation is critical to business and IT departments need to be a core driver to help organizations move forward on the digital transformation front. Digital Transformation is the new Industrial Revolution of business today with CloudOps/DevOps being the Assembly line that will bring innovation to the business.
Through DevOps businesses can bring digital services to the market at very fast rates and can pivot quickly as needed to beat and stay ahead of the competition meeting the customers’ demands in an agile way. CloudOps allows the scale and another point to pivot on at any time to redirect in a new direction as needed by the business in an agile manor.
Through a Hybrid Cloud solution like Azure Stack things IoT, Microservices, extreme automation, hyper-scale, and agility can be realized for the business empowering Digital Transformation from the core.
The transition of the IT Pro to Cloud Pro
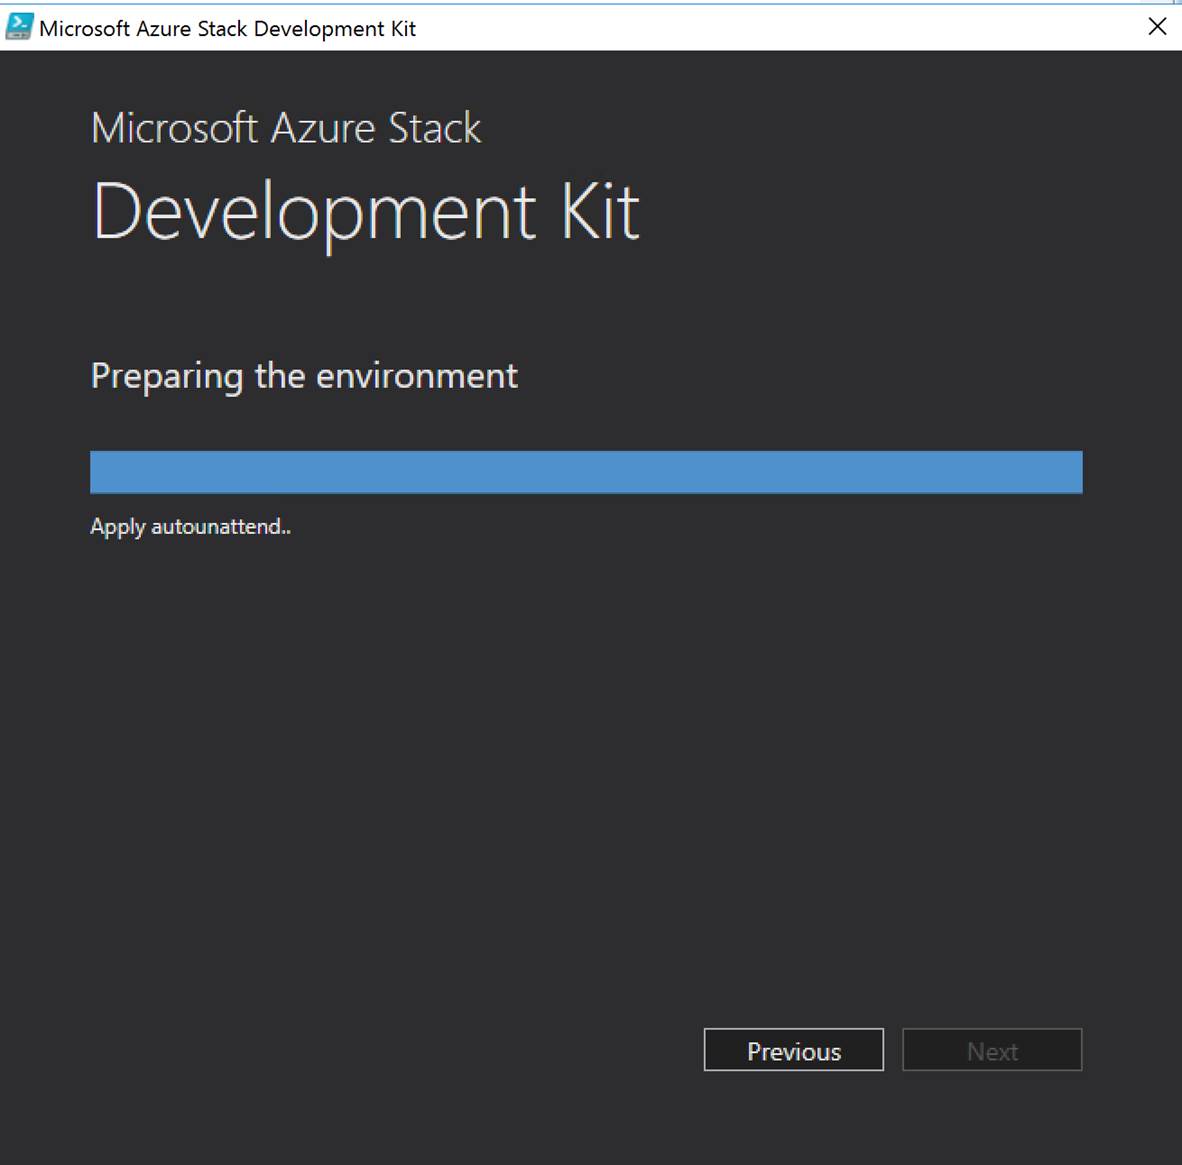
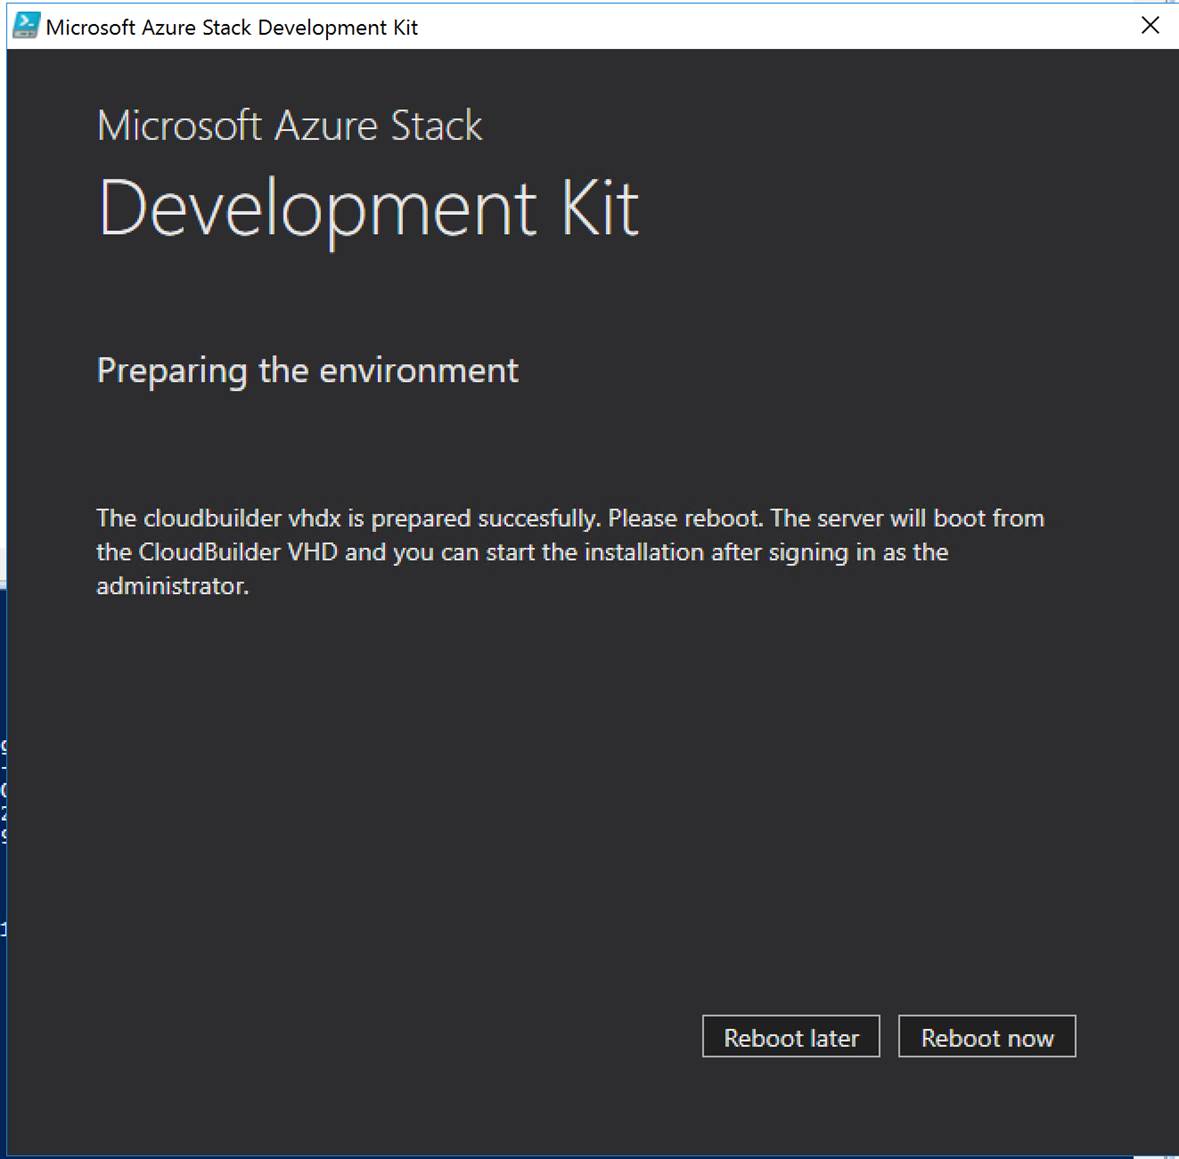
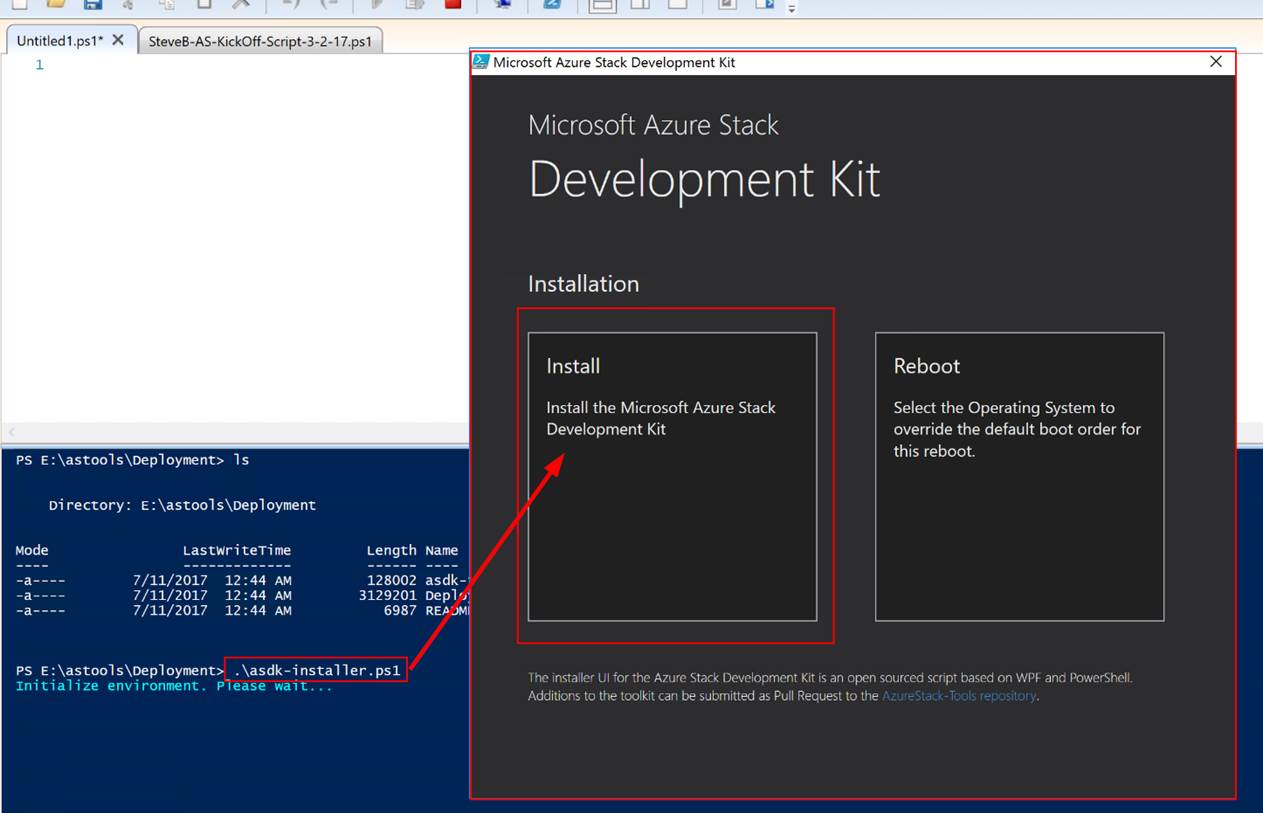
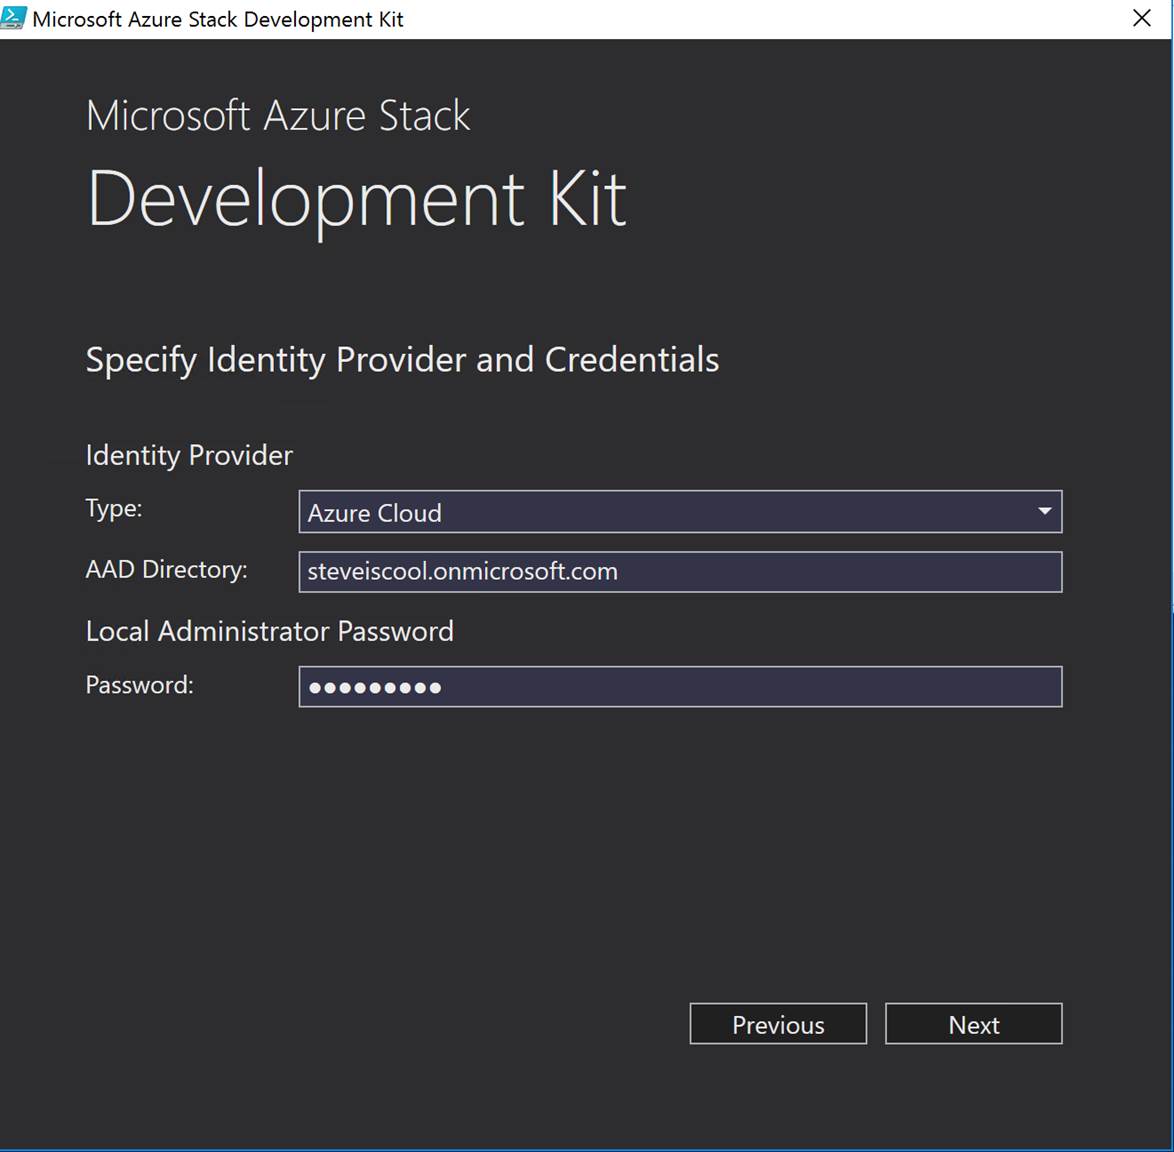
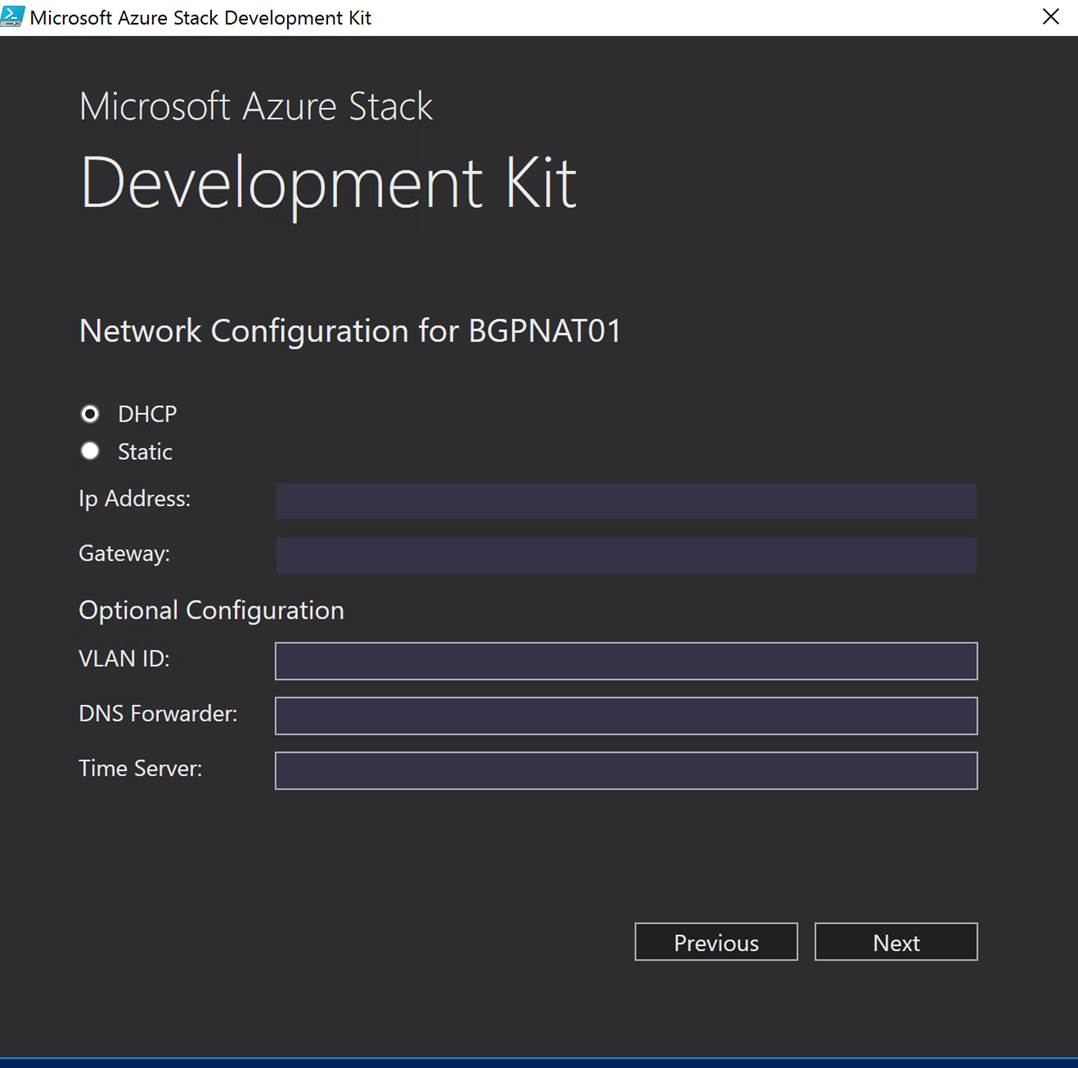
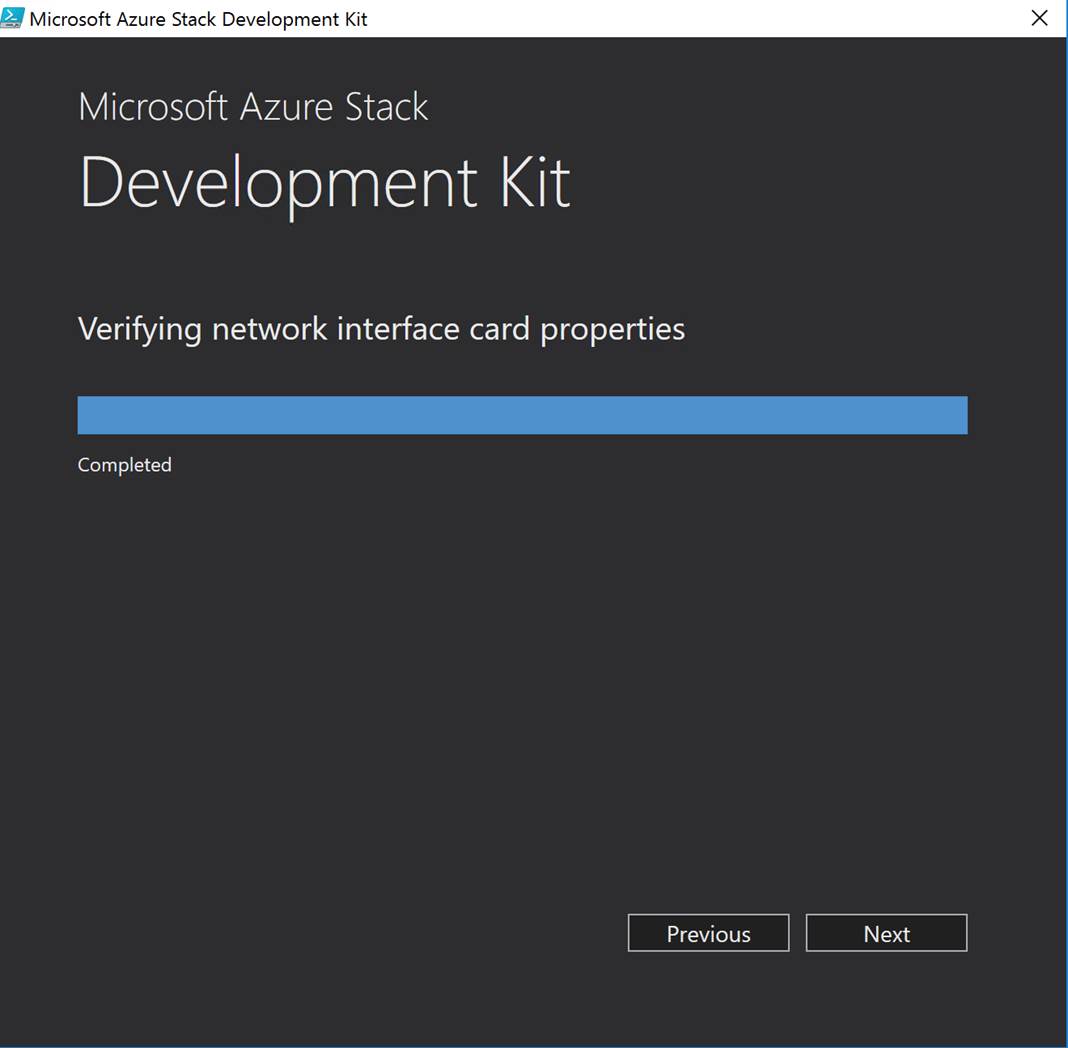
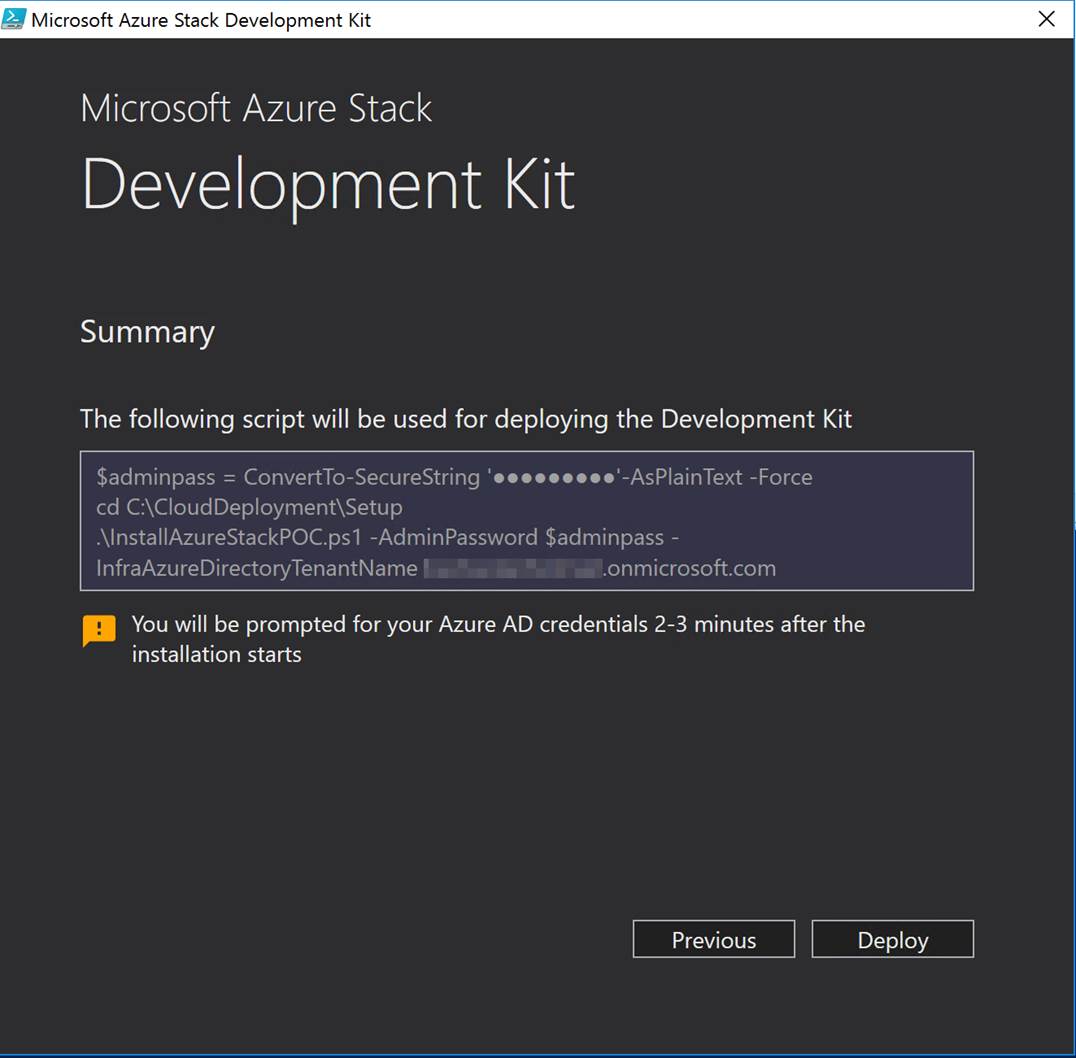
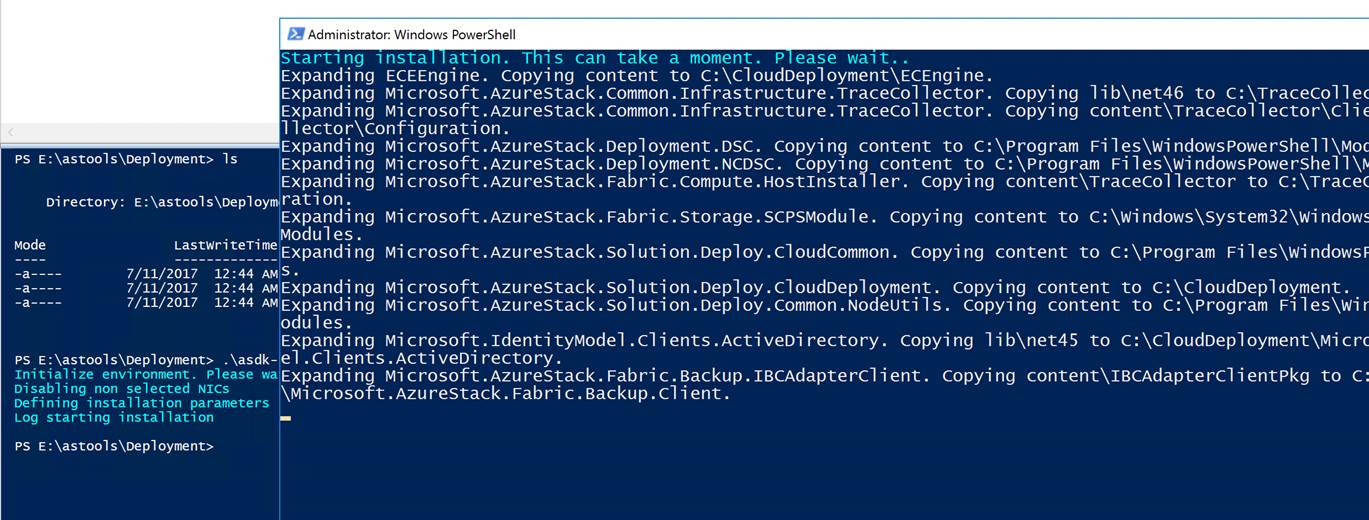
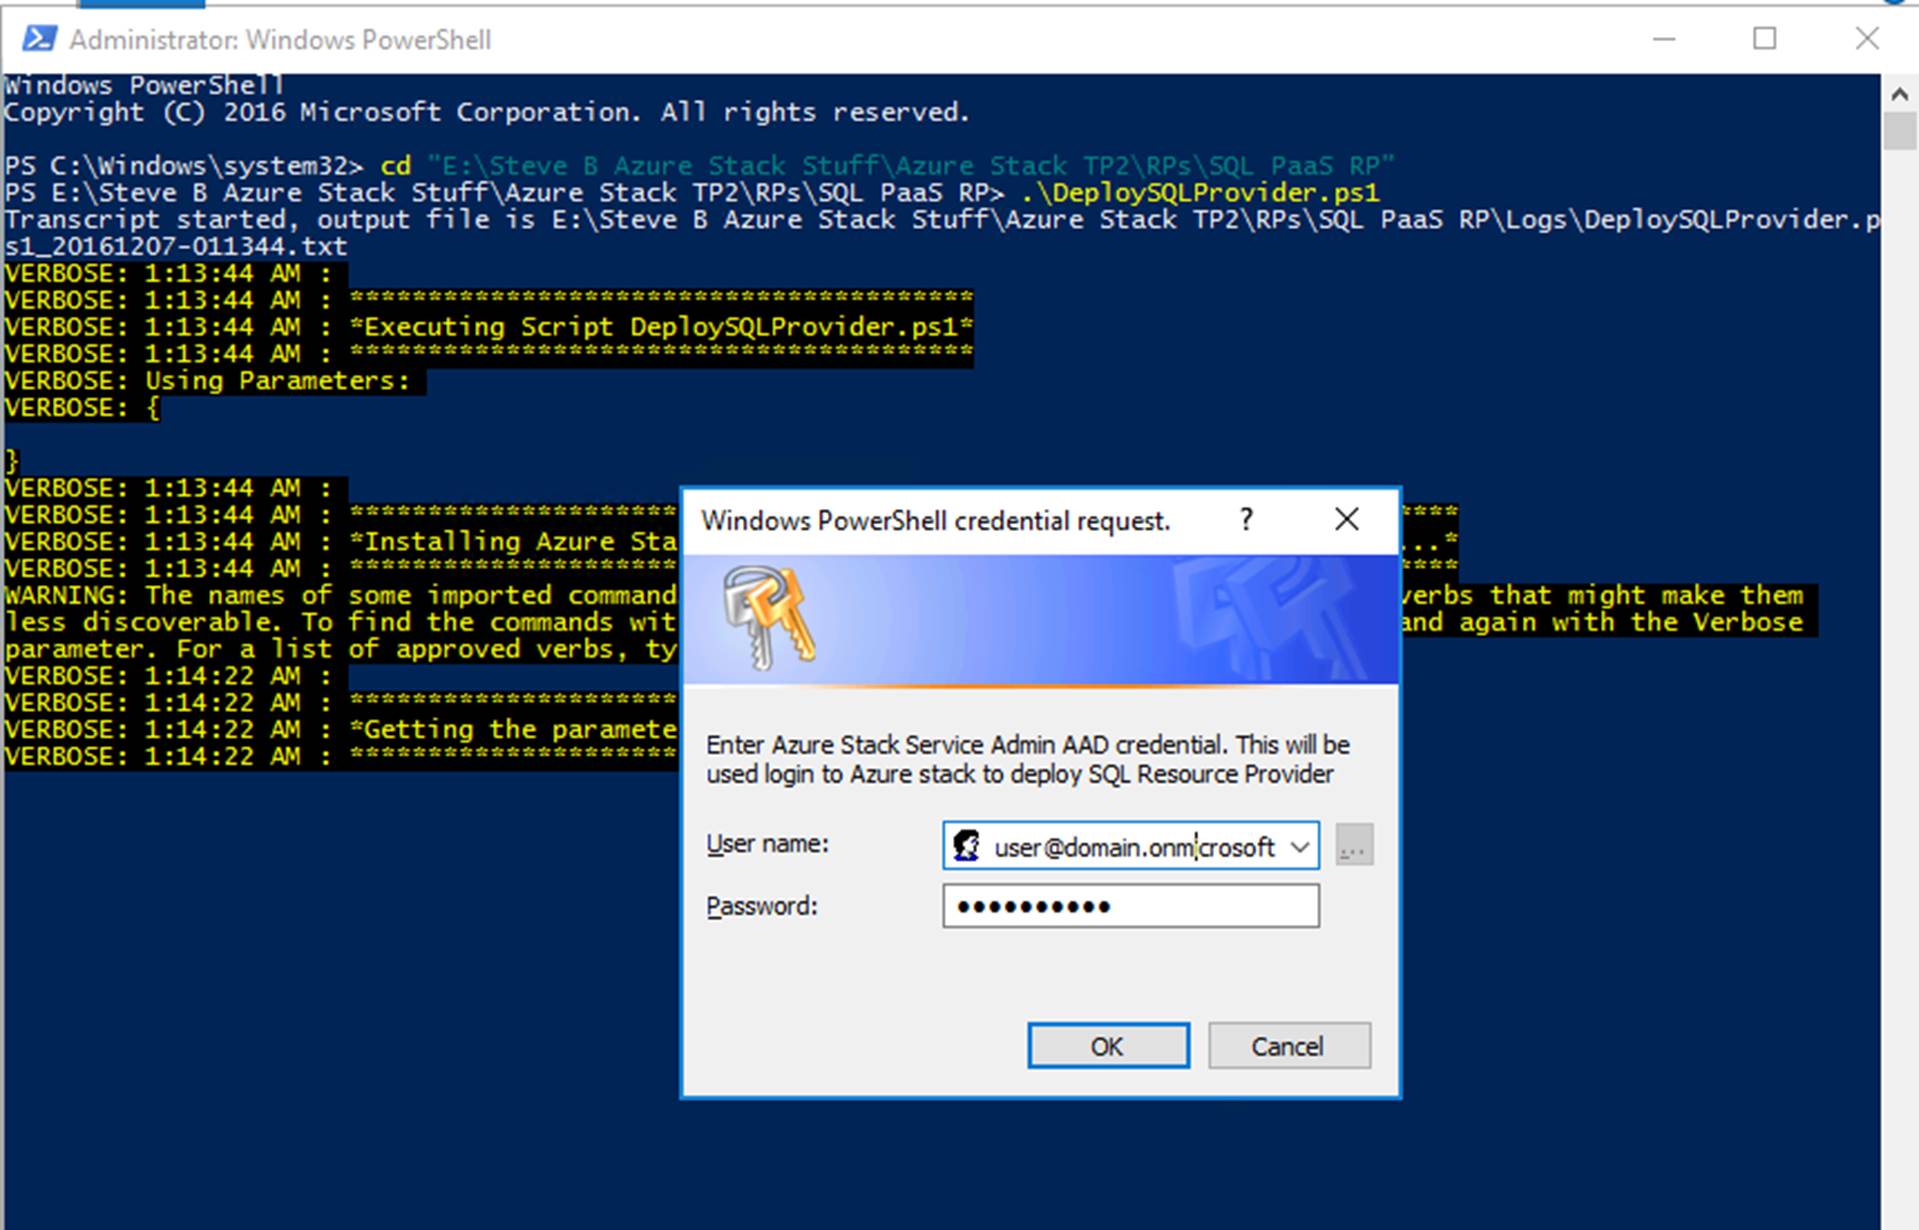
Ok. That was a lot of information and background on CloudOps, DevOps, Digital Transformation and Hybrid Cloud. You may be asking yourself at this point where does the IT Pro fit into the picture? Let me answer that for you and take you on a tour of Azure Stack to prove why as an IT Pro you should start working with it today!
The path for an IT Professional when moving from traditional IT into a Hybrid Cloud world consists of:

 |
A cloud administrator can configure and manage resource providers, tenant offers, plans, services, quotas, and pricing. |
 |
A tenant purchases (or acquires) services that the service administrator offers. Tenants can provision, monitor, and manage services that they have subscribed to, such as Web Apps, Storage, and Virtual Machines. |
Those cloud roles fit in a new world of CloudOps including Cloud architect, engineer, and administrator. Being a part of CloudOps requires a different mindset. Think about dynamic shifts such as software defined everything and extreme standardization. More concepts and technologies that a cloud role requires an understanding of are:
- IaaS
- PaaS
- Software Defined Data Center technologies
- Automation
- Source Control Systems
- Business Intelligence (Showback/Chargeback)
- High Availability technologies
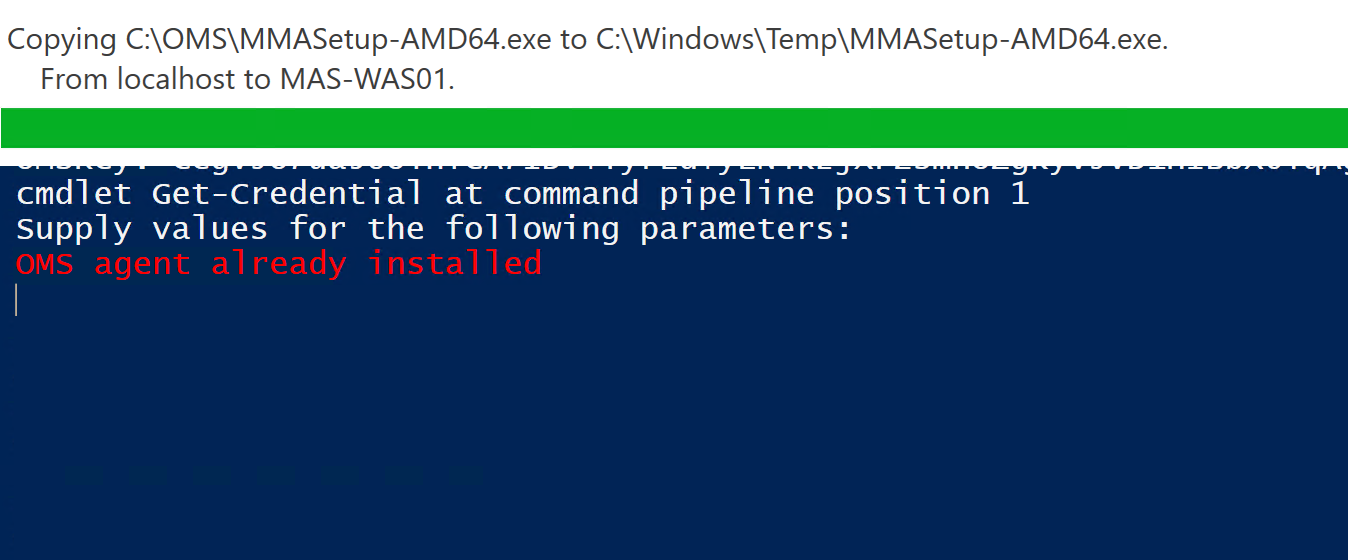
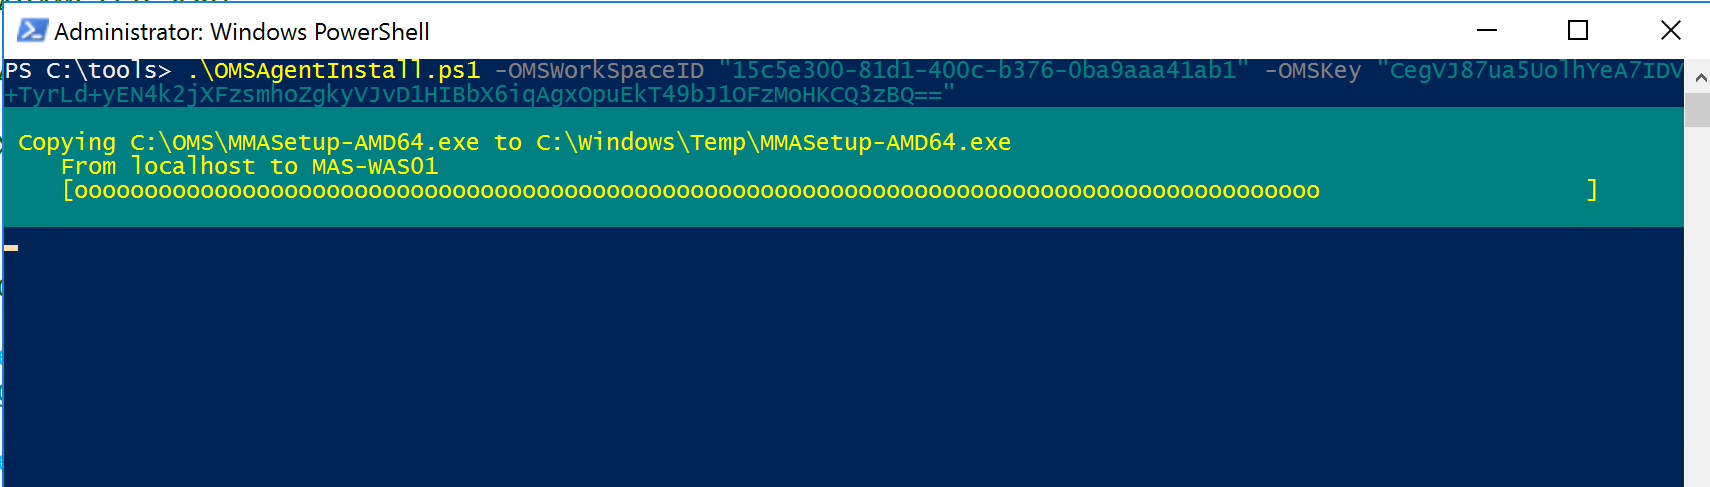
- Backup and Disaster Recovery
- Scaling technologies
- Containerization
- Server less technologies
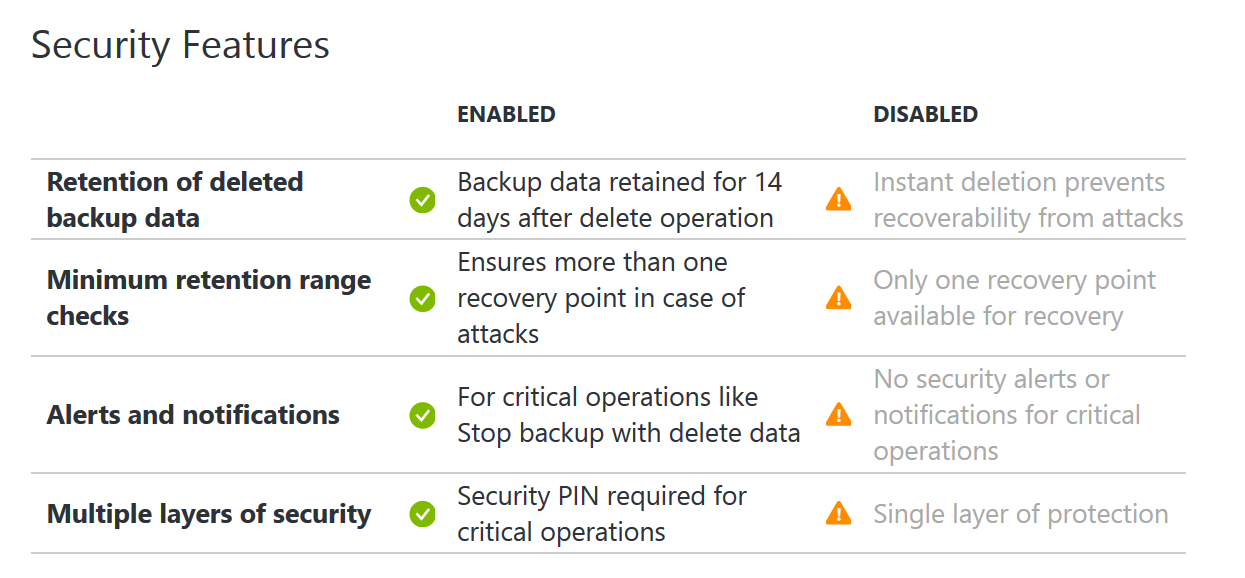
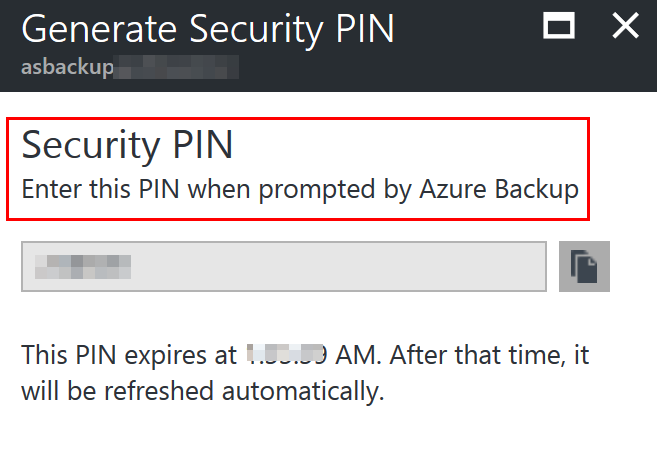
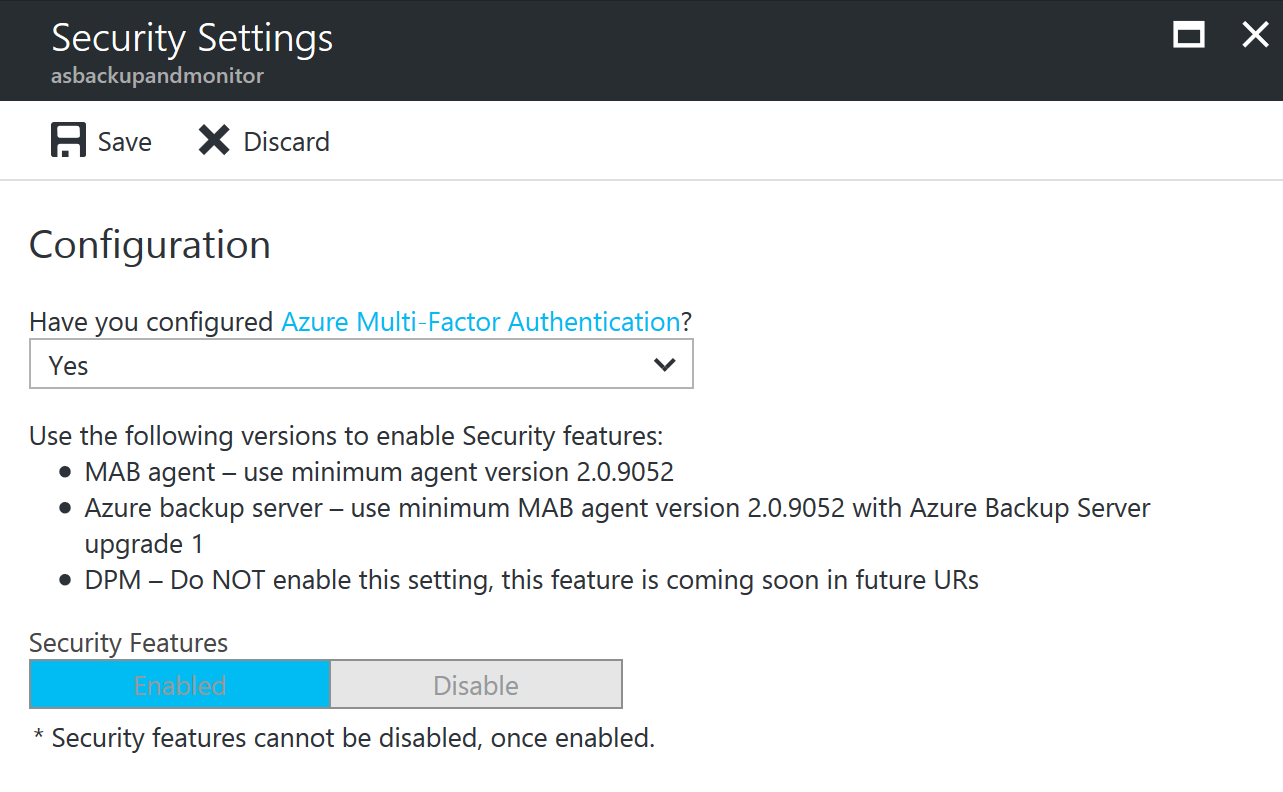
- Cloud Security
- Both Linux and Windows
- Self-Service (Service Catalog)
- Multitenancy technologies
- Tenant administration
- And more
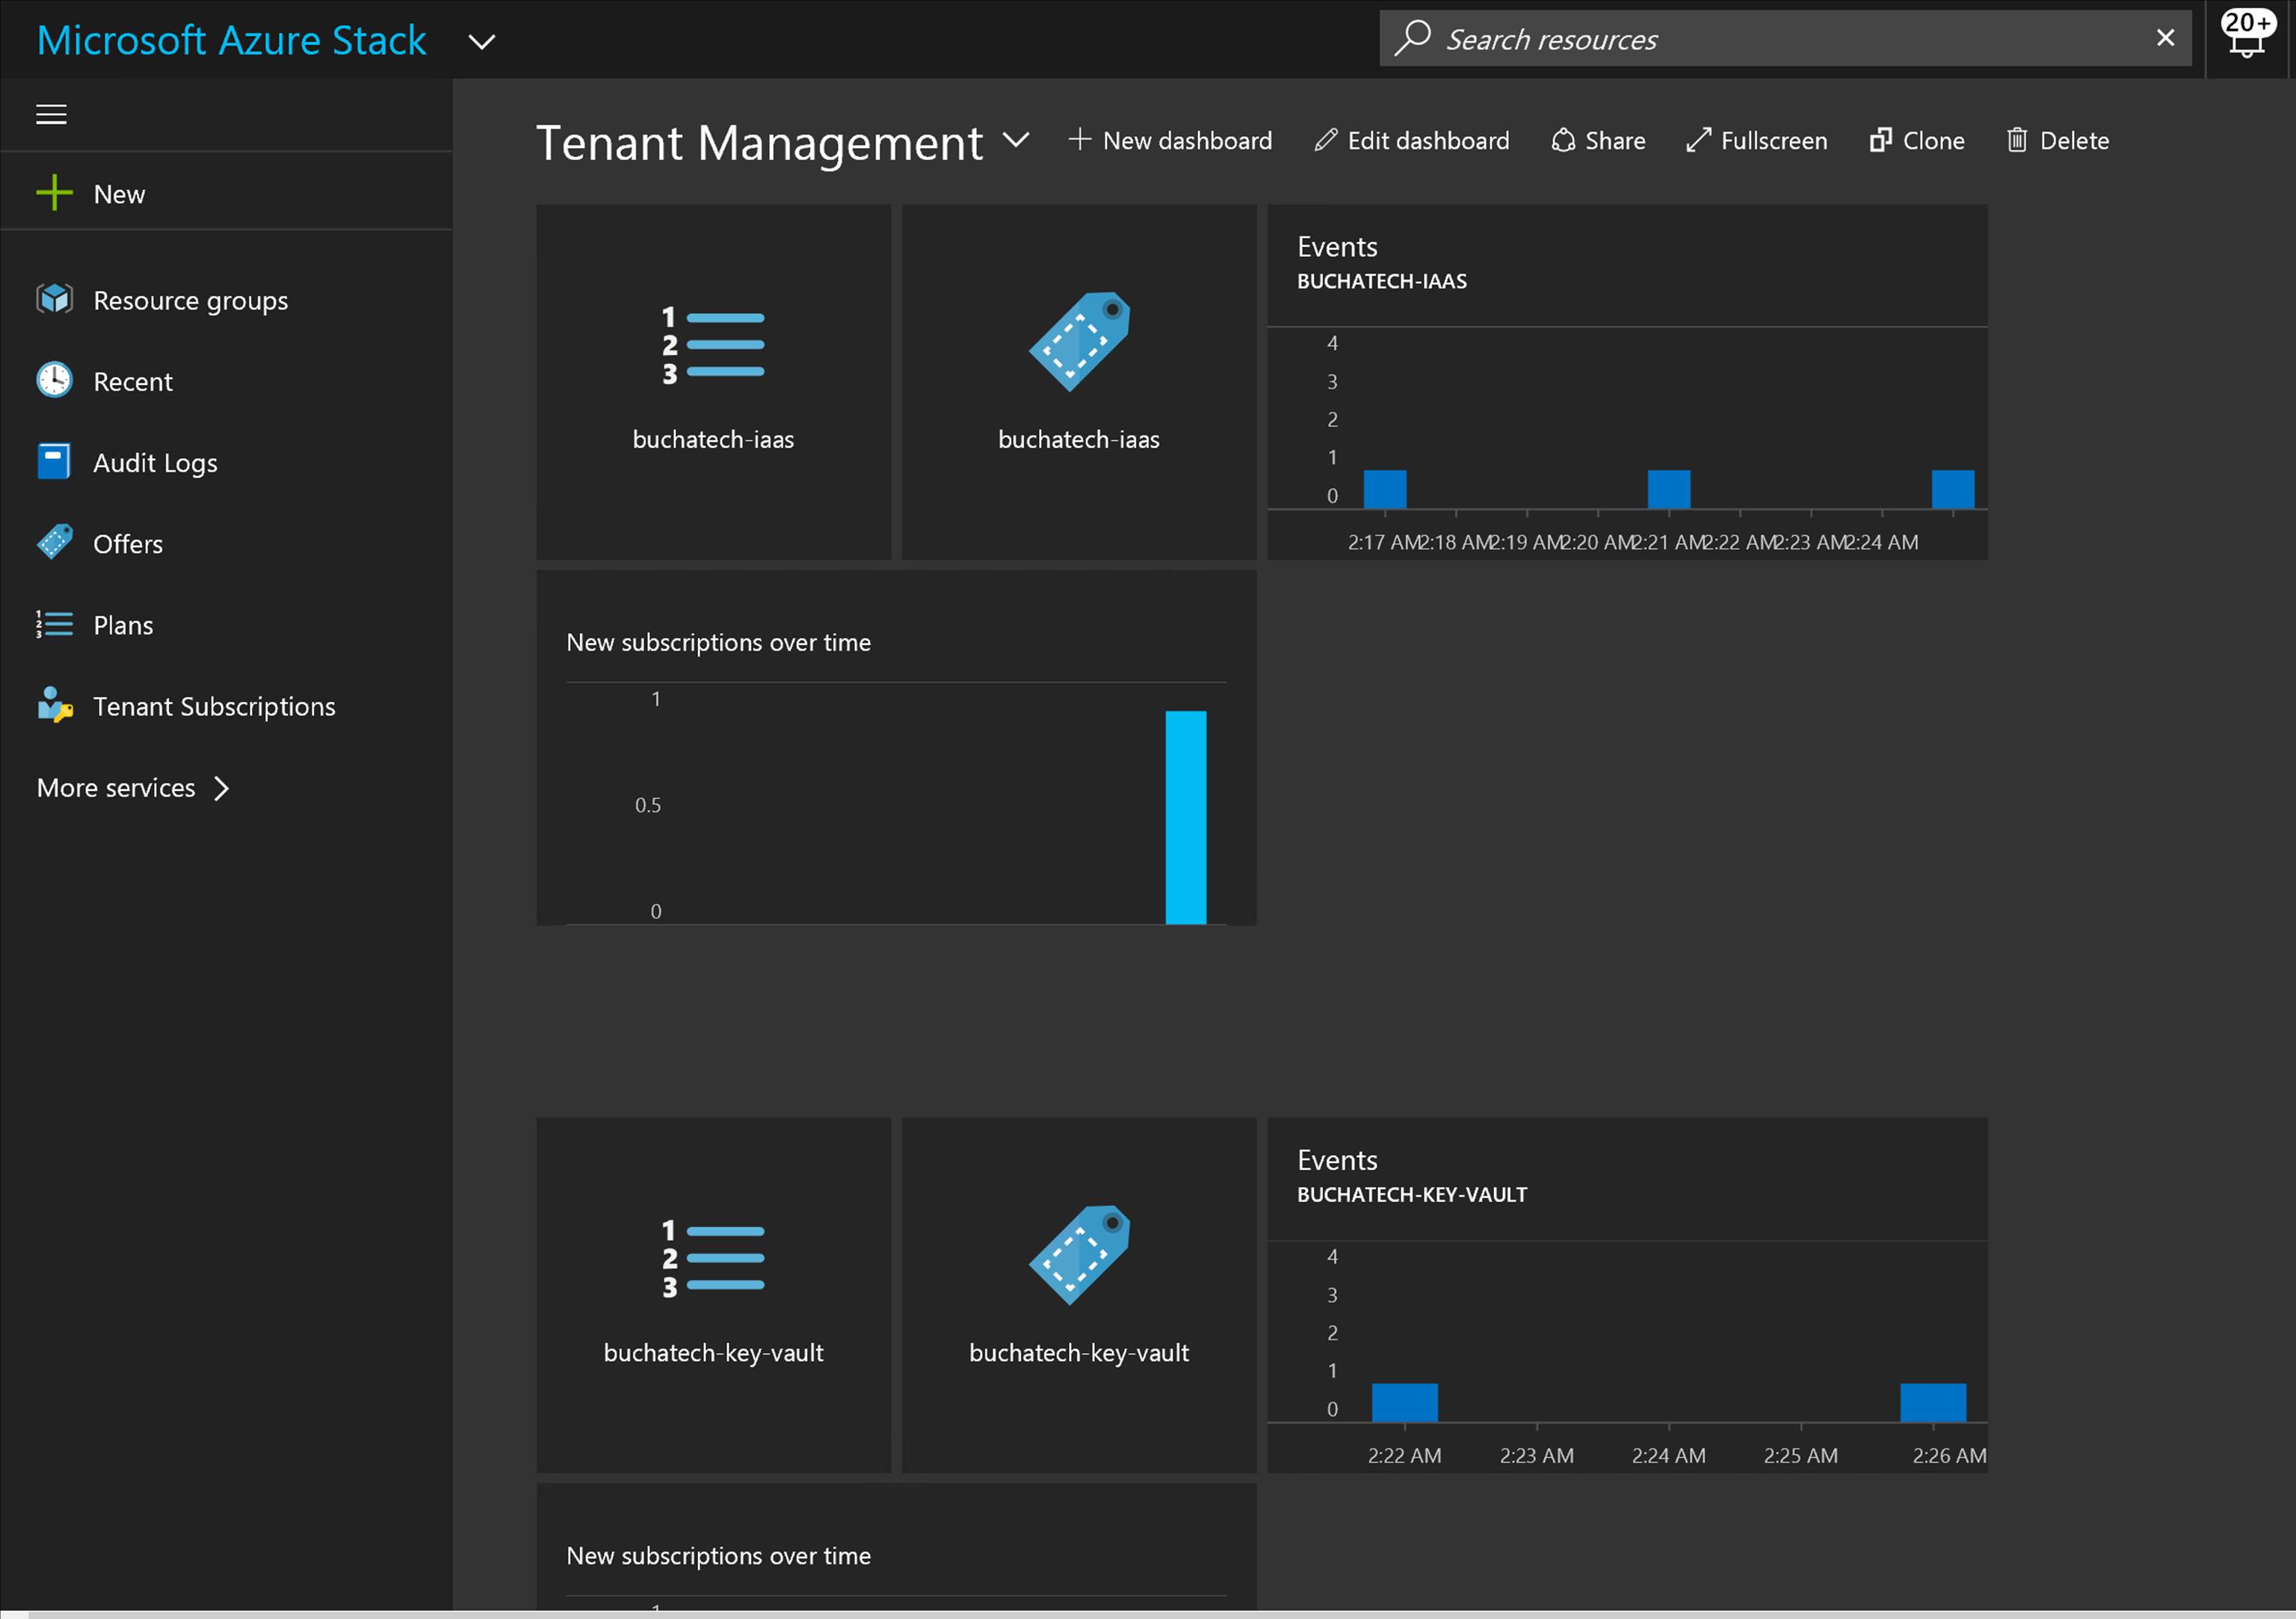
Ok. Now let’s jump into some example of CloudOps tooling in Azure Stack. First off, we as a cloud admin you need to know how to perform management of tenants (customers). Here is an example of a dashboard for doing this in Azure Stack:
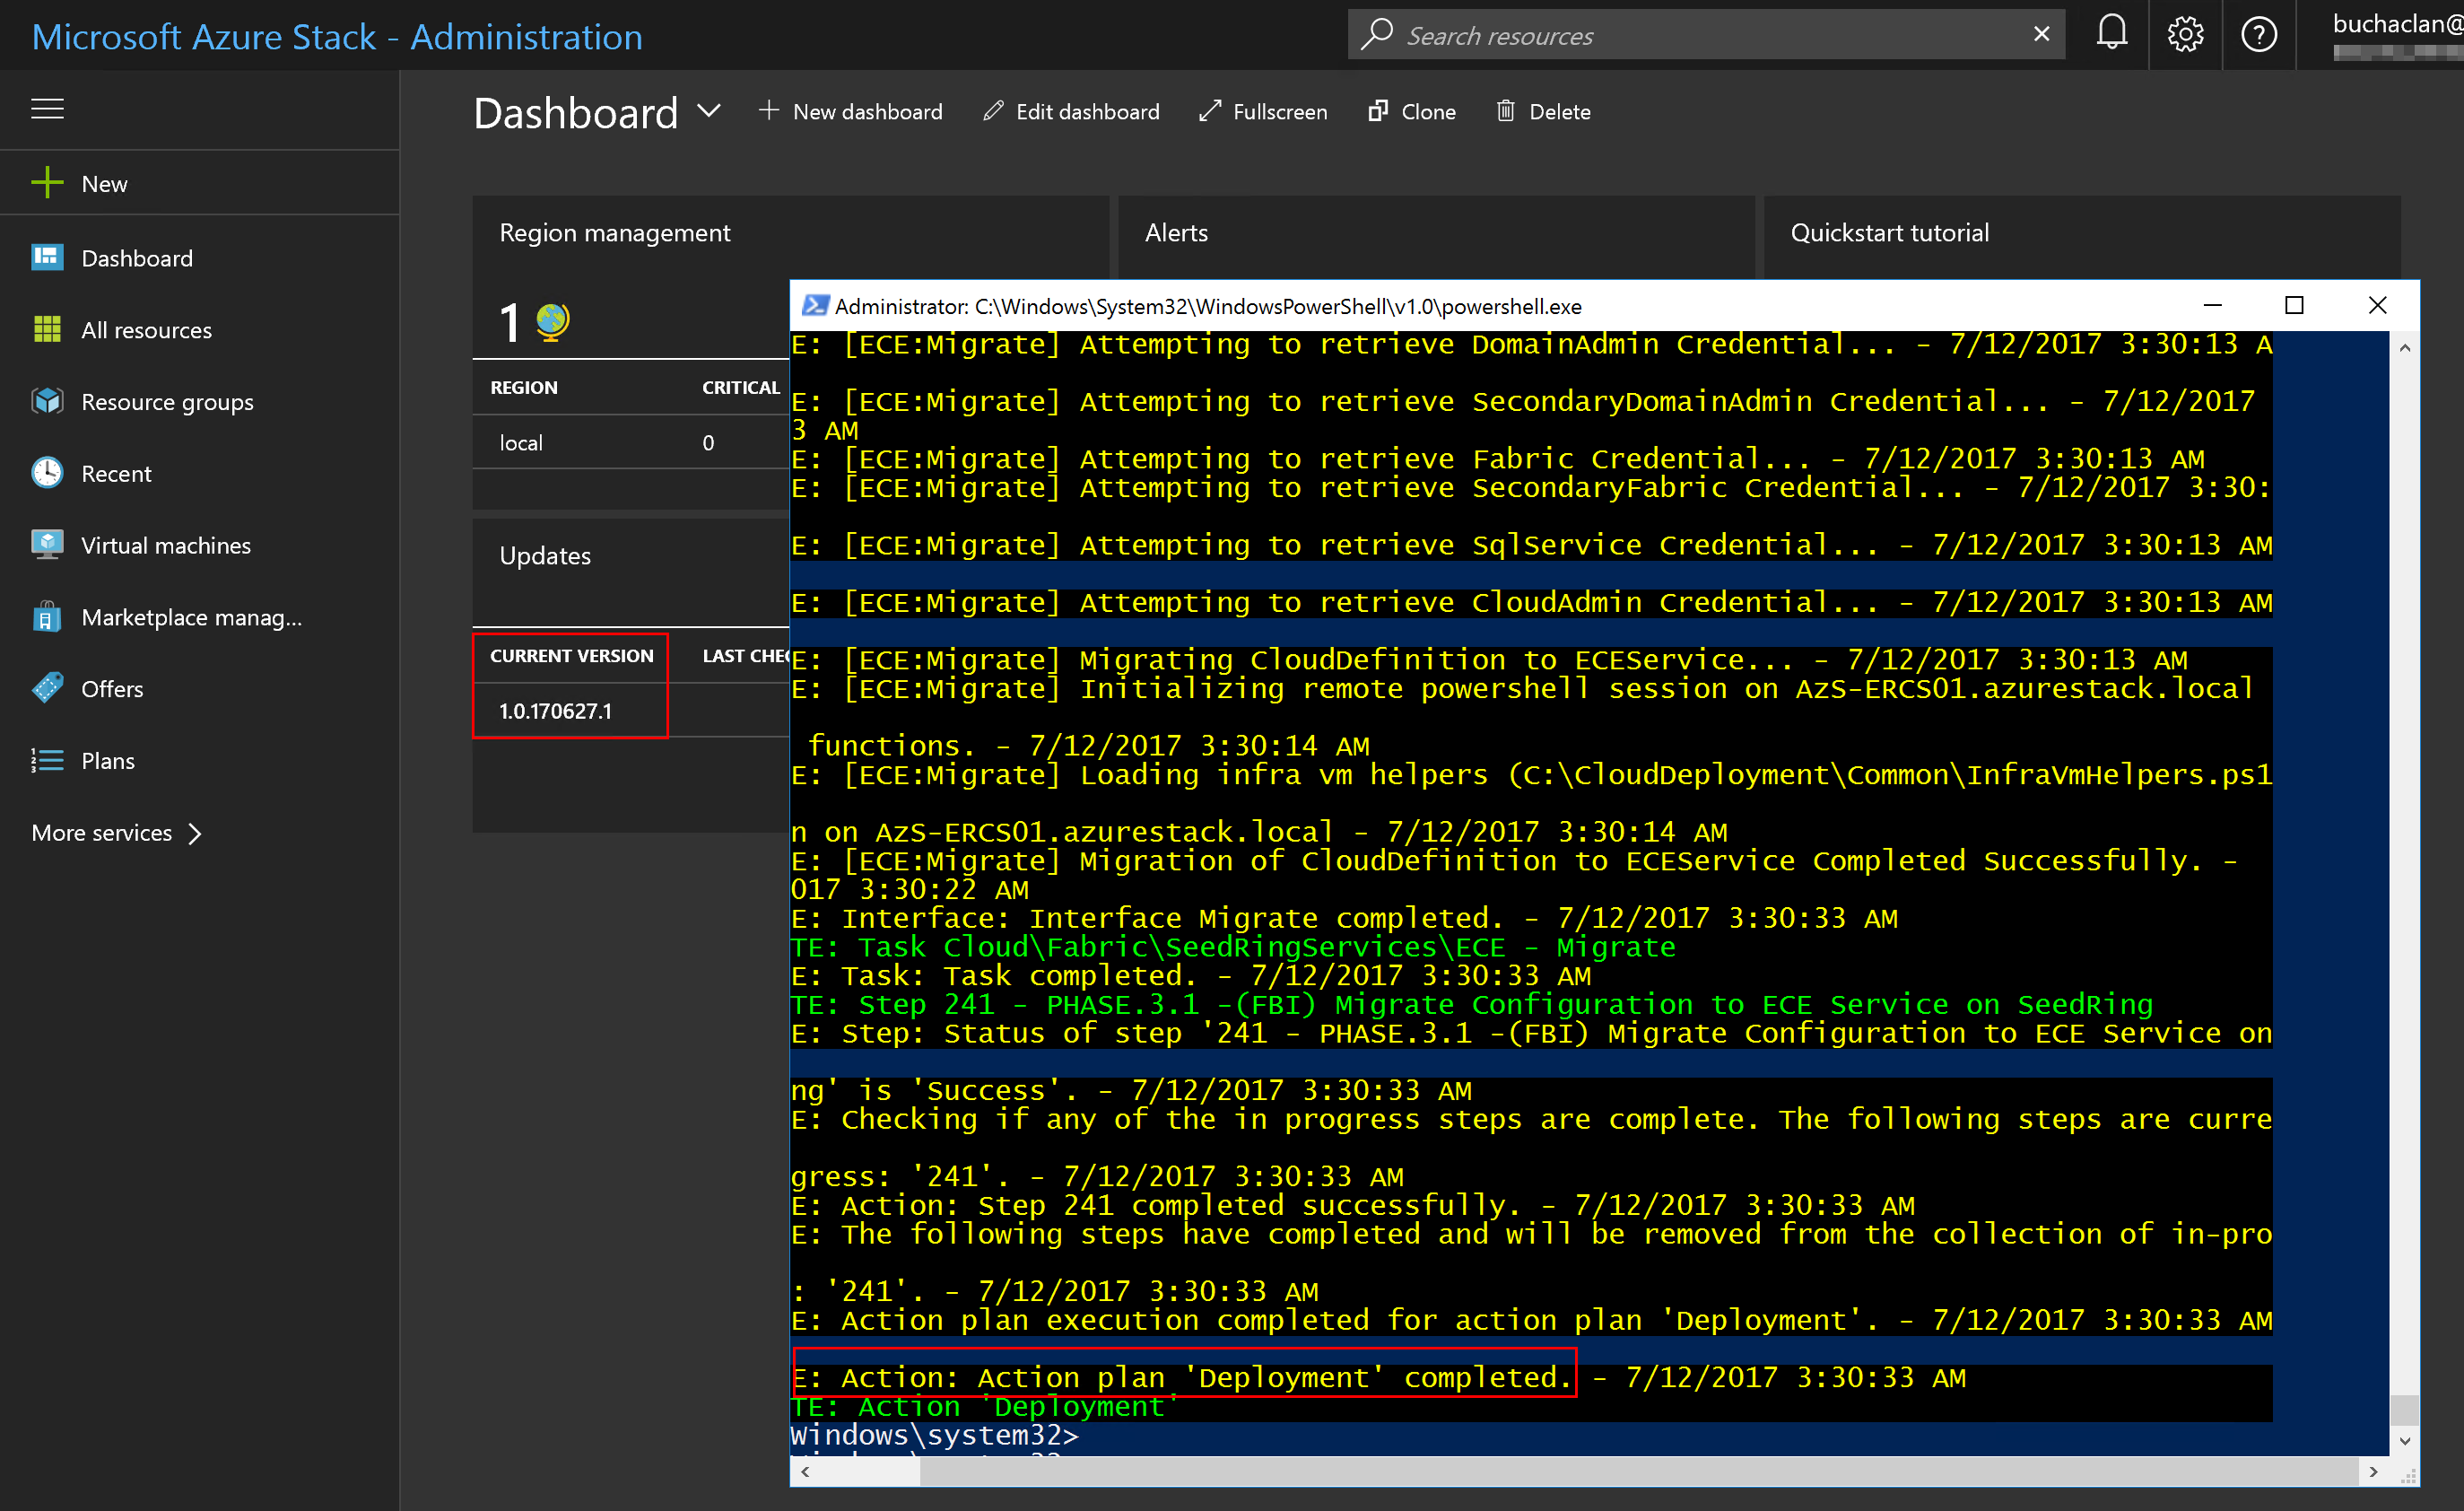
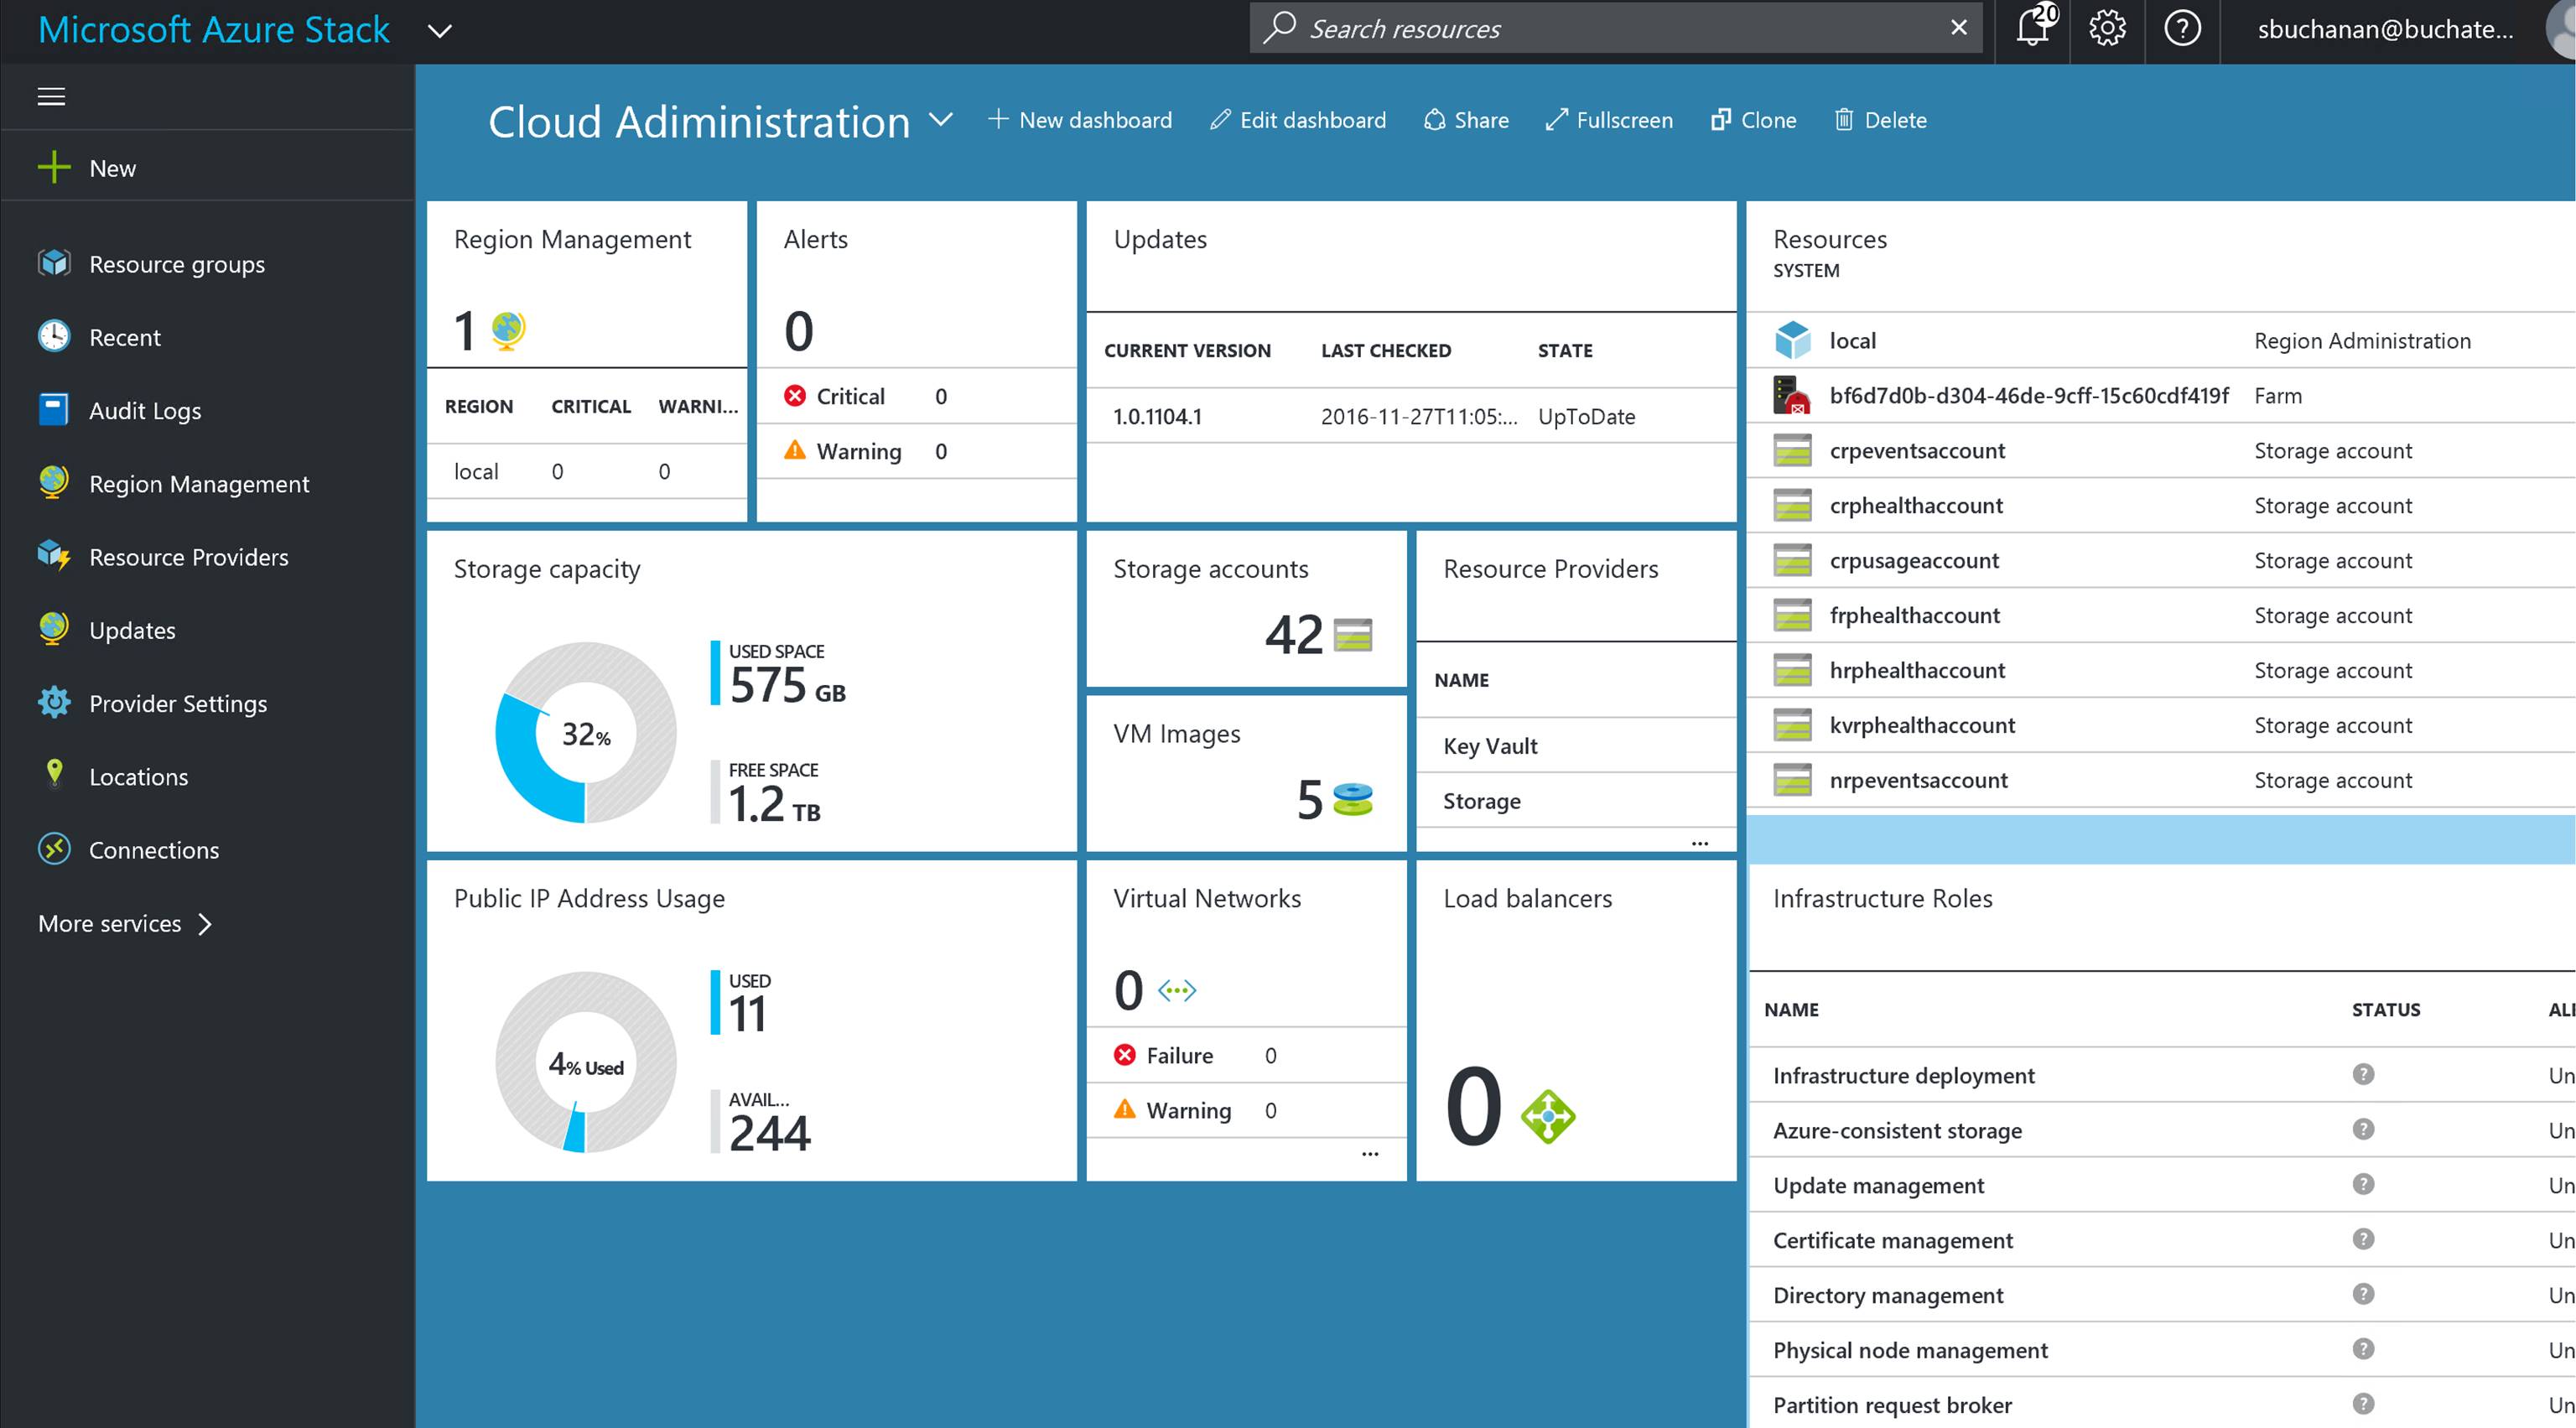
In Azure Stack, you will need to know and understand the administration of managing the cloud itself. This includes many things some of them being management of a region/s, resource providers that contain the services you can offer up to tenants, along with monitoring, high availability, and backup of the cloud. Below is an example of administration in Azure Stack at the cloud model layer of CloudOps.
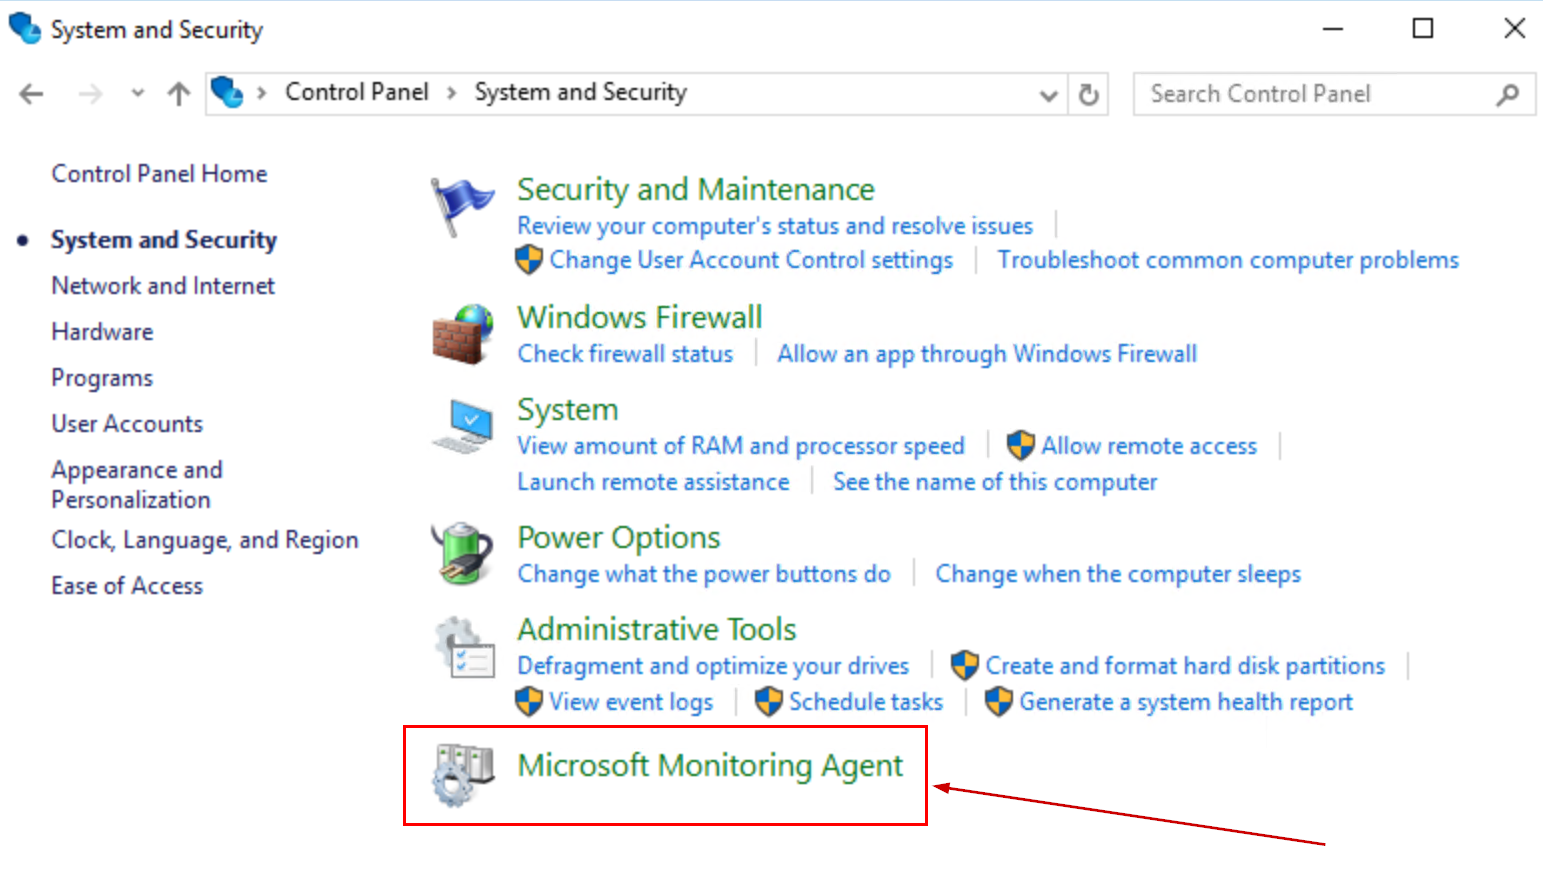
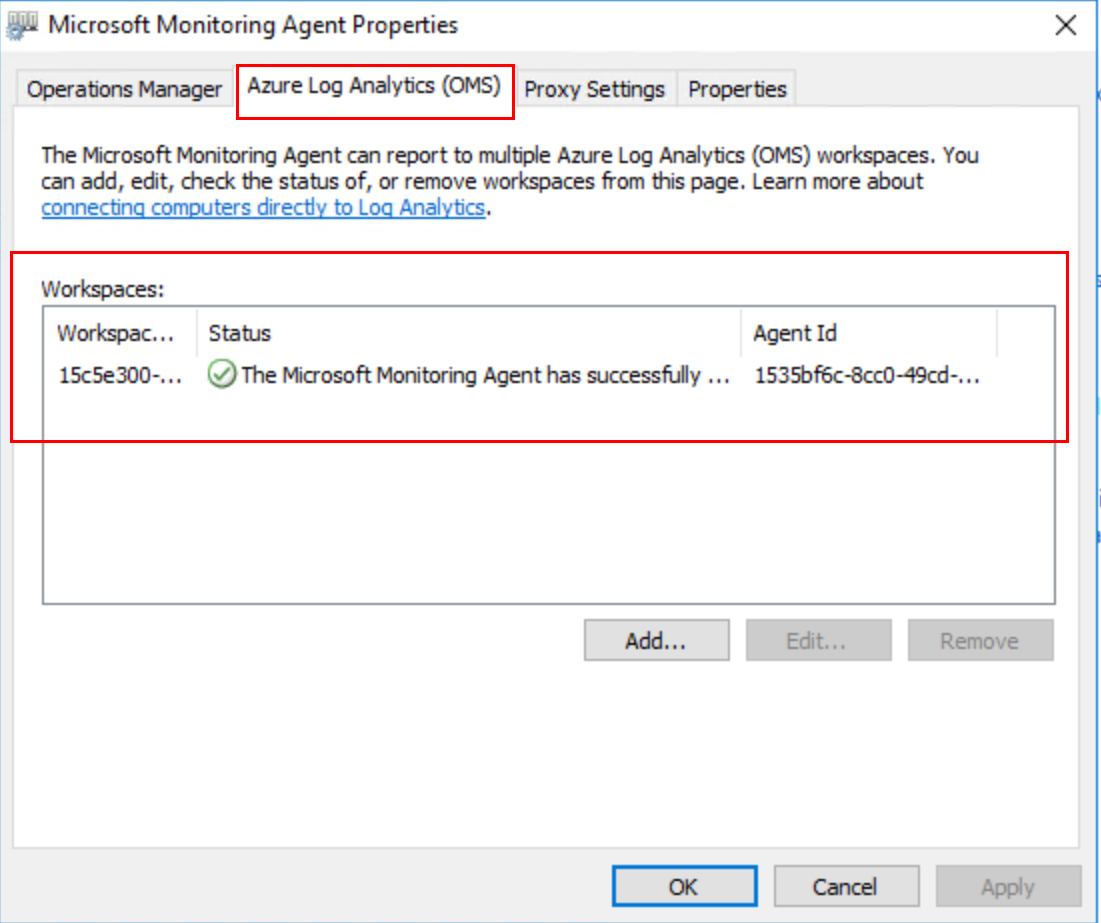
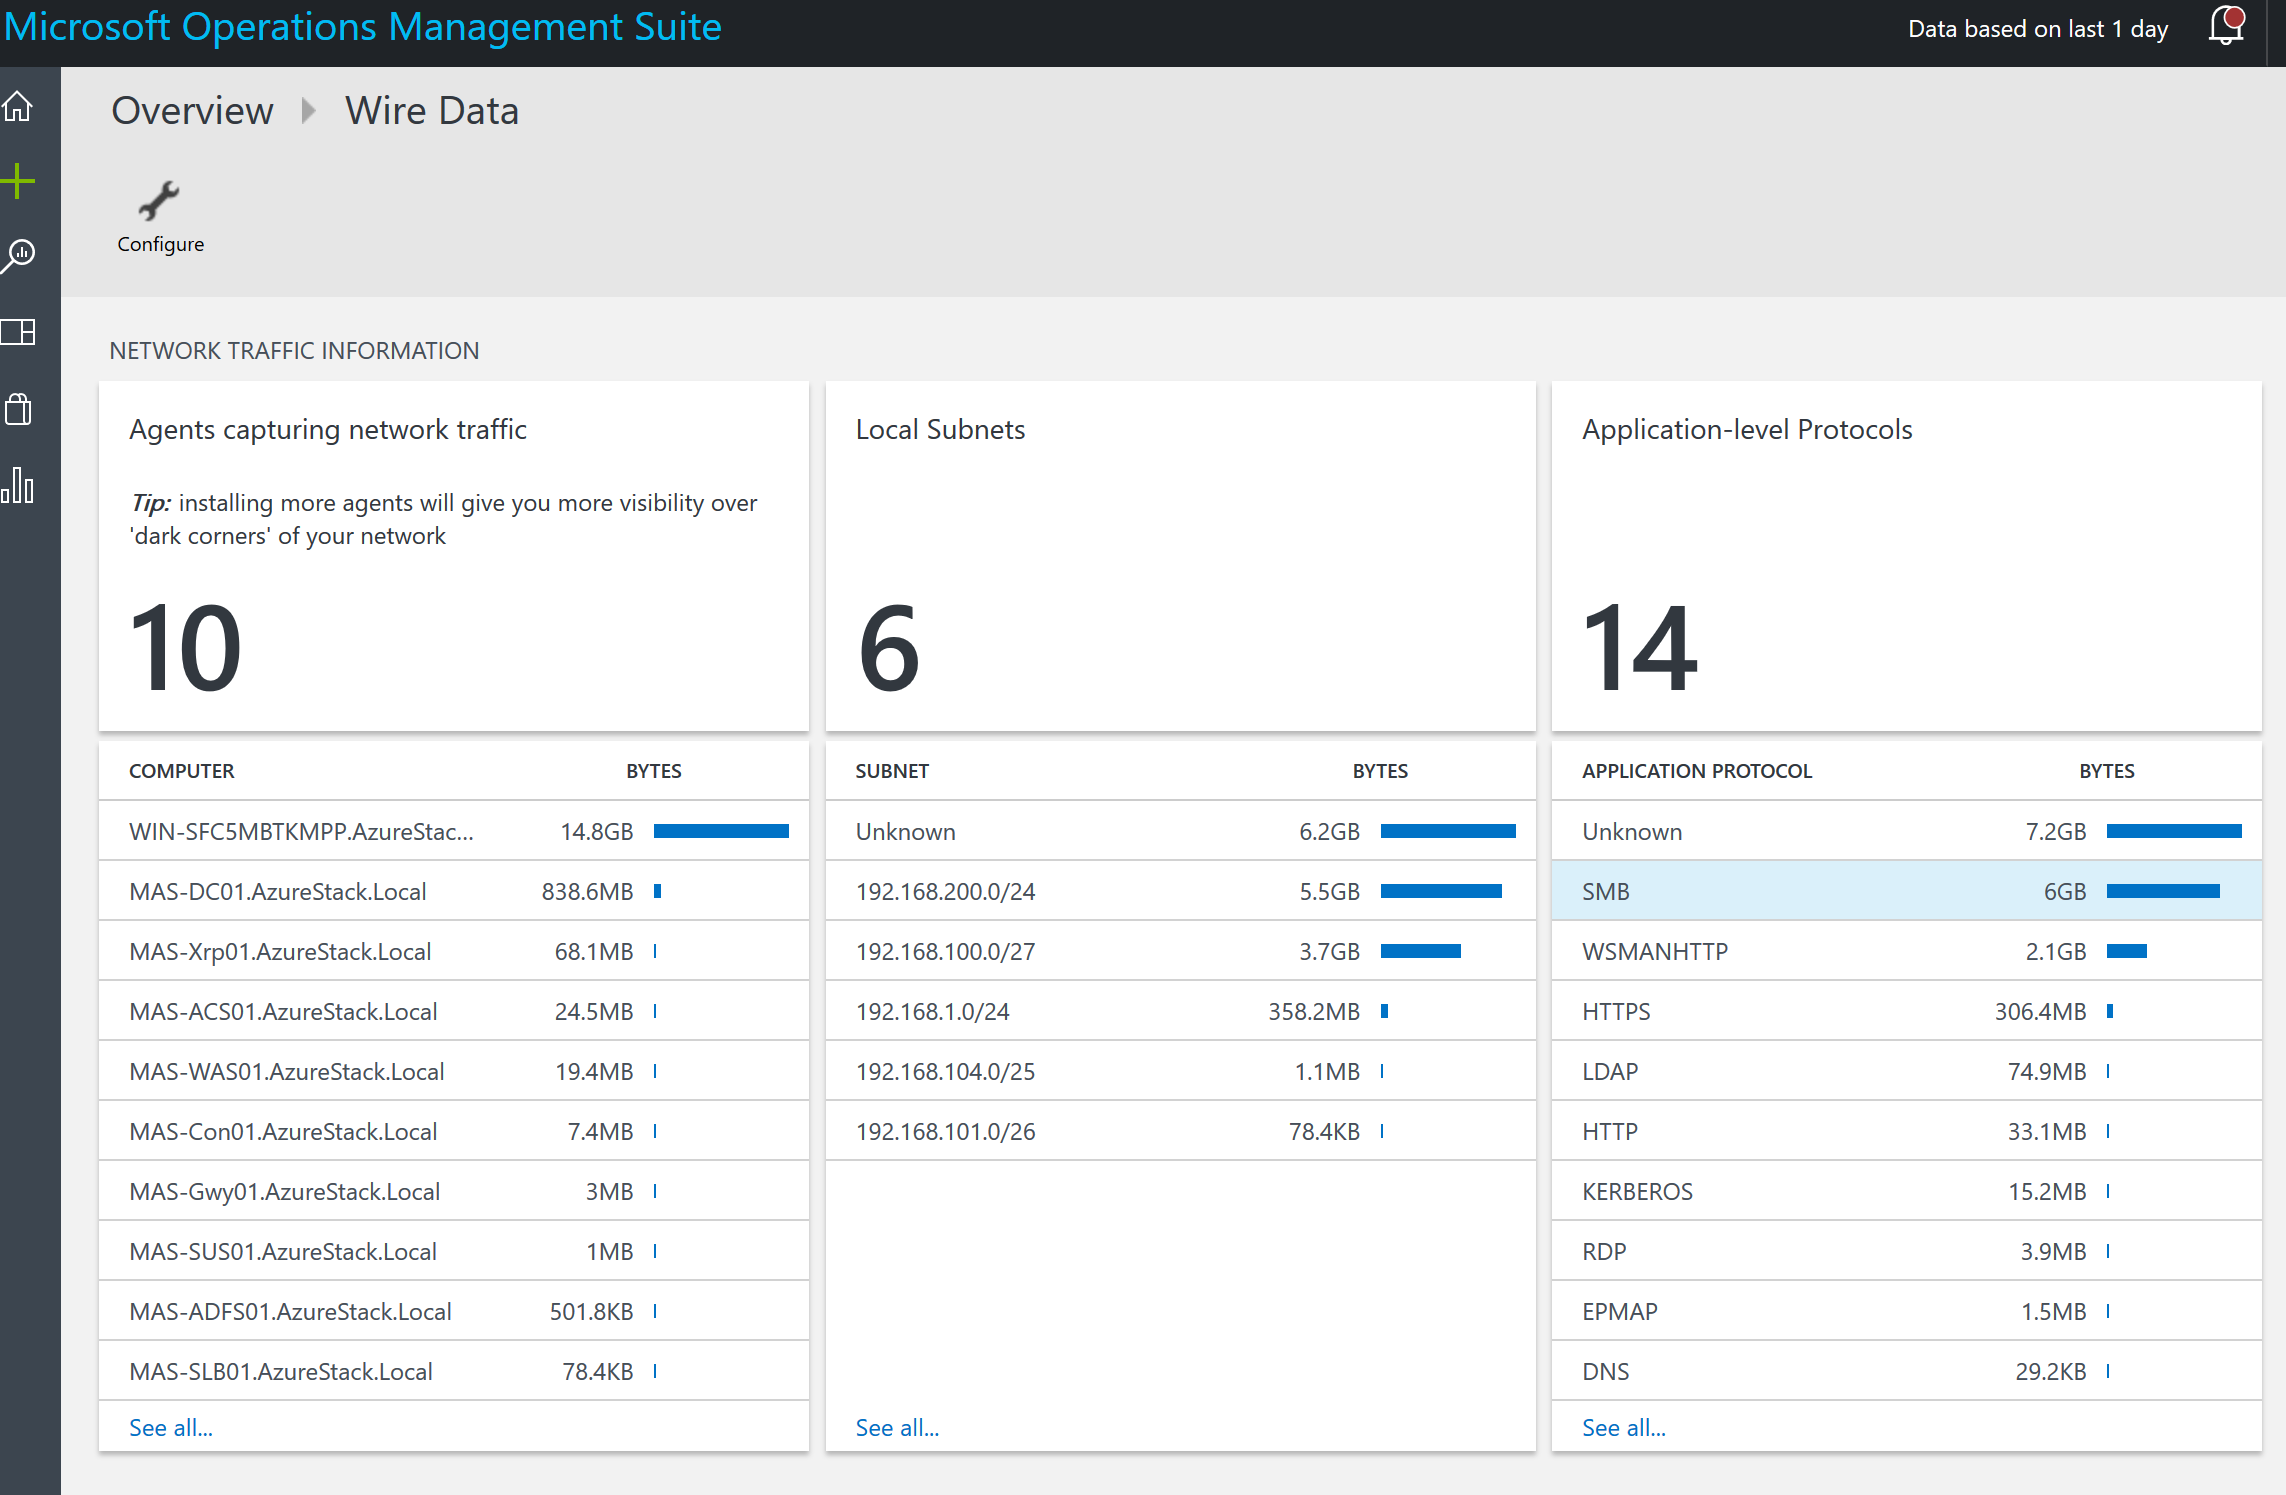
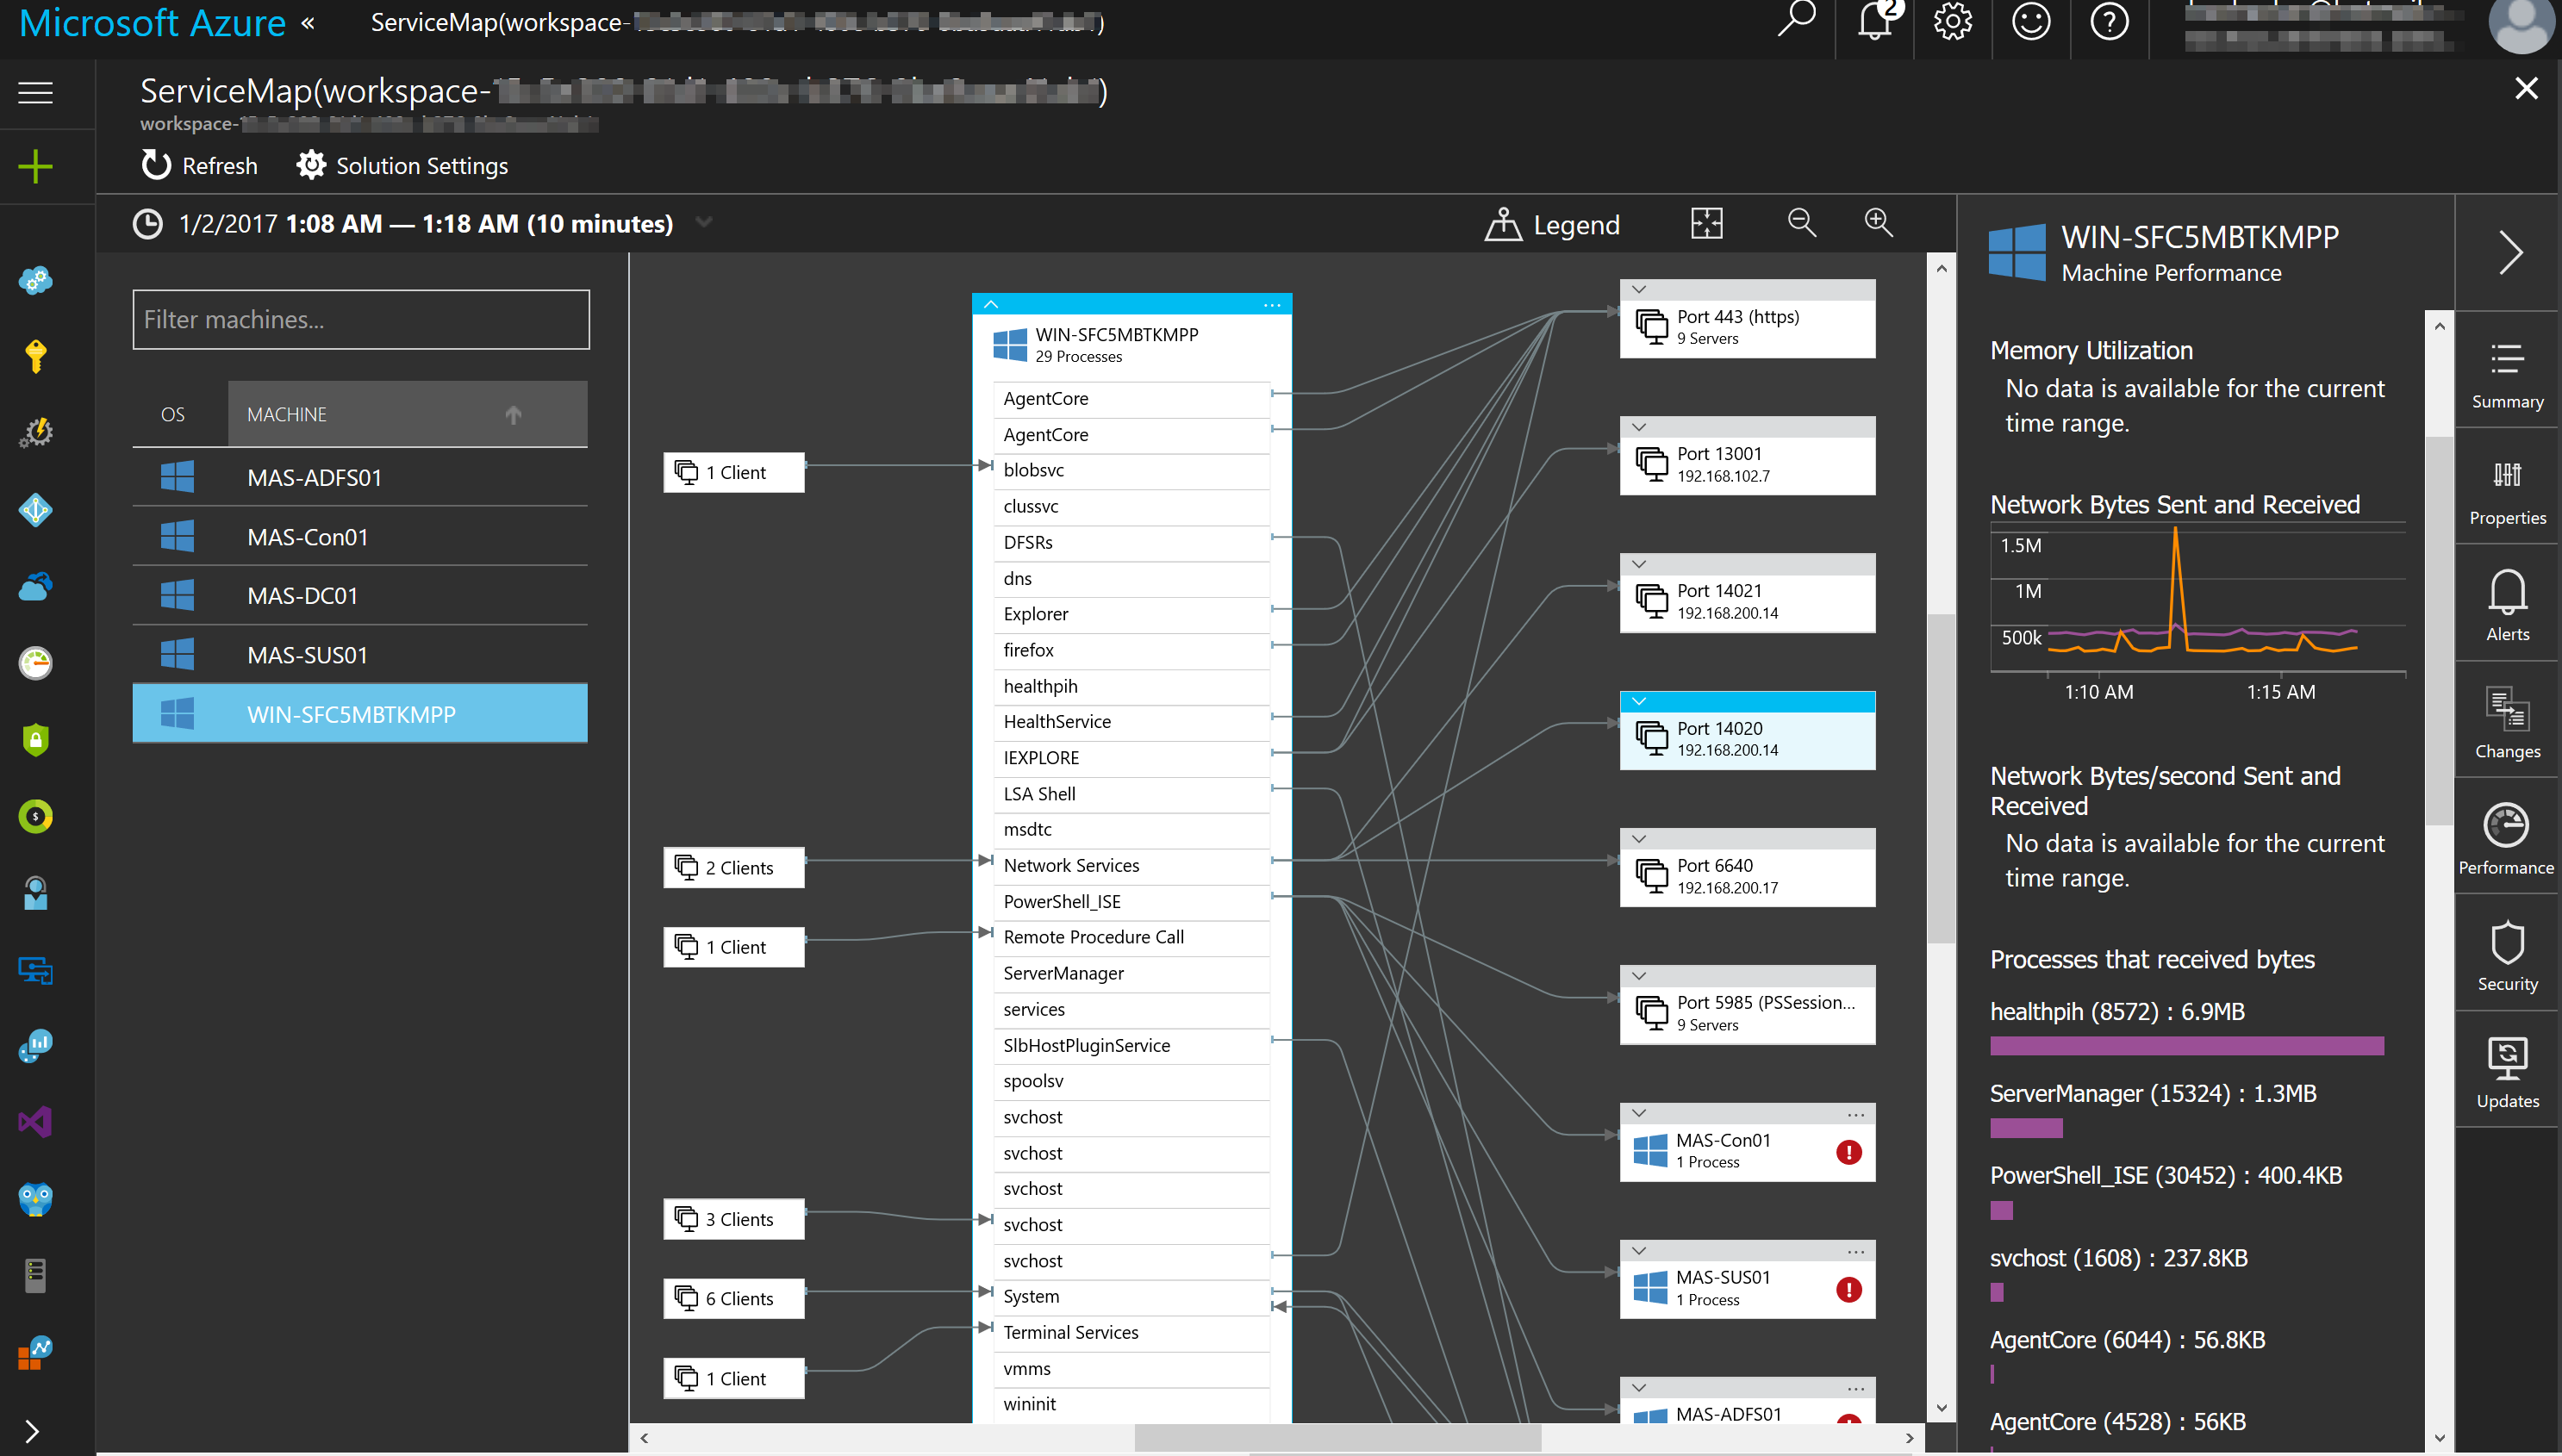
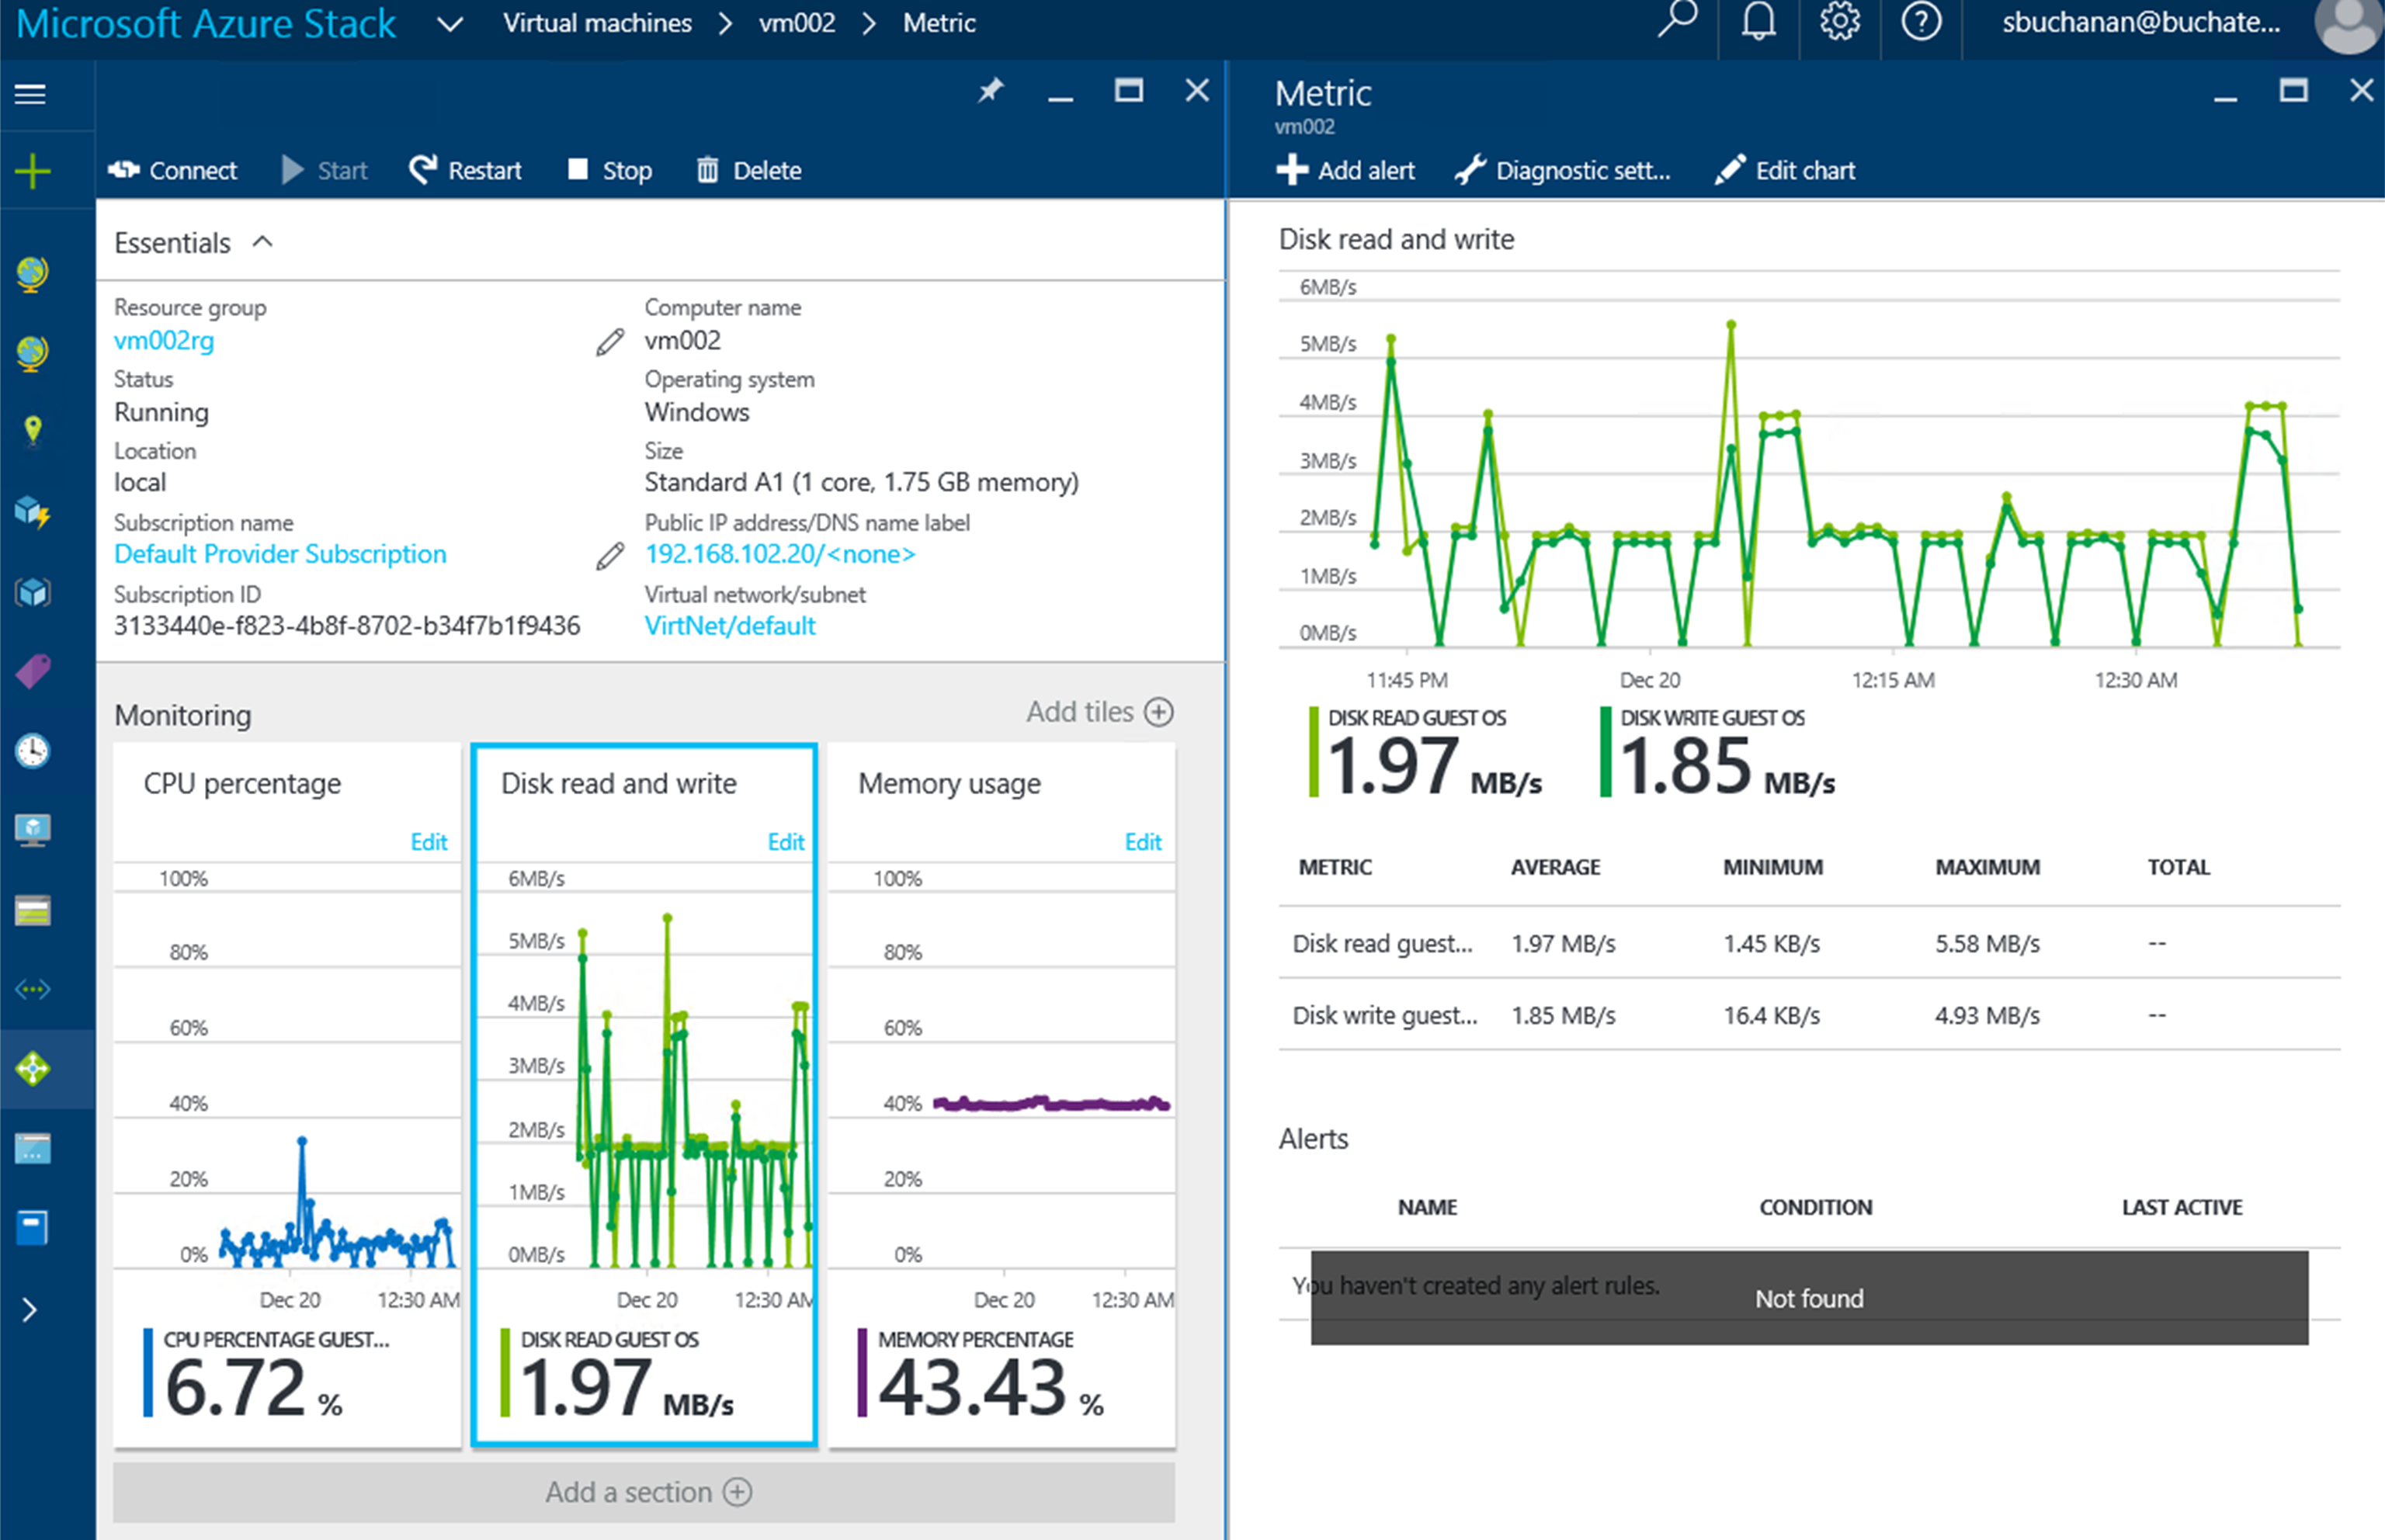
We already mentioned monitoring. There is monitoring of the cloud environment itself but there also is a need to monitor the resources being consumed by the tenants. One of the great things about Azure and Azure Stack is the out of the box monitoring and health diagnostics of IaaS virtual machines. I am a SCOM guy and have done a lot of SCOM projects. SCOM works well and serves a purpose but the out of the box monitoring in Azure and Azure Stack is amazing in the ease of turning it on. Once turned on it just works and has very nice visuals to see and work with as shown in the following screenshot. As a cloud administrator, you need technology to be easy so that you can move away from complex setups and troubleshooting the monitoring solution and move to monitoring the resources.
One of the best benefits about Hybrid Cloud is the consistency between public and on-premises cloud. In the following screenshot news updates on Azure and Azure stack are the same. 🙂 Another huge point of consistency between Azure and Azure Stack is the ability to view, deploy and run items from the Azure marketplace in Azure Stack. This is called marketplace syndication.
|
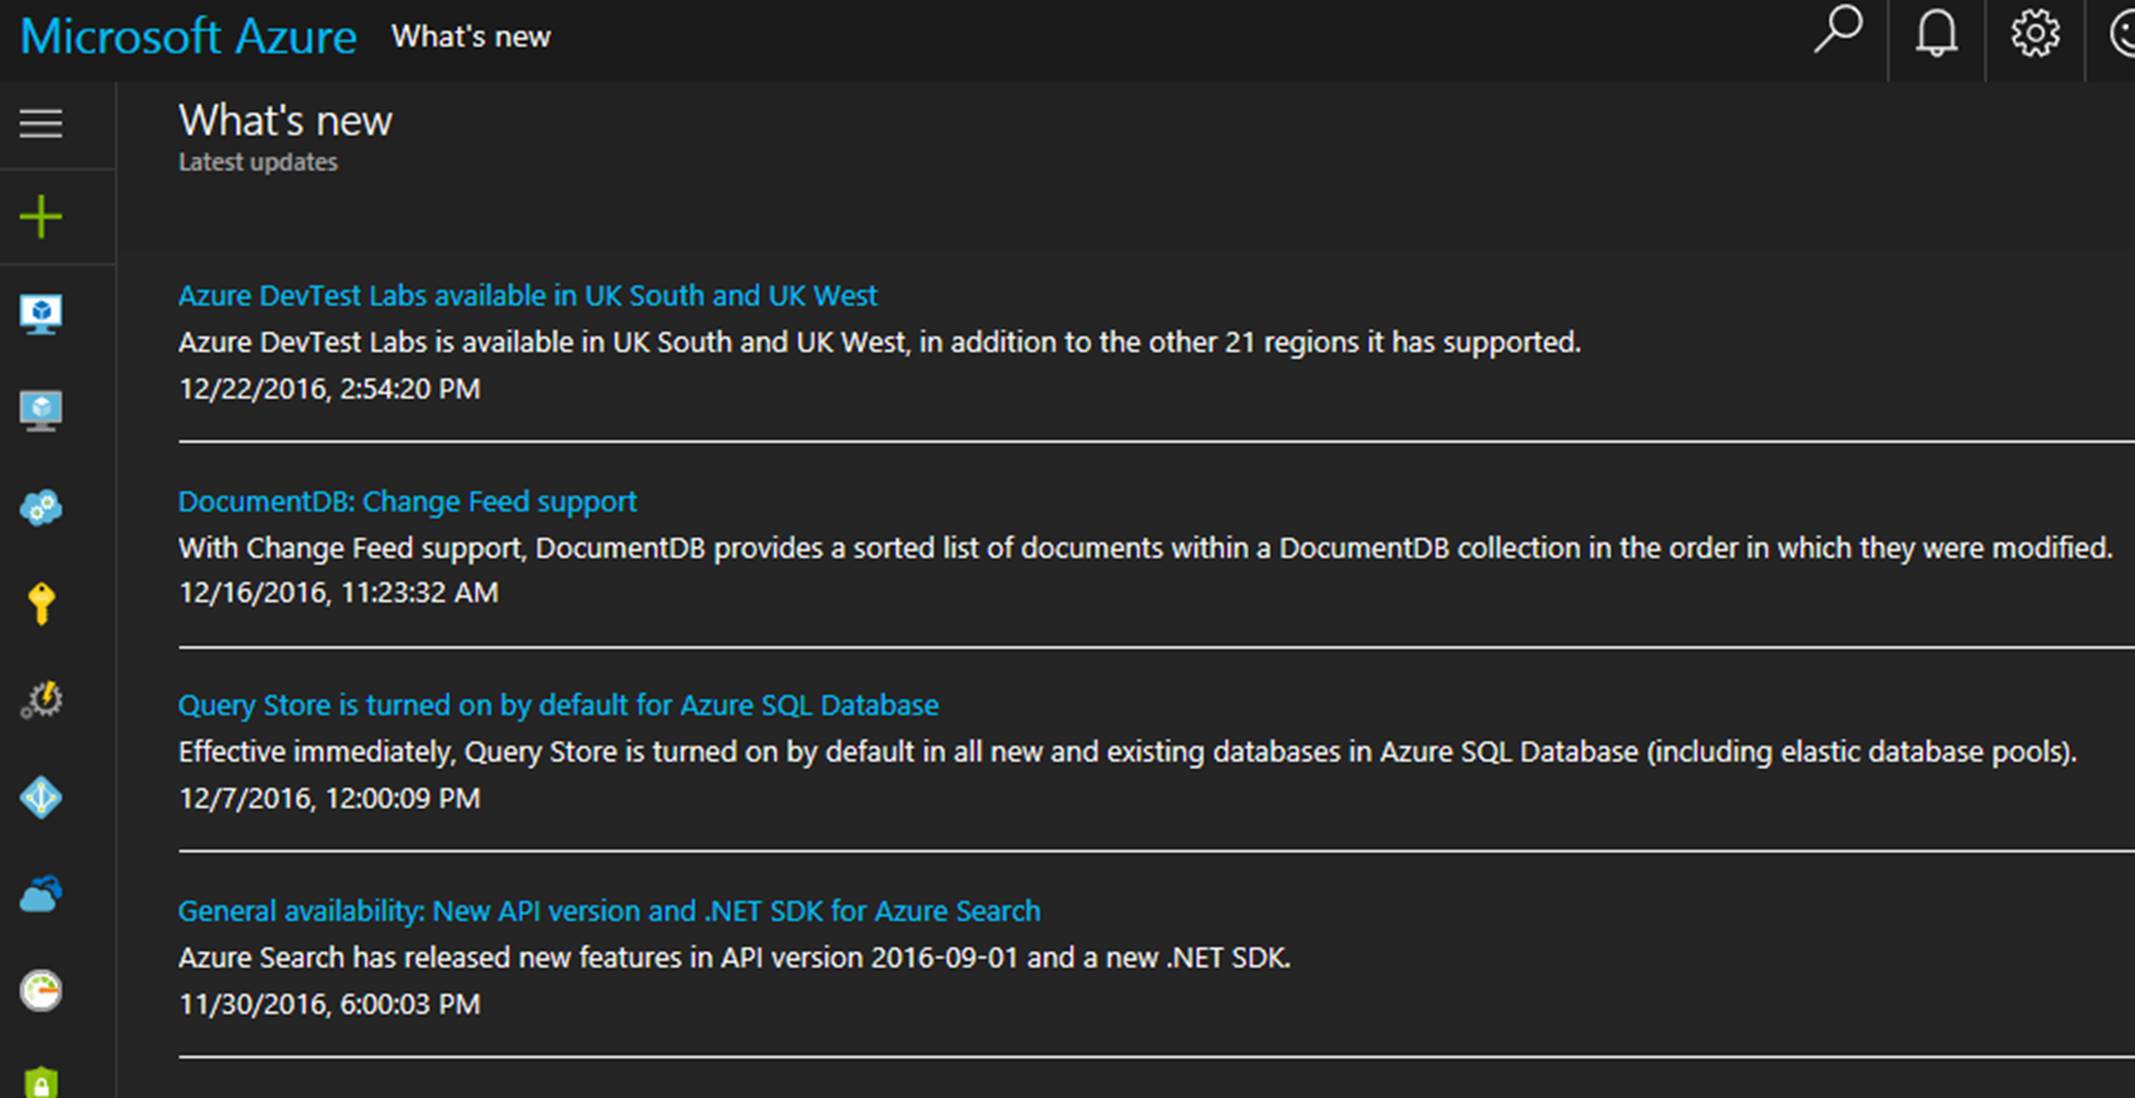
Azure
|
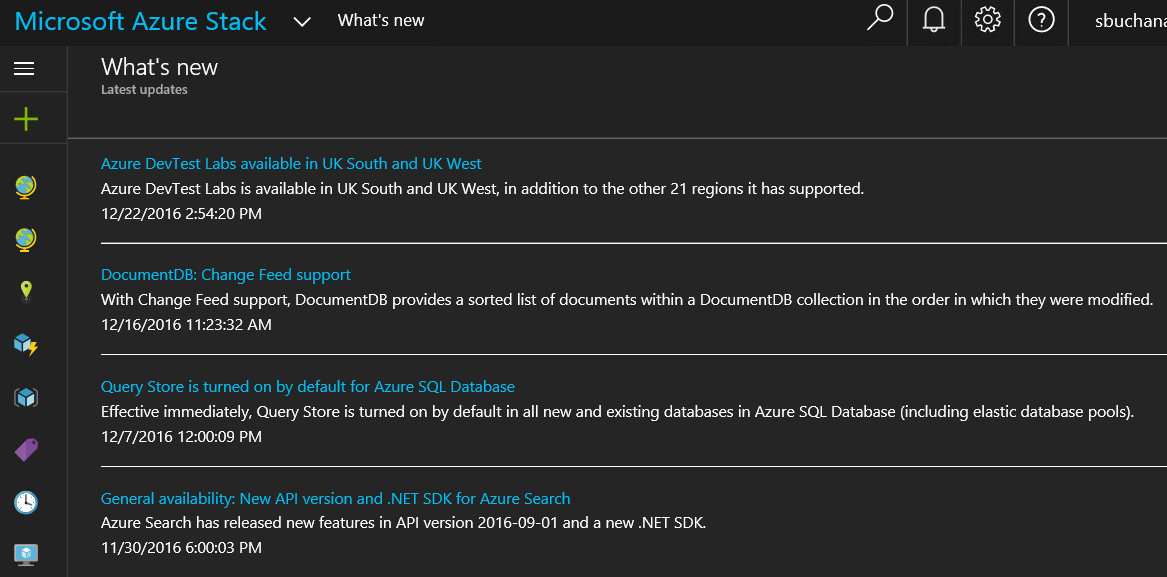
Azure Stack
|
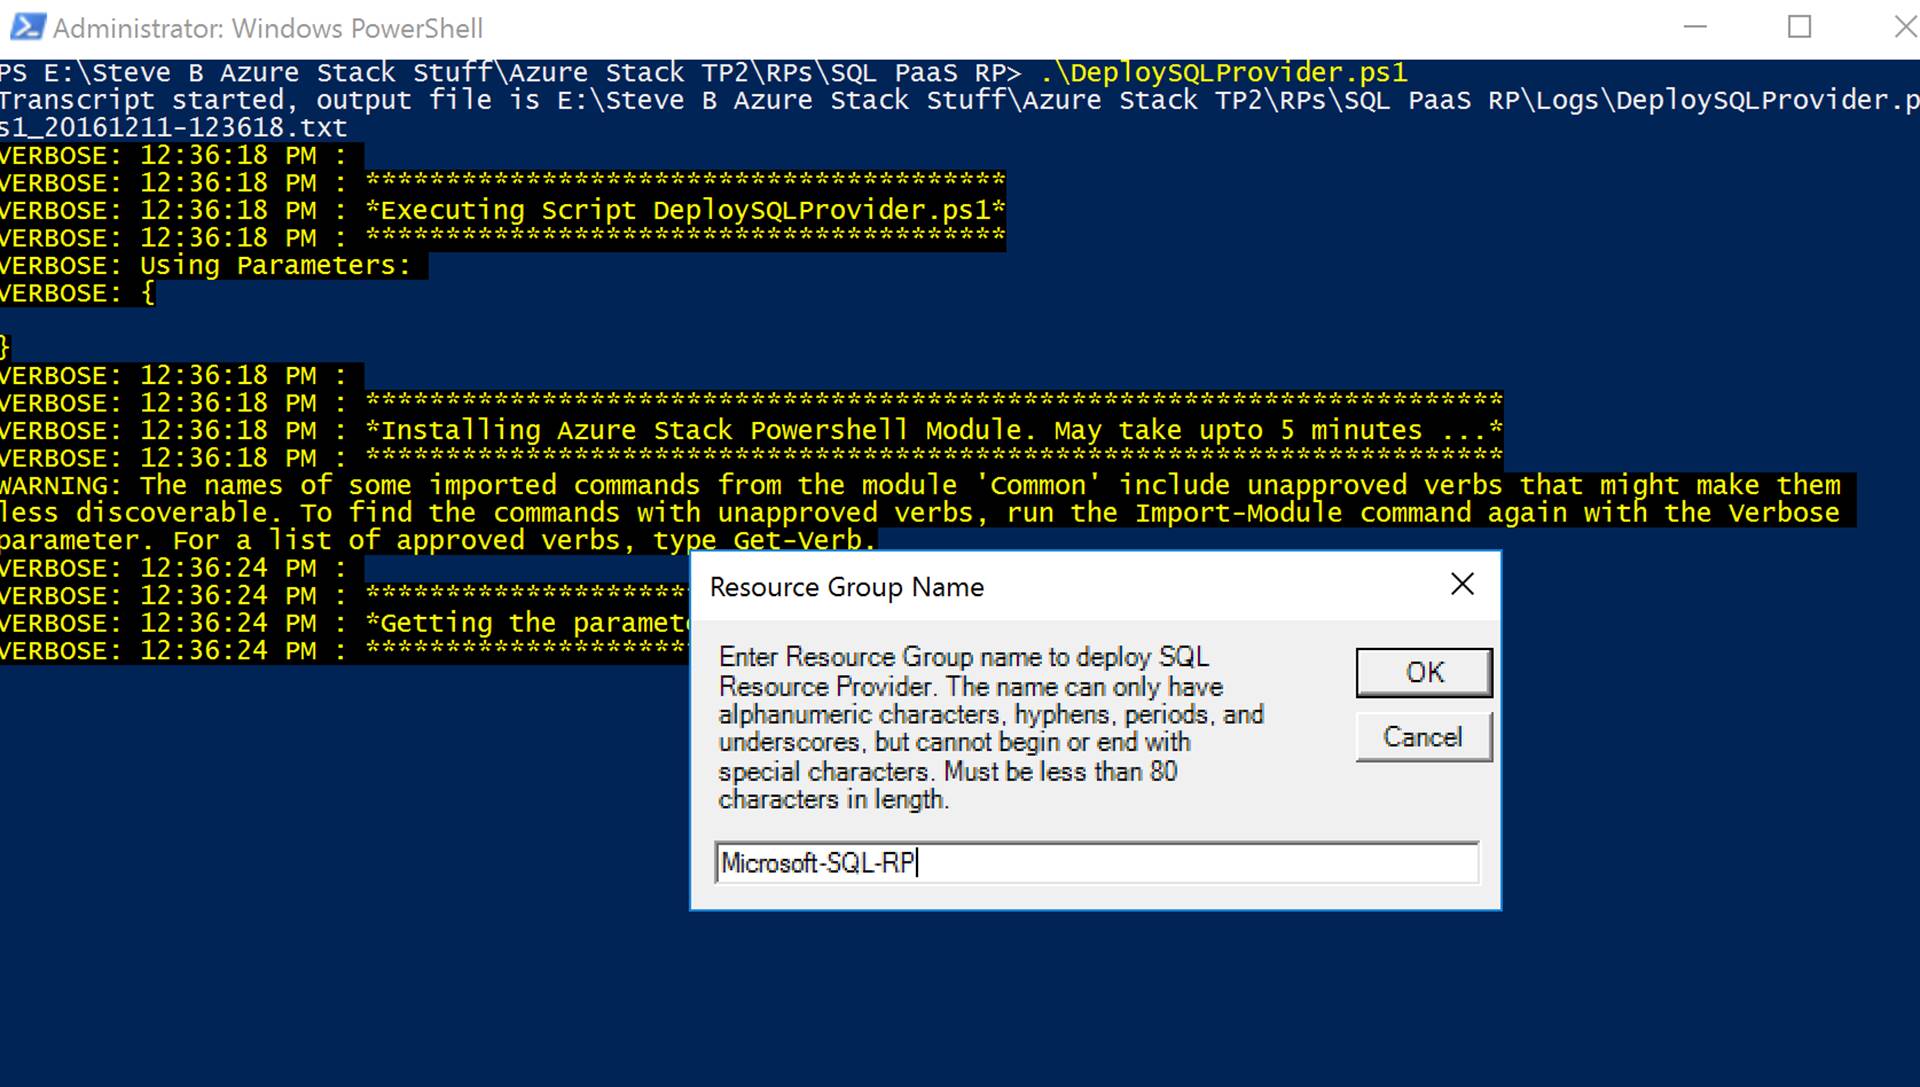
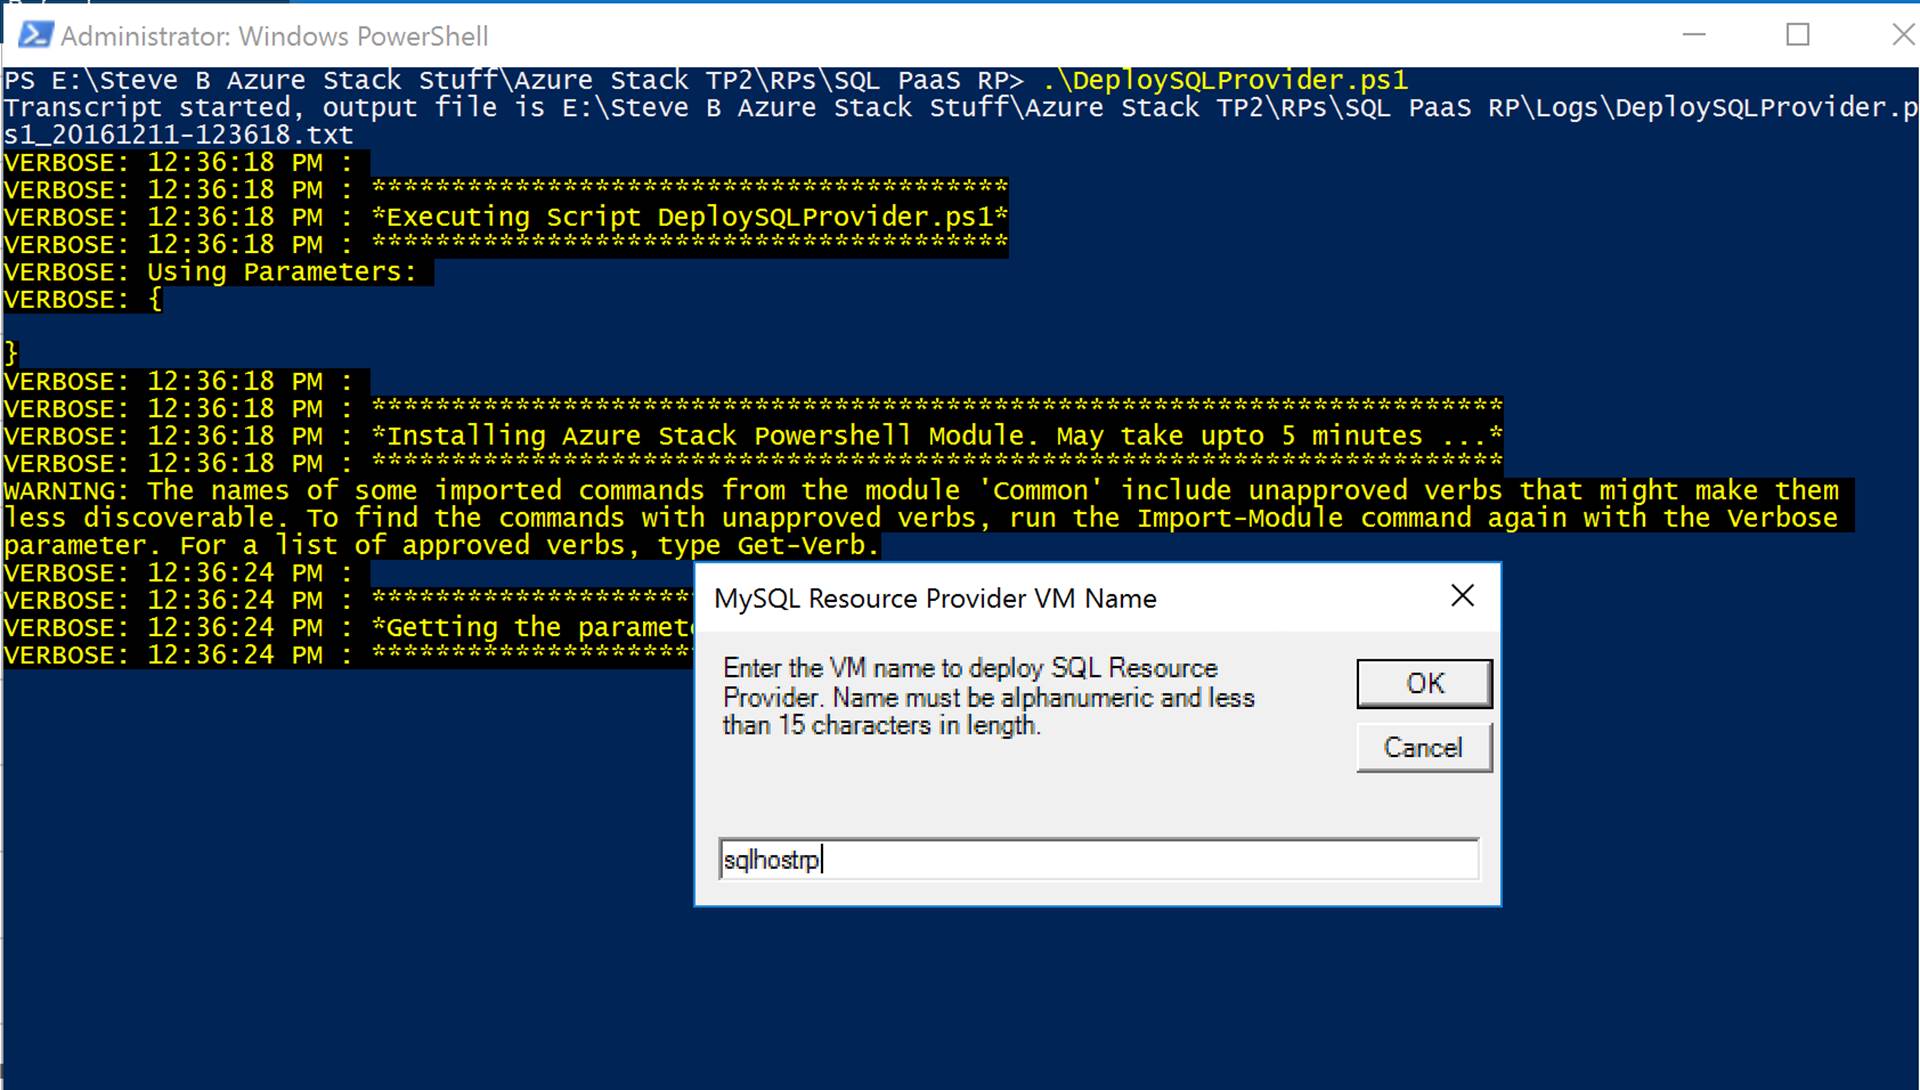
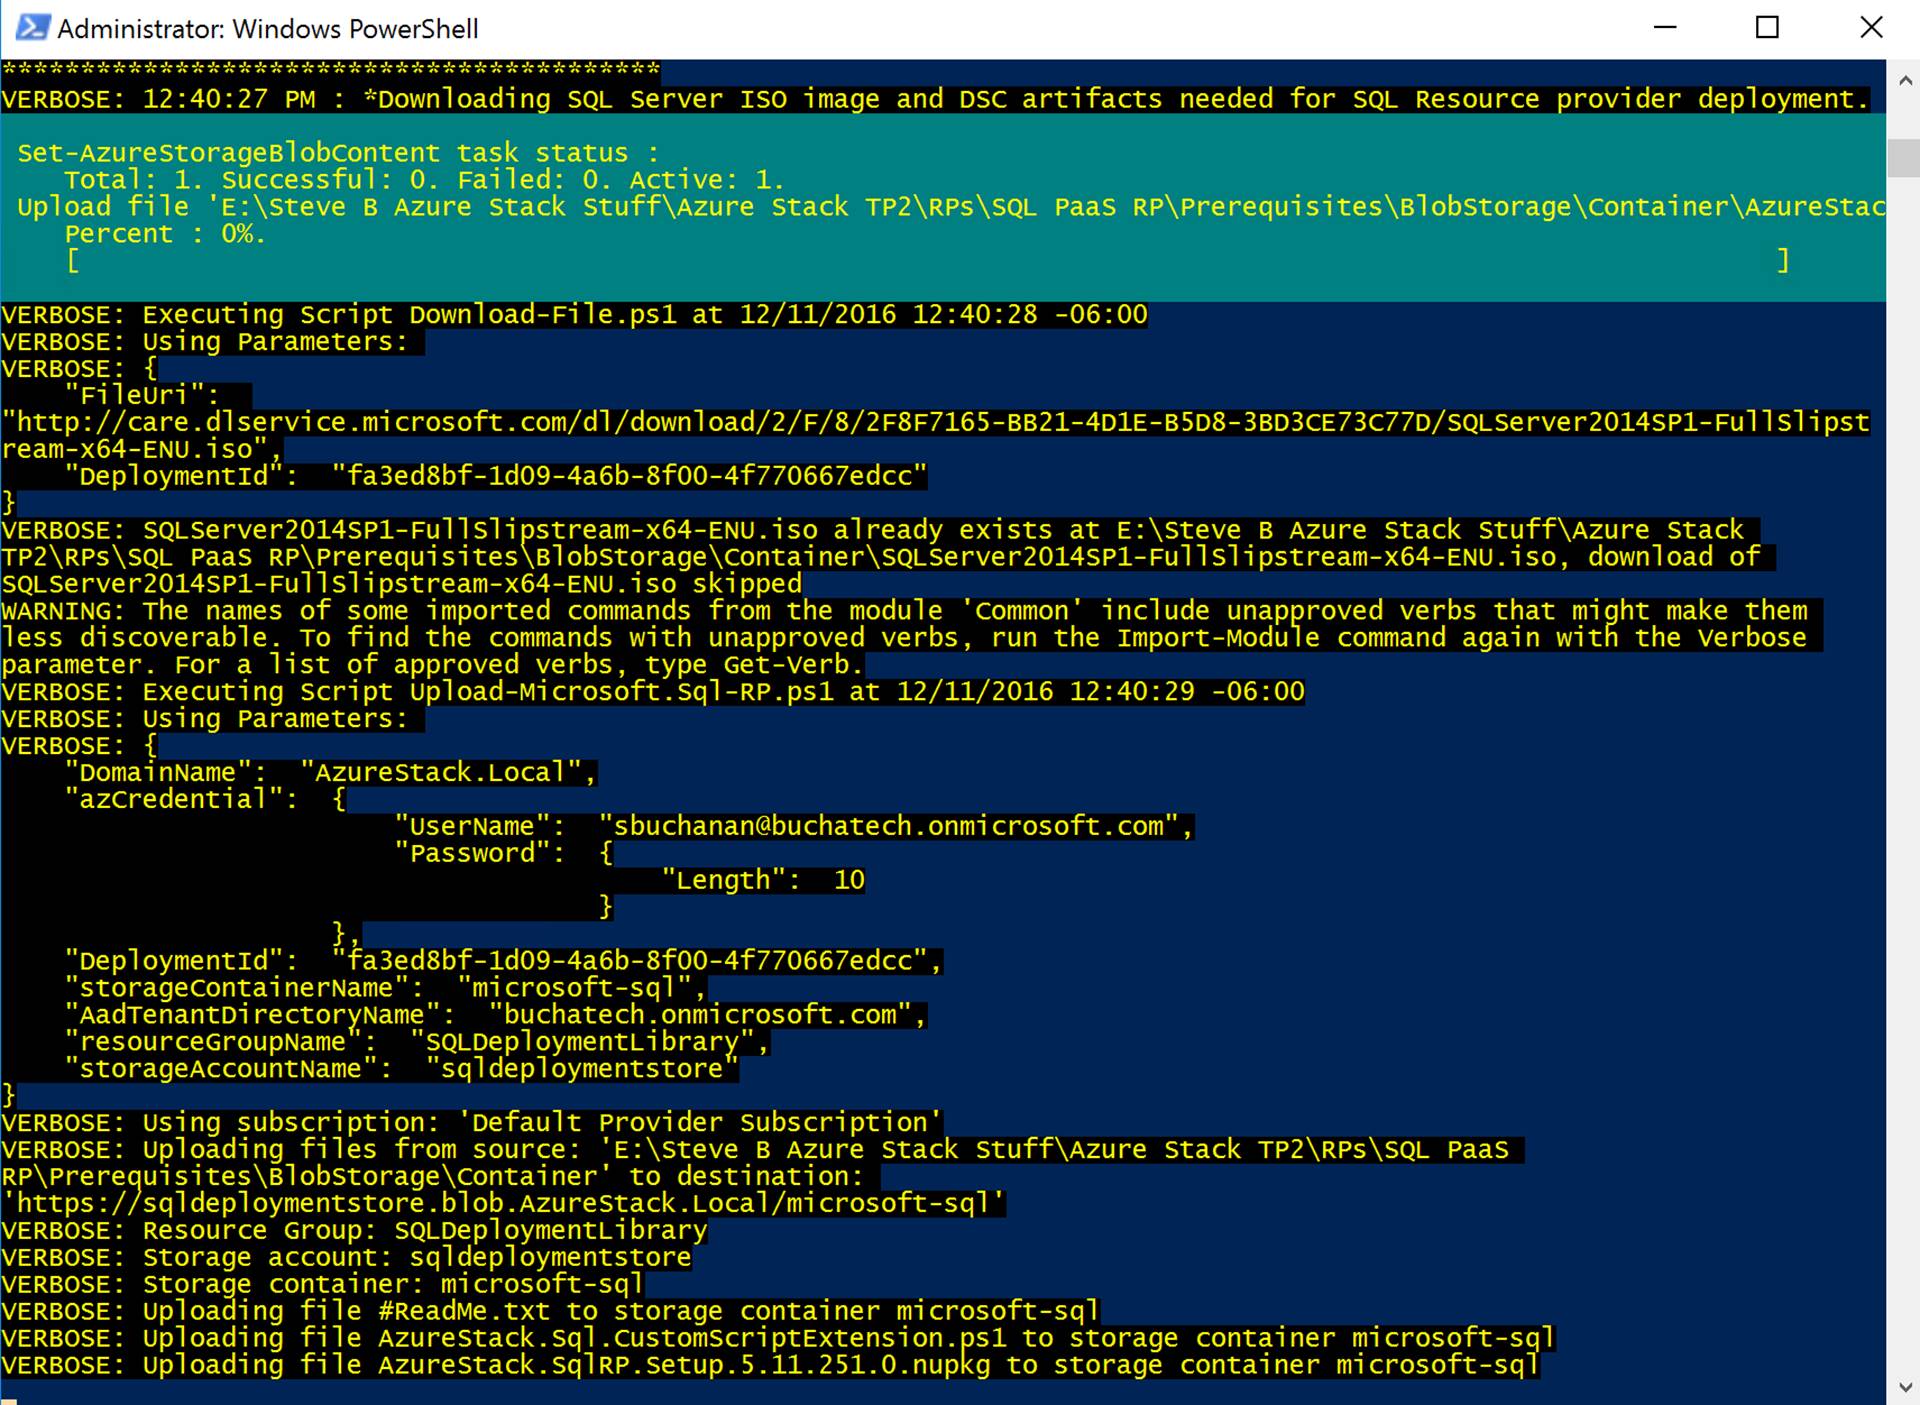
Azure Stack is set to release in 2017. I want to highlight some of the services already in Azure Stack and more coming to Azure Stack that can be offered in your Service Catalog to tenants.
Already in Azure Stack as of TP3:
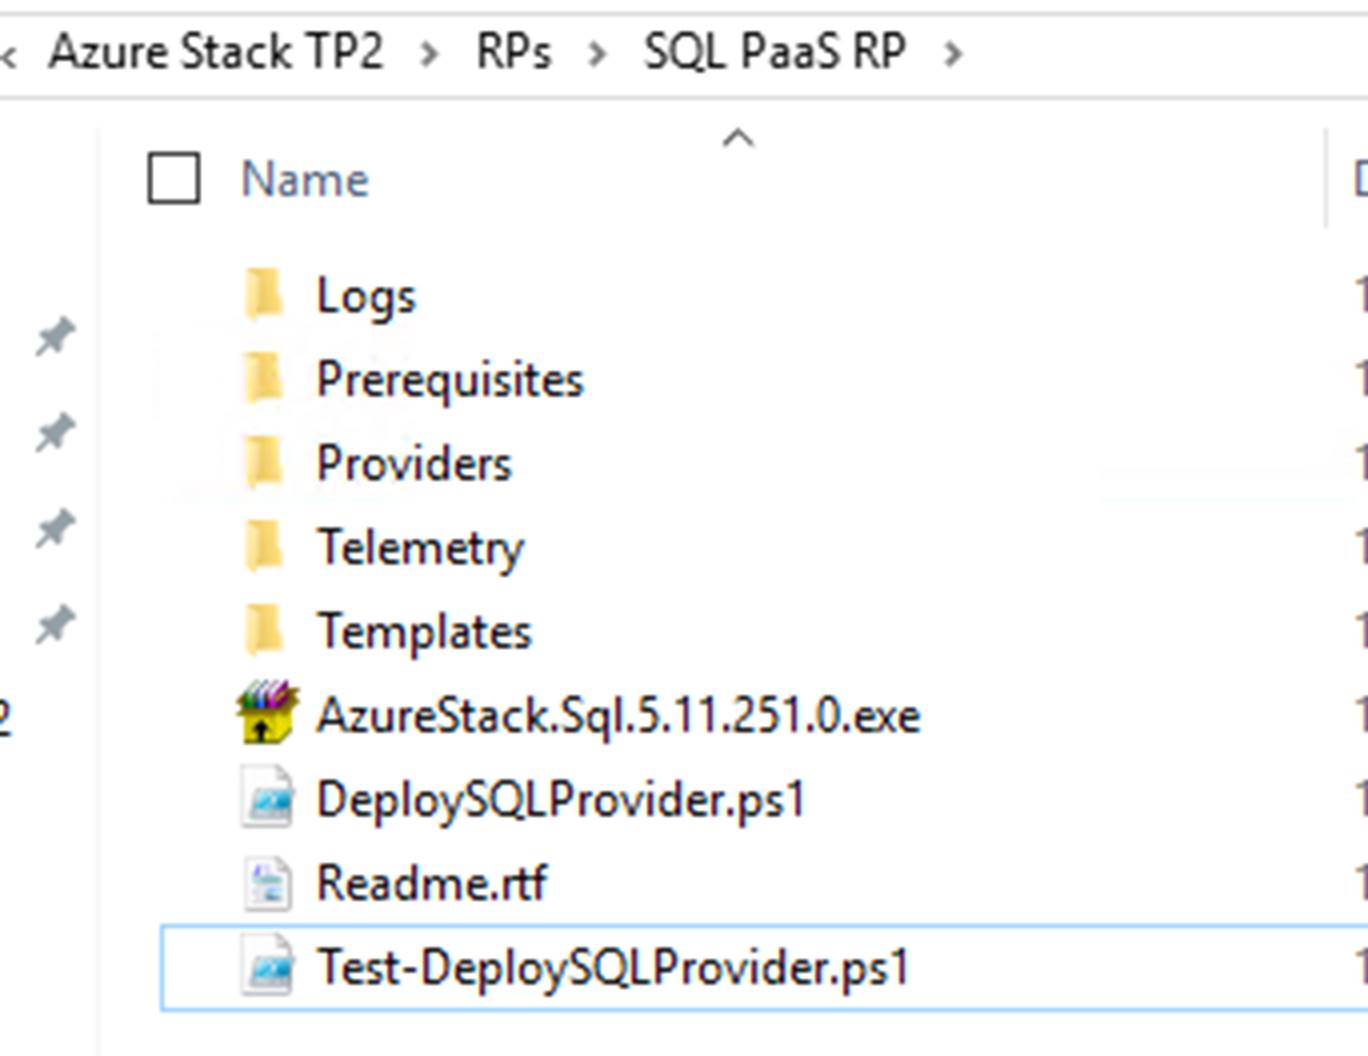
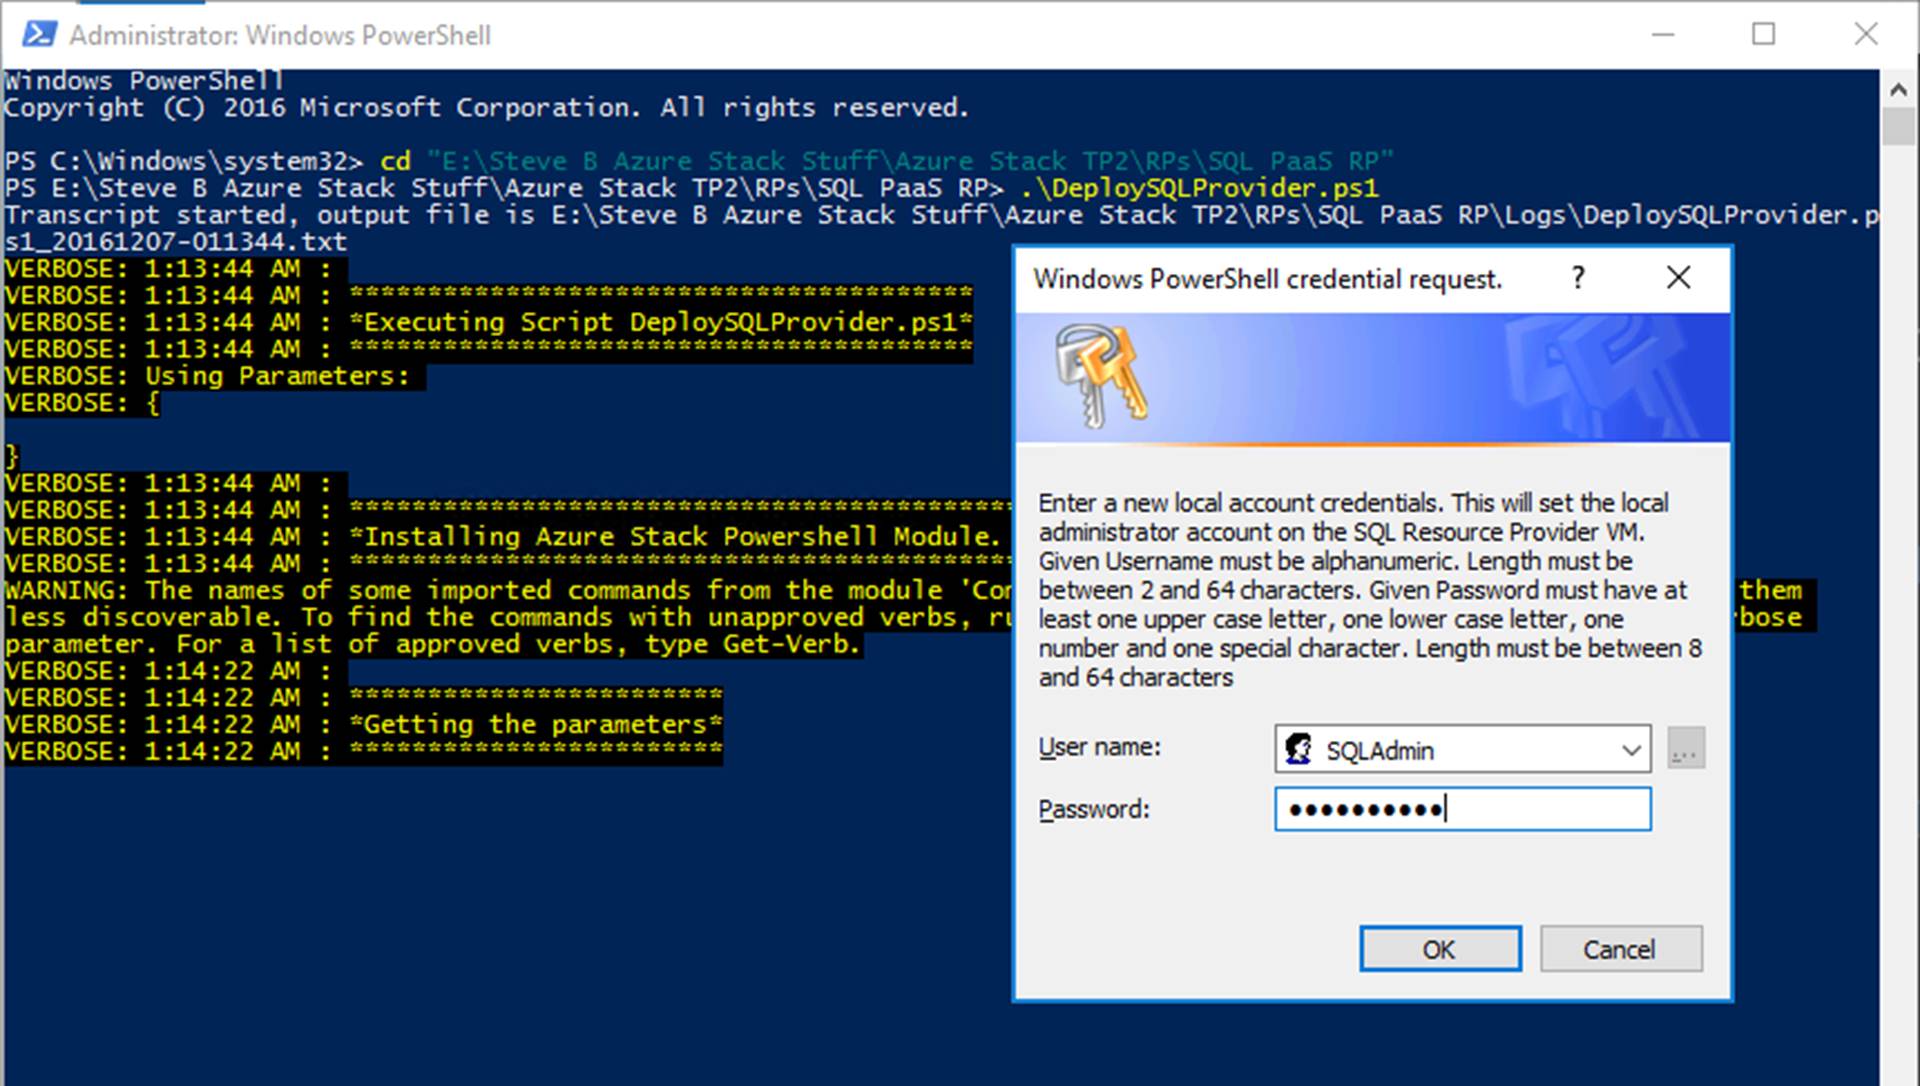
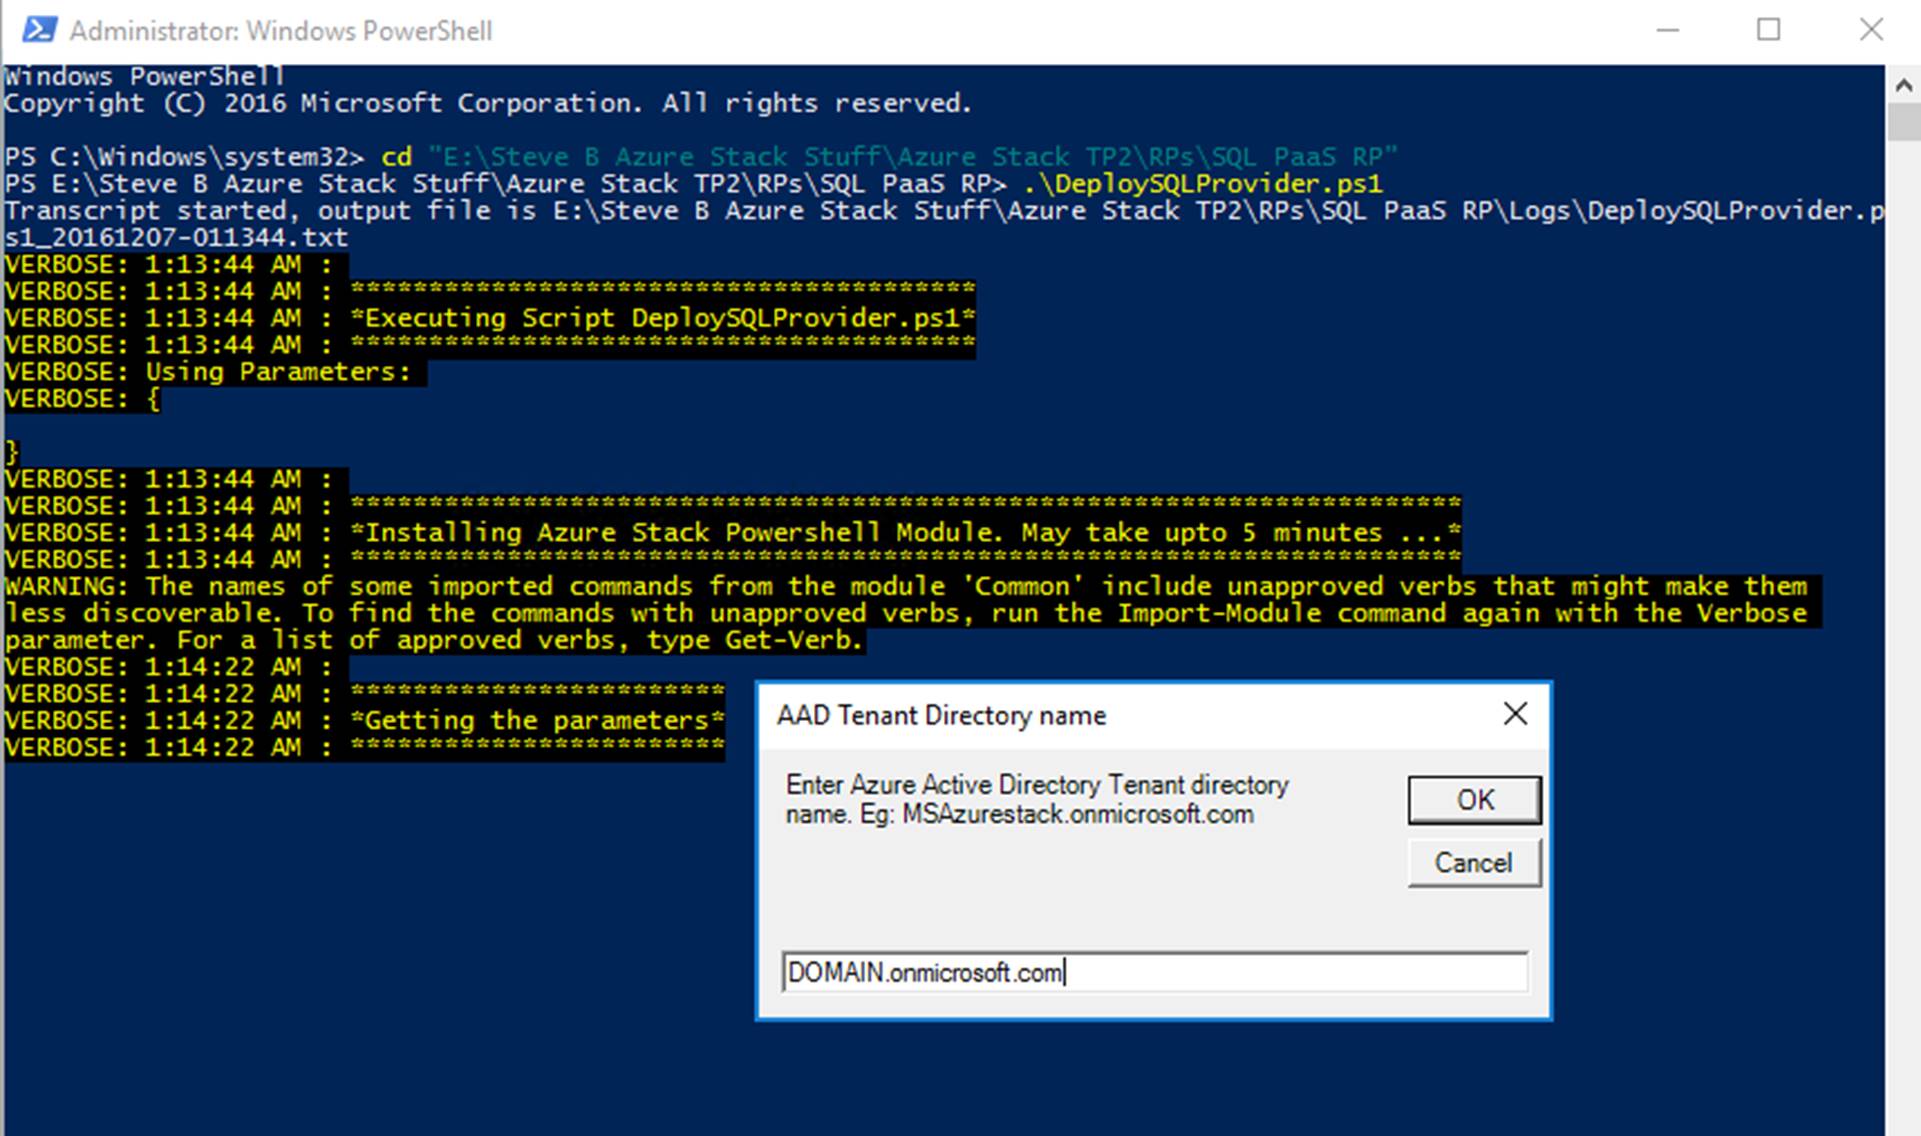
- SQL PaaS
- MySQL PaaS
- Web Apps PaaS
- Computer IaaS
- Virtual Machines (Linux or Windows)
- VM Scale Sets
- Storage
- Networking
- PaaS: Storage
- Key Vault
- Management of Azure Pack virtual machines
- Marketplace Syndication
Coming to Azure Stack at some point:
- Microservices
- Service Fabric
- Cloud Foundry
- Blockchain
- Container Service
- IoT
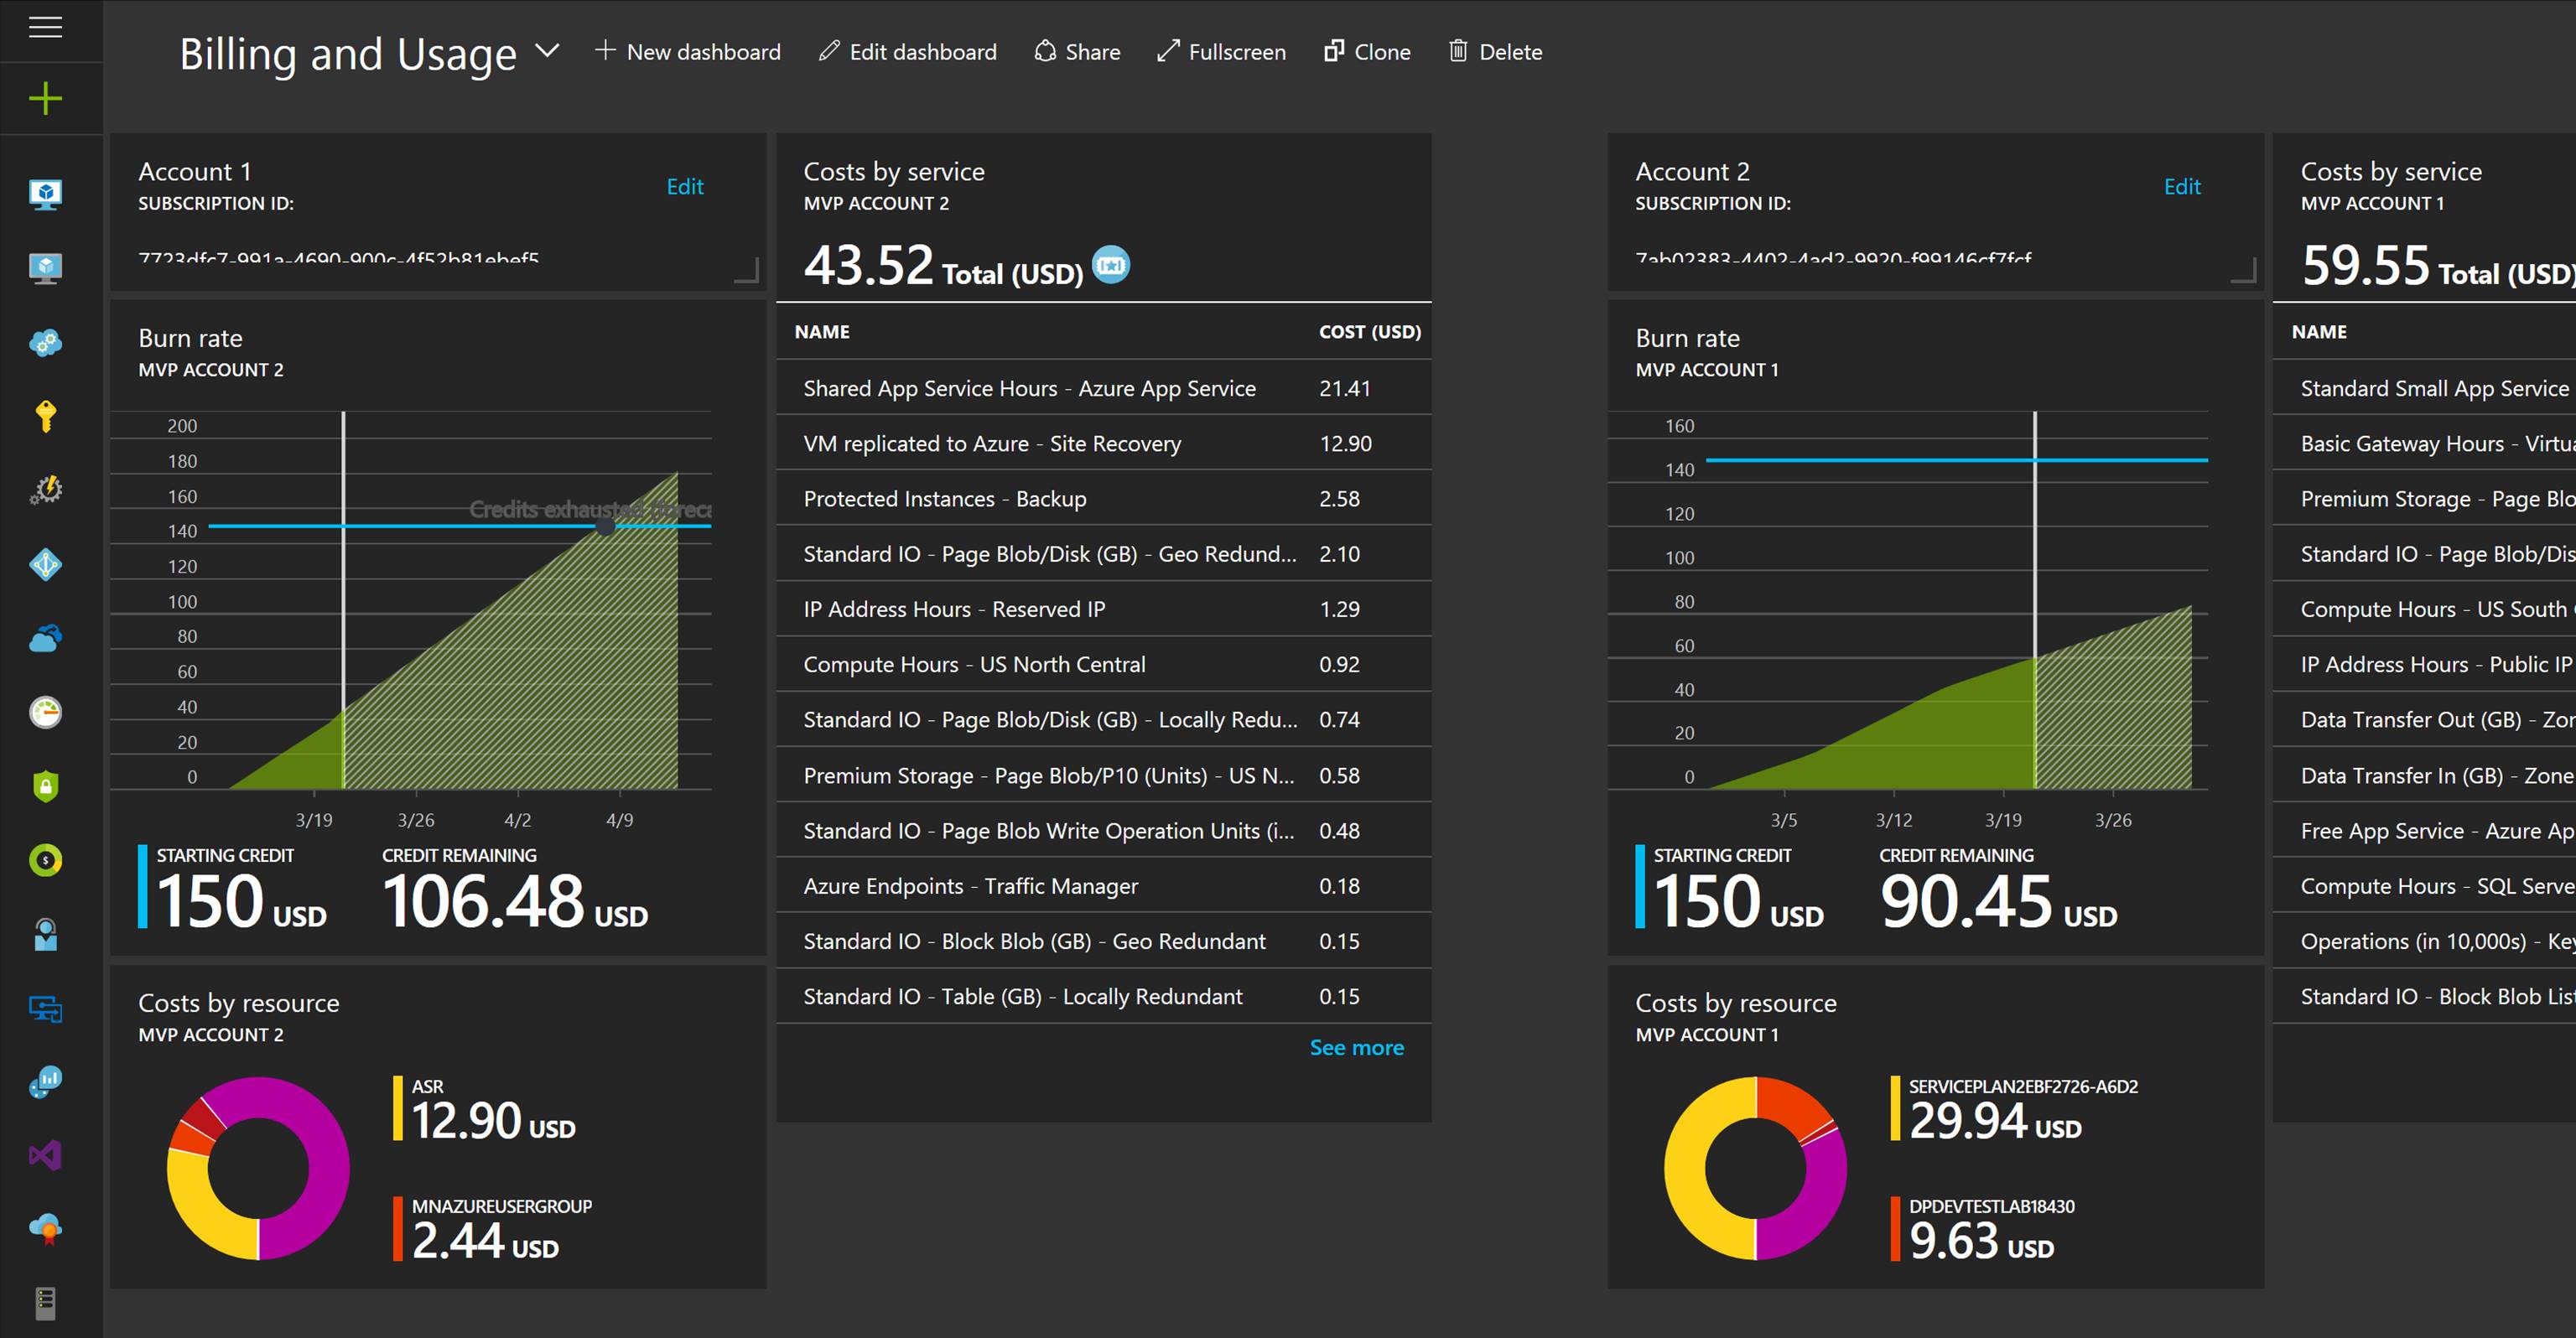
Another big part of CloudOps is being able to measured services that are being consumed. Measured Service can translate to show back or charge back. Measured Service is the ability to track the usage of resources down to the individual resource level. With Azure and Azure Stack resource management (ARM) model resources are carved out and placed into resource groups. In ARM, each resource has an associated cost that is tracked via the usage. There is full role based access around resources and resource groups. Resources and resource groups can be tagged and each resource or resource group’s usage can be tracked and displayed on business intelligence reporting or a dashboard like shown in the following screenshot.
That concludes this blog post. I hope I was able to shed some light on the transition from IT Pro to cloud pro, from IT Ops/ITSM to CloudOps and showcase the power of Hybrid Cloud via Azure Stack. Stay tuned for more exciting stuff coming from Azure Stack.
Read more