As many of you know, I was honored to be named a Docker Captain earlier this year (2025). This week, I had the incredible opportunity to attend my very first Docker Captain Summit, and what an experience it was.
The event reminded me a bit of the Microsoft MVP Summit, but with even closer access to the Docker product teams across multiple areas. Every year, the Captain Summit takes place in a different location, bringing together Docker staff from product groups, community management, marketing, and DevRel, along with fellow Docker Captains from around the world.
At the summit, we got an inside look at Docker’s roadmap and were among the first to learn about upcoming products and initiatives. We also had the opportunity to provide direct feedback to the product teams, helping shape the future of Docker from the community’s perspective.
This year’s summit was held in Istanbul, and it was a fantastic few days of connecting with so many brilliant people. I finally met in person several Docker staff members and Captains I’ve been collaborating with online. It was also a chance to reunite with friends from Microsoft and the MVP community.
Of course, not everything we discussed can be shared publicly because of NDAs, but I can tell you that we all walked away with some exciting insights and some awesome Docker swag.
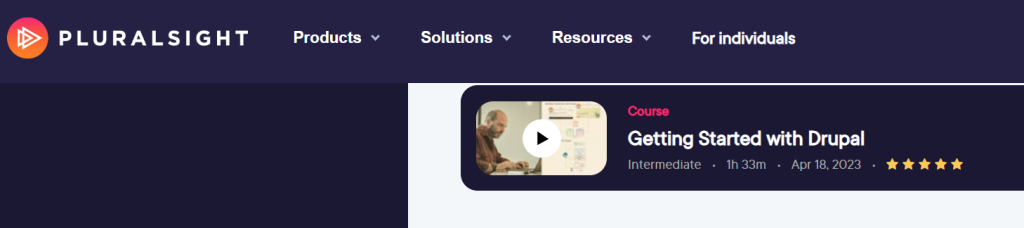
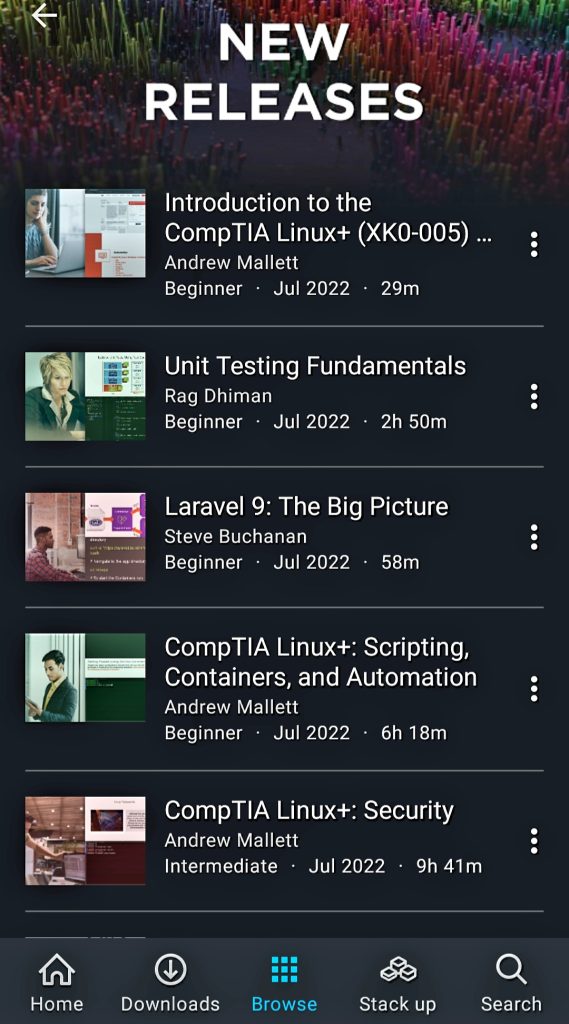
Last week I published a new course on Pluralsight. This one is a milestone as it marks my 20th course! This course is titled “Getting Started with Drupal“. Startups, enterprises and more continue to adopt content management systems at a fast rate with Drupal being one of the top Content Management Systems used.
Drupal is one of the top choices for startups and enterprises. It is used for many uses from web apps, marketing tools, e-commerce, and even a company’s main website.
I have been working with Drupal and other content management systems in various aspects for over sixteen years. I have used Drupal for my own websites, hosted it for businesses, administered Drupal sites for customers, Drupal development for customers, and even managed the development of Drupal modules. With all of my history with Drupal, I was excited when the opportunity came up to build a course about it.
This course is ideal for bloggers, entrepreneurs, Product Managers, Marketing managers, Marketing executives, Marketing consultants, Marketing employees, web developers, project managers, business analysts, web designers, graphic designers, UX/UI, designers, and anyone interested in content management systems specifically Drupal.
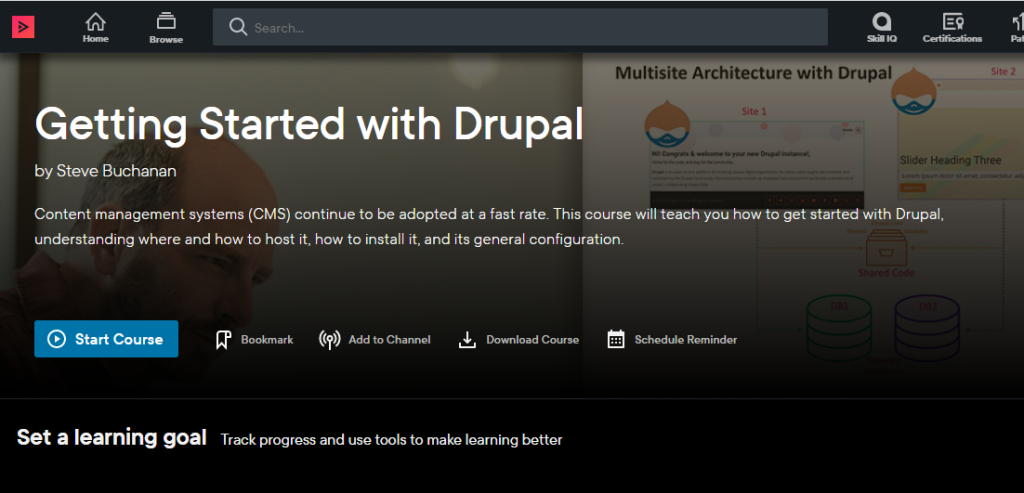
This course will take you from little to no knowledge of Drupal to a place where you can be confident enough to get started. Whether you want to create a personal blog, a business website, or an online store, Drupal is a skill you should have and this course has you covered.
In this course,Getting Started with Drupal, you’ll learn its many uses, features, tech stack, and you’ll also explore hosting it. Next, you’ll learn how to install it. Finally, you’ll discover its user interface and general configuration.
Some of the major topics that are covered in this course include:
Core Drupal knowledge.
About its tech stack such as web servers like Apache, language PHP, Composer, Drush, & databases like MySQL & how these work with Drupal.
How to acquire a domain & hosting for Drupal.
& Finally, how to install and configure Drupal.
By the end of this course, you will have a better understanding of content management systems, & Drupal itself, its uses, features, & tech stack. As well as knowledge of how to get a domain name, hosting, and install Drupal along with a tour of its interface and general configuration.
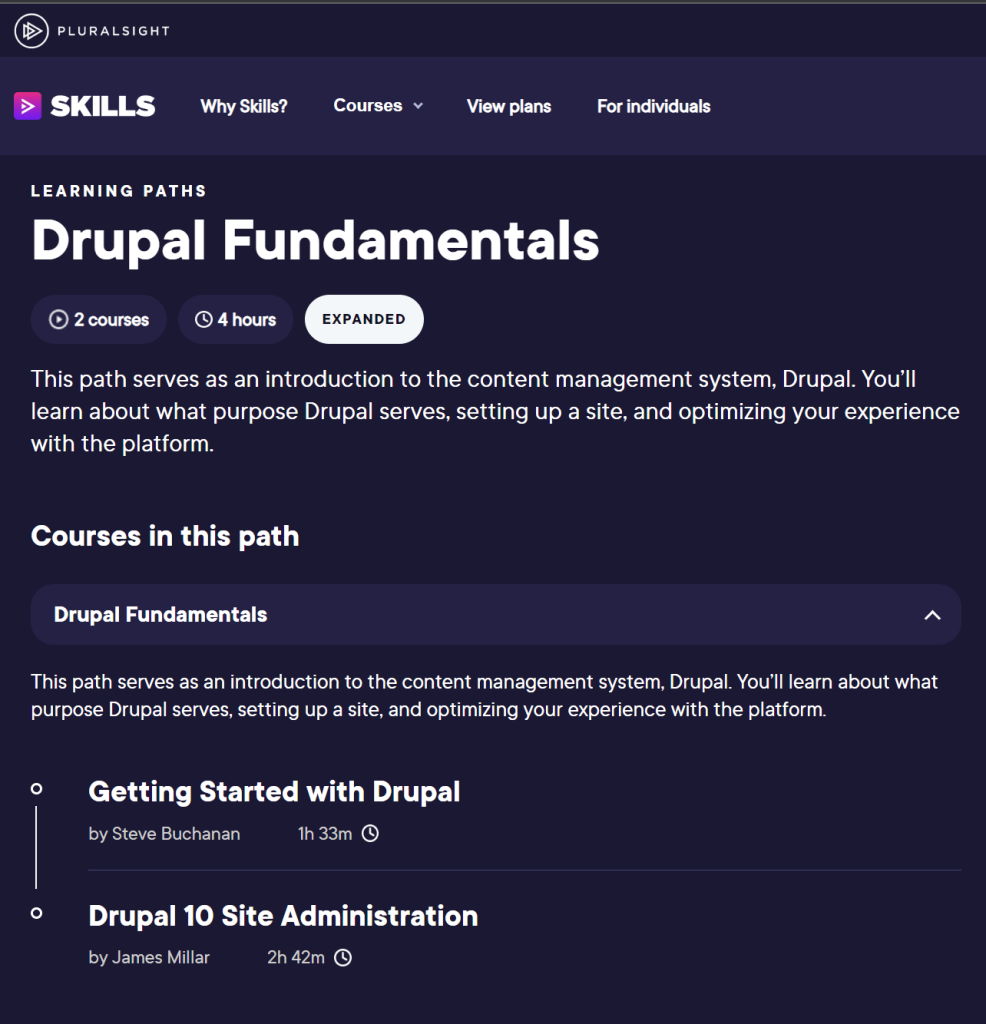
This course is the 1st in a Drupal Path named “Drupal Fundamentals” on Pluralsight. The 2nd course in the path is “Drupal 10 Site Administration”. You can check out the full path here:
I hope you find value in this new Getting Started with Drupal course. Be sure to follow my profile on Pluralsight so you will be notified as I release new courses!
Here is the link to my Pluralsight profile to follow me:
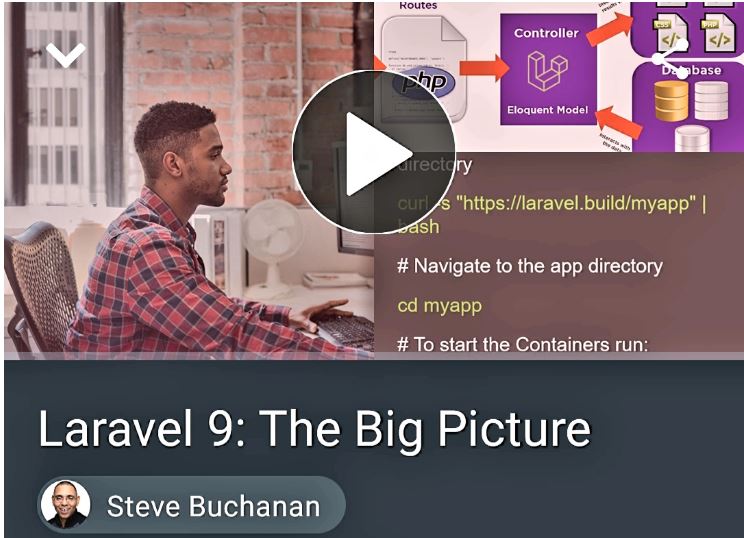
I am excited to announce that I published a Laravel course on Pluralsight! This course is titled “Laravel 9: The Big Picture“. This is my 16th course with Pluralsight. I have been working with PHP based websites, Content Management Systems, Frameworks, and the language off and on for many years. When the opportunity came to author a course on Laravel I jumped on it.
Laravel is a full-stack web framework for modern PHP based web applications. PHP is a language that has been around for a long time used to power most of the web site and web apps on the internet today. And some of the best web development teams in the world build their products with Laravel.
Many don’t know this but Laravel can be used for front-end and back-end development, as well as developing a REST API. Some of the largest companies and most popular websites have been built using Laravel such as Disney, Apple, Pfizer, BBC, Twitch, Mastercard, and more.
In this course, Laravel 9: The Big Picture, you’ll learn about the Laravel full-stack framework. First, you’ll explore Laravel’s core components such as: routing, middleware, controllers, requests, responses, views, blade templates, and more. Next, you’ll discover how to install Laravel, configure it, how it handles security, works with databases, about its APIs and more. Finally, you’ll learn what it is like to develop, build, and deploy an app with Laravel.
When you’re finished with this course, you’ll have the skills and knowledge of Laravel needed to decide if it is the right PHP web framework for you and where to go next on your journey with Laravel.
I hope you find value in this new Laravel 9: The Big Picture course. Be sure to follow my profile on Pluralsight so you will be notified as I release new courses!
I recently published a blog post on 4sysops.com about Web App for Containers on Azure here: https://4sysops.com/archives/web-app-for-containers-on-azure. That blog post is about the often-overlooked service in Azure that can be used to host a container/s on a web app in Azure App service.
This is a great service if you just need to run a single container or even a couple of containers that you have in Docker Compose. This service is PaaS and abstracts away an orchestration system like Kubernetes. If you need insight into the Azure App Service Web App for Containers service check out the blog post on 4sysops.
In this long blog post I am going to take things a step further and walk-through the build & release of a Container from Azure DevOps to Azure Web App for Containers. The overall goal of this post is to help someone else out if they want to setup a build and release pipeline for building and deploying a container to Azure App Service. We will use a very simple PHP web app I built that will run in the container.
Here are the components that are involved in this scenario:
Azure Container Registry (ACR): We will use this to store our container image. We will be pushing up the container image and pull it back down from the registry as a part of the build and release process.
Azure DevOps (ADO): This is the DevOps tooling we will use to build our container, push it up to ACR, pull it down into our release pipeline and then deploy to our Azure App Service.
App Service Web App for Containers: This is the web server service on Azure that will be used to host our container. Under the hood this will be a container that is running Linux and Apache to host the PHP web app.
Here is the data Flow for our containerized web app:
Deploy the Azure App Service Web App for Containers instance
Deploy the Azure Container Registry
Deploy the Azure DevOps organization and project, create repository to host the code, clone repository in VS Code (Not shown in this blog post. Assume you know how to this up.)
Update the application code (PHP code and Docker image) in Visual Studio code
Commit application code from Visual Studio code to the Azure DevOps repo (Not shown in this blog post. Assume you know how to this up.)
Setup build and then run container build and push the container image to ACR
Setup release pipeline and then kick off the release pipeline pulling down the container image from ACR and deploys the container to the App Service Web App for Containers instance.
Here is a diagram detailing out the build and release process we will be using:
Ok. Let’s get into the setup of core components of the solution and the various parts of the build and release pipeline.
For starters this solution will need a project in Azure DevOps with a repo. Create a project in Azure DevOps and a repo based on Git. Name the repo exerciseoftheday. Next up let’s create the core framework we need in Azure.
Deploy Azure App Service Web App for Containers
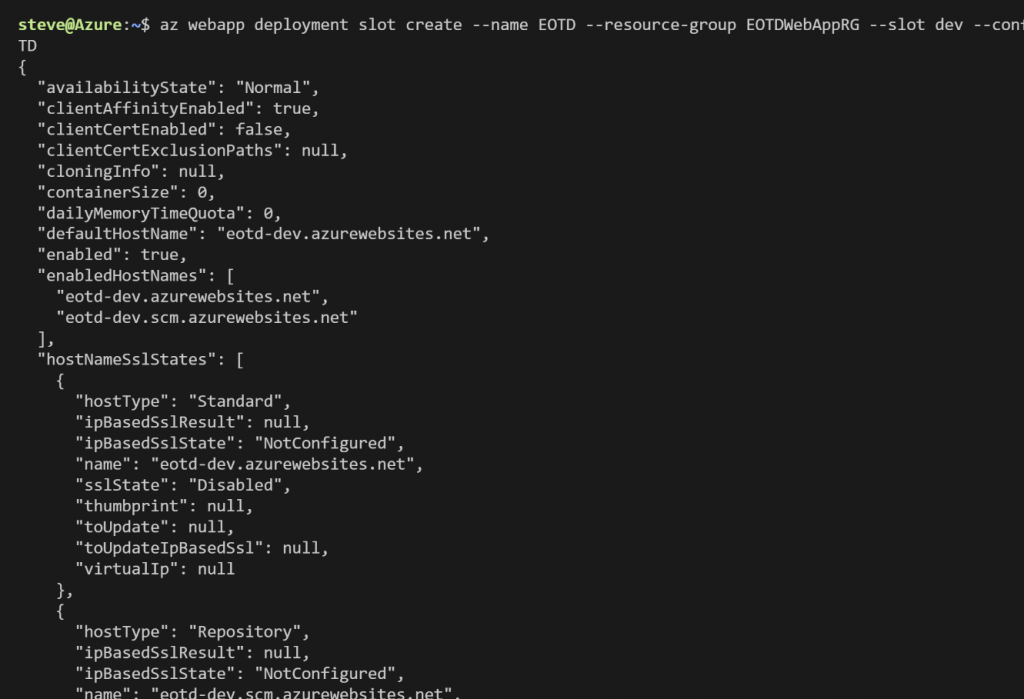
Let’s create the Azure App Service Web App for Containers that will be needed. We will need a resource group, an app service plan and then we can setup the app service. The PHP app we will be running is named Exercise Of The Day (EOTD) for short so our resources will use EOTD. Use the following steps to set all of this up.
We will do everything via Azure Cloud Shell. Go to https://shell.azure.com/ or launch Cloud Shell within VS Code.
Run the following Syntax:
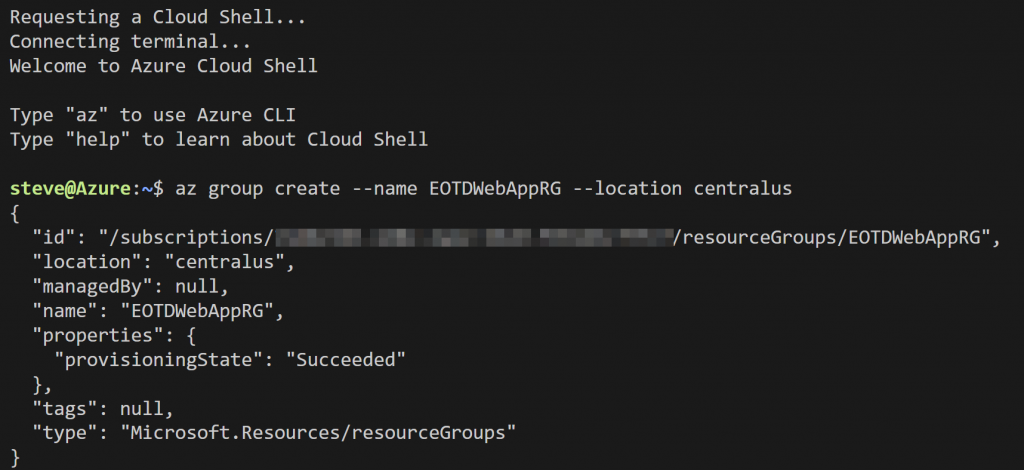
# Create a resource group
az group create –name EOTDWebAppRG –location centralus
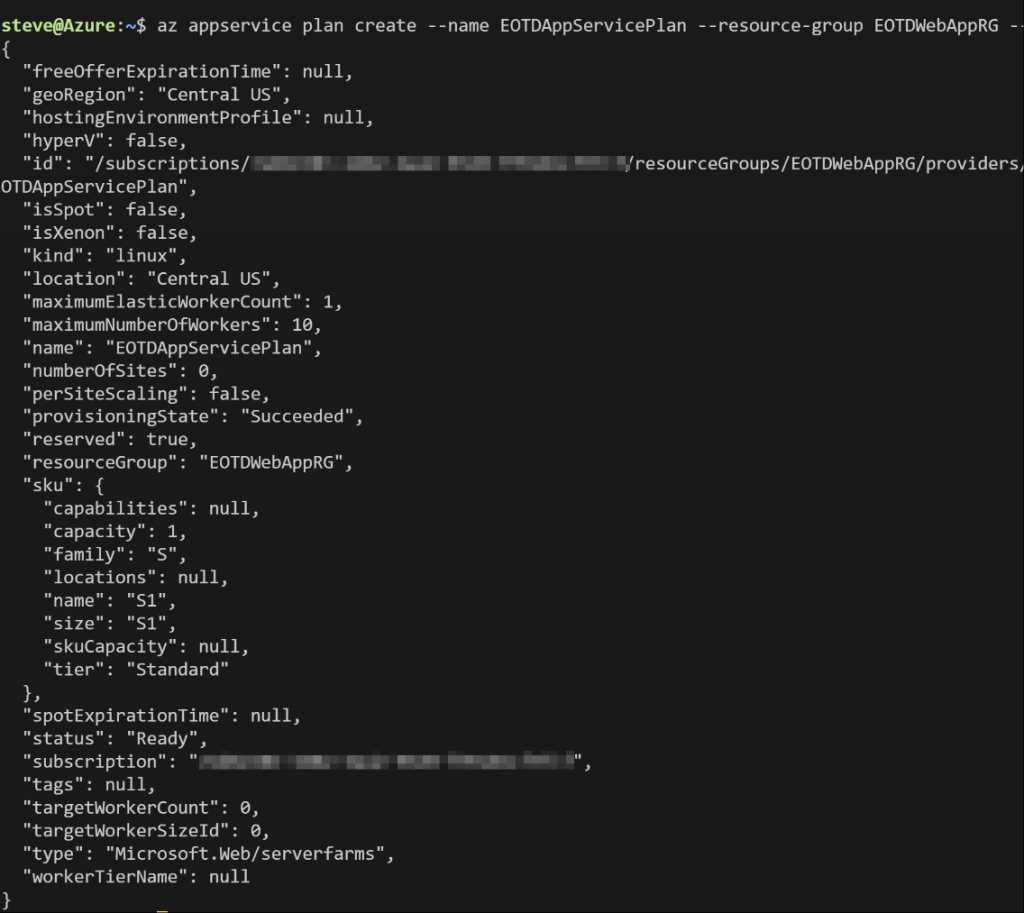
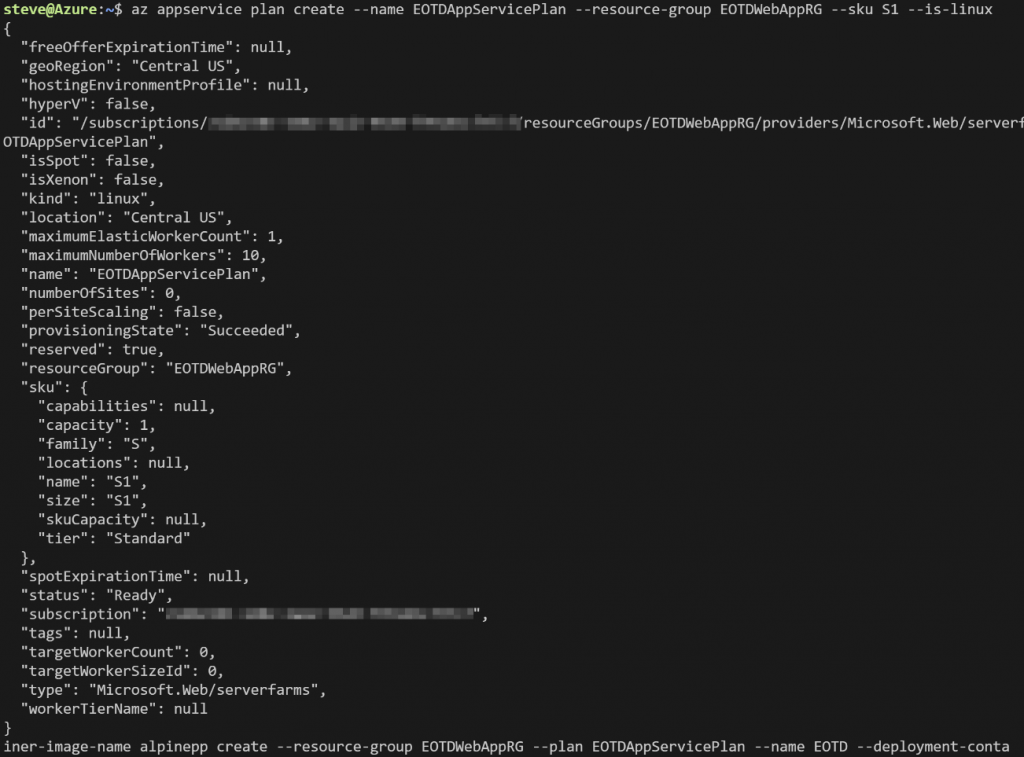
# Create an Azure App Service plan
az appservice plan create –name EOTDAppServicePlan –resource-group EOTDWebAppRG –sku S1 –is-linux
# Create an Azure App Service Web App for Containers
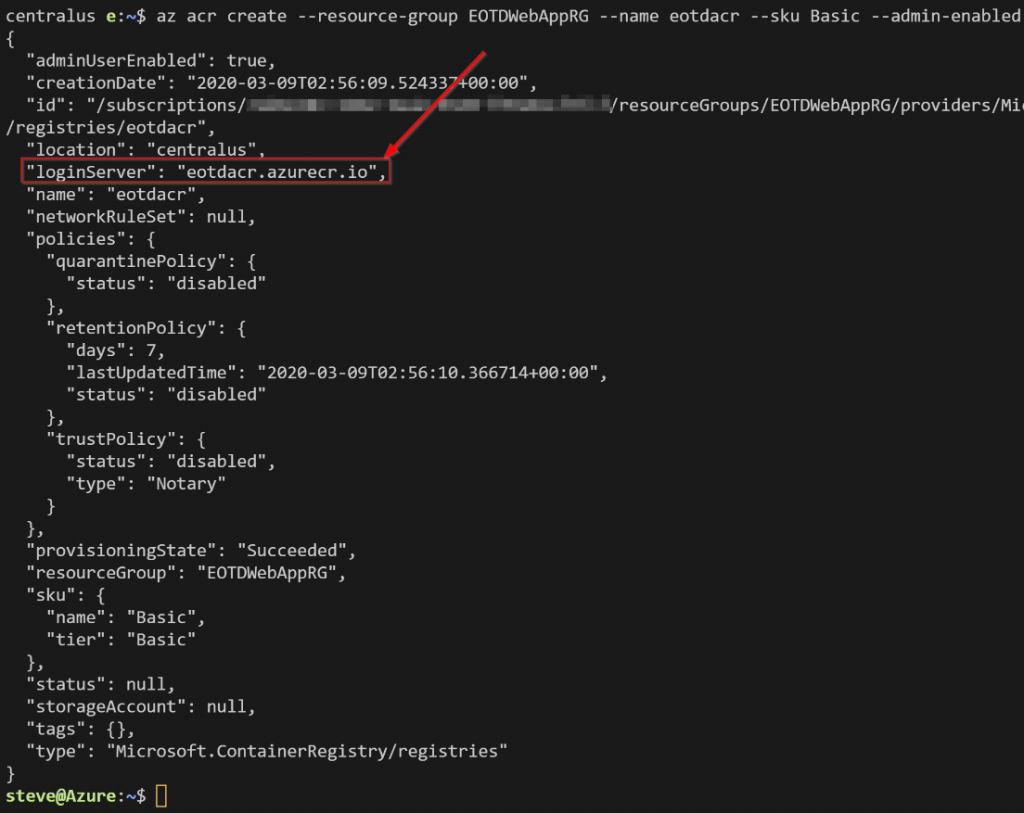
Note the loginServer from the output. This is the FQDN of the registry. Normally we would need this, admin enabled, and the password to log into the registry. In this scenario we won’t need admin enabled or the password because we will be adding a connection to Azure DevOps and the pipelines will handle pushing to and pulling the image from the registry.
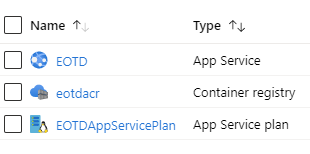
When it’s all done you should see the following resources in the new resource group:
Next, we will need to build an application and a container image.
This will be a short
post and this one is mostly for me so I can easily find this information in the
future when I need it again. 🙂
Recently I was
containerizing some PHP websites that use Composer. If you are not familiar
with Composer but you are working with PHP, you will run across it at some
point. Composer is a dependency package manager for PHP. Composer manages
(install/update) any required libraries and dependencies needed for your PHP
site.
To use Composer you must first declare the libraries and dependencies in a composer.json file in your site directory and then you would run Composer and it will do its magic. For more information on Composer visit: https://getcomposer.org/doc/00-intro.md
Back to my task, I
needed to install Composer in the containers I was building and run it to
install all the dependencies. I needed these actions in the Dockerfile so it
would all happen during the container build. After some research on Composer I
was able to pull something together. Here is the syntax that I ended up putting
in the Dockerfile:
# Install Composer
RUN curl -sS https://getcomposer.org/installer | php -- --install-dir=/usr/local/bin --filename=composer

# Set working directory for composer (Contains the composer.json file)
WORKDIR /var/www/html/sitename

# Run Composer
RUN composer install
Note: I placed the above code at the end of the
Dockerfile ensuring Apache, PHP etc was all in place first.