Resource Group Clean-up in Azure Stack

If you are like me, you end up creating a ton of resource groups in Azure Stack when testing things out. I needed a way to delete them without having to click one each one via the portal. The best option of course is to leverage PowerShell. I threw together some PowerShell to handle this. I came up with two options #1 can be used to delete a bunch of RG’s that have a common name. For example, I had a bunch of VM00* resource groups. I use the script to go loop through and delete all resource groups with VMO in the name. Option #2 pop’s up a GUI window so I could select the RG’s I wanted to delete. It put them in an array and then looped through to delete them in one shot.

This is great because I can kick this off and go do something else. I will share both below in this blog post along with some screenshots. I won’t have a download for the PowerShell syntax so just copy from this post if you want to use it. Be sure to use AzureStack.Connect.psm1 for connecting to your Azure Stack environment before running any of the following code.

Code:
#1

#Create Variable of RG’s with common name
$Resourcegroups = Get-AzureRmResourceGroup | where {$_.ResourceGroupName -like (‘*VM0*’)}

#Create array of RG’s
$RGLIST = $Resourcegroups.ResourceGroupName

#Loop to remove each resource group in the array
ForEach(
$rg in $RGLIST
)
{
Get-AzureRmResourceGroup -Name $rg -ErrorAction SilentlyContinue | Remove-AzureRmResourceGroup -Force -Verbose
}

This image shows the array of RG’s that will be looped through. I highlighted vm003rg in the array and in the PowerShell status message.

rgcleanup-1

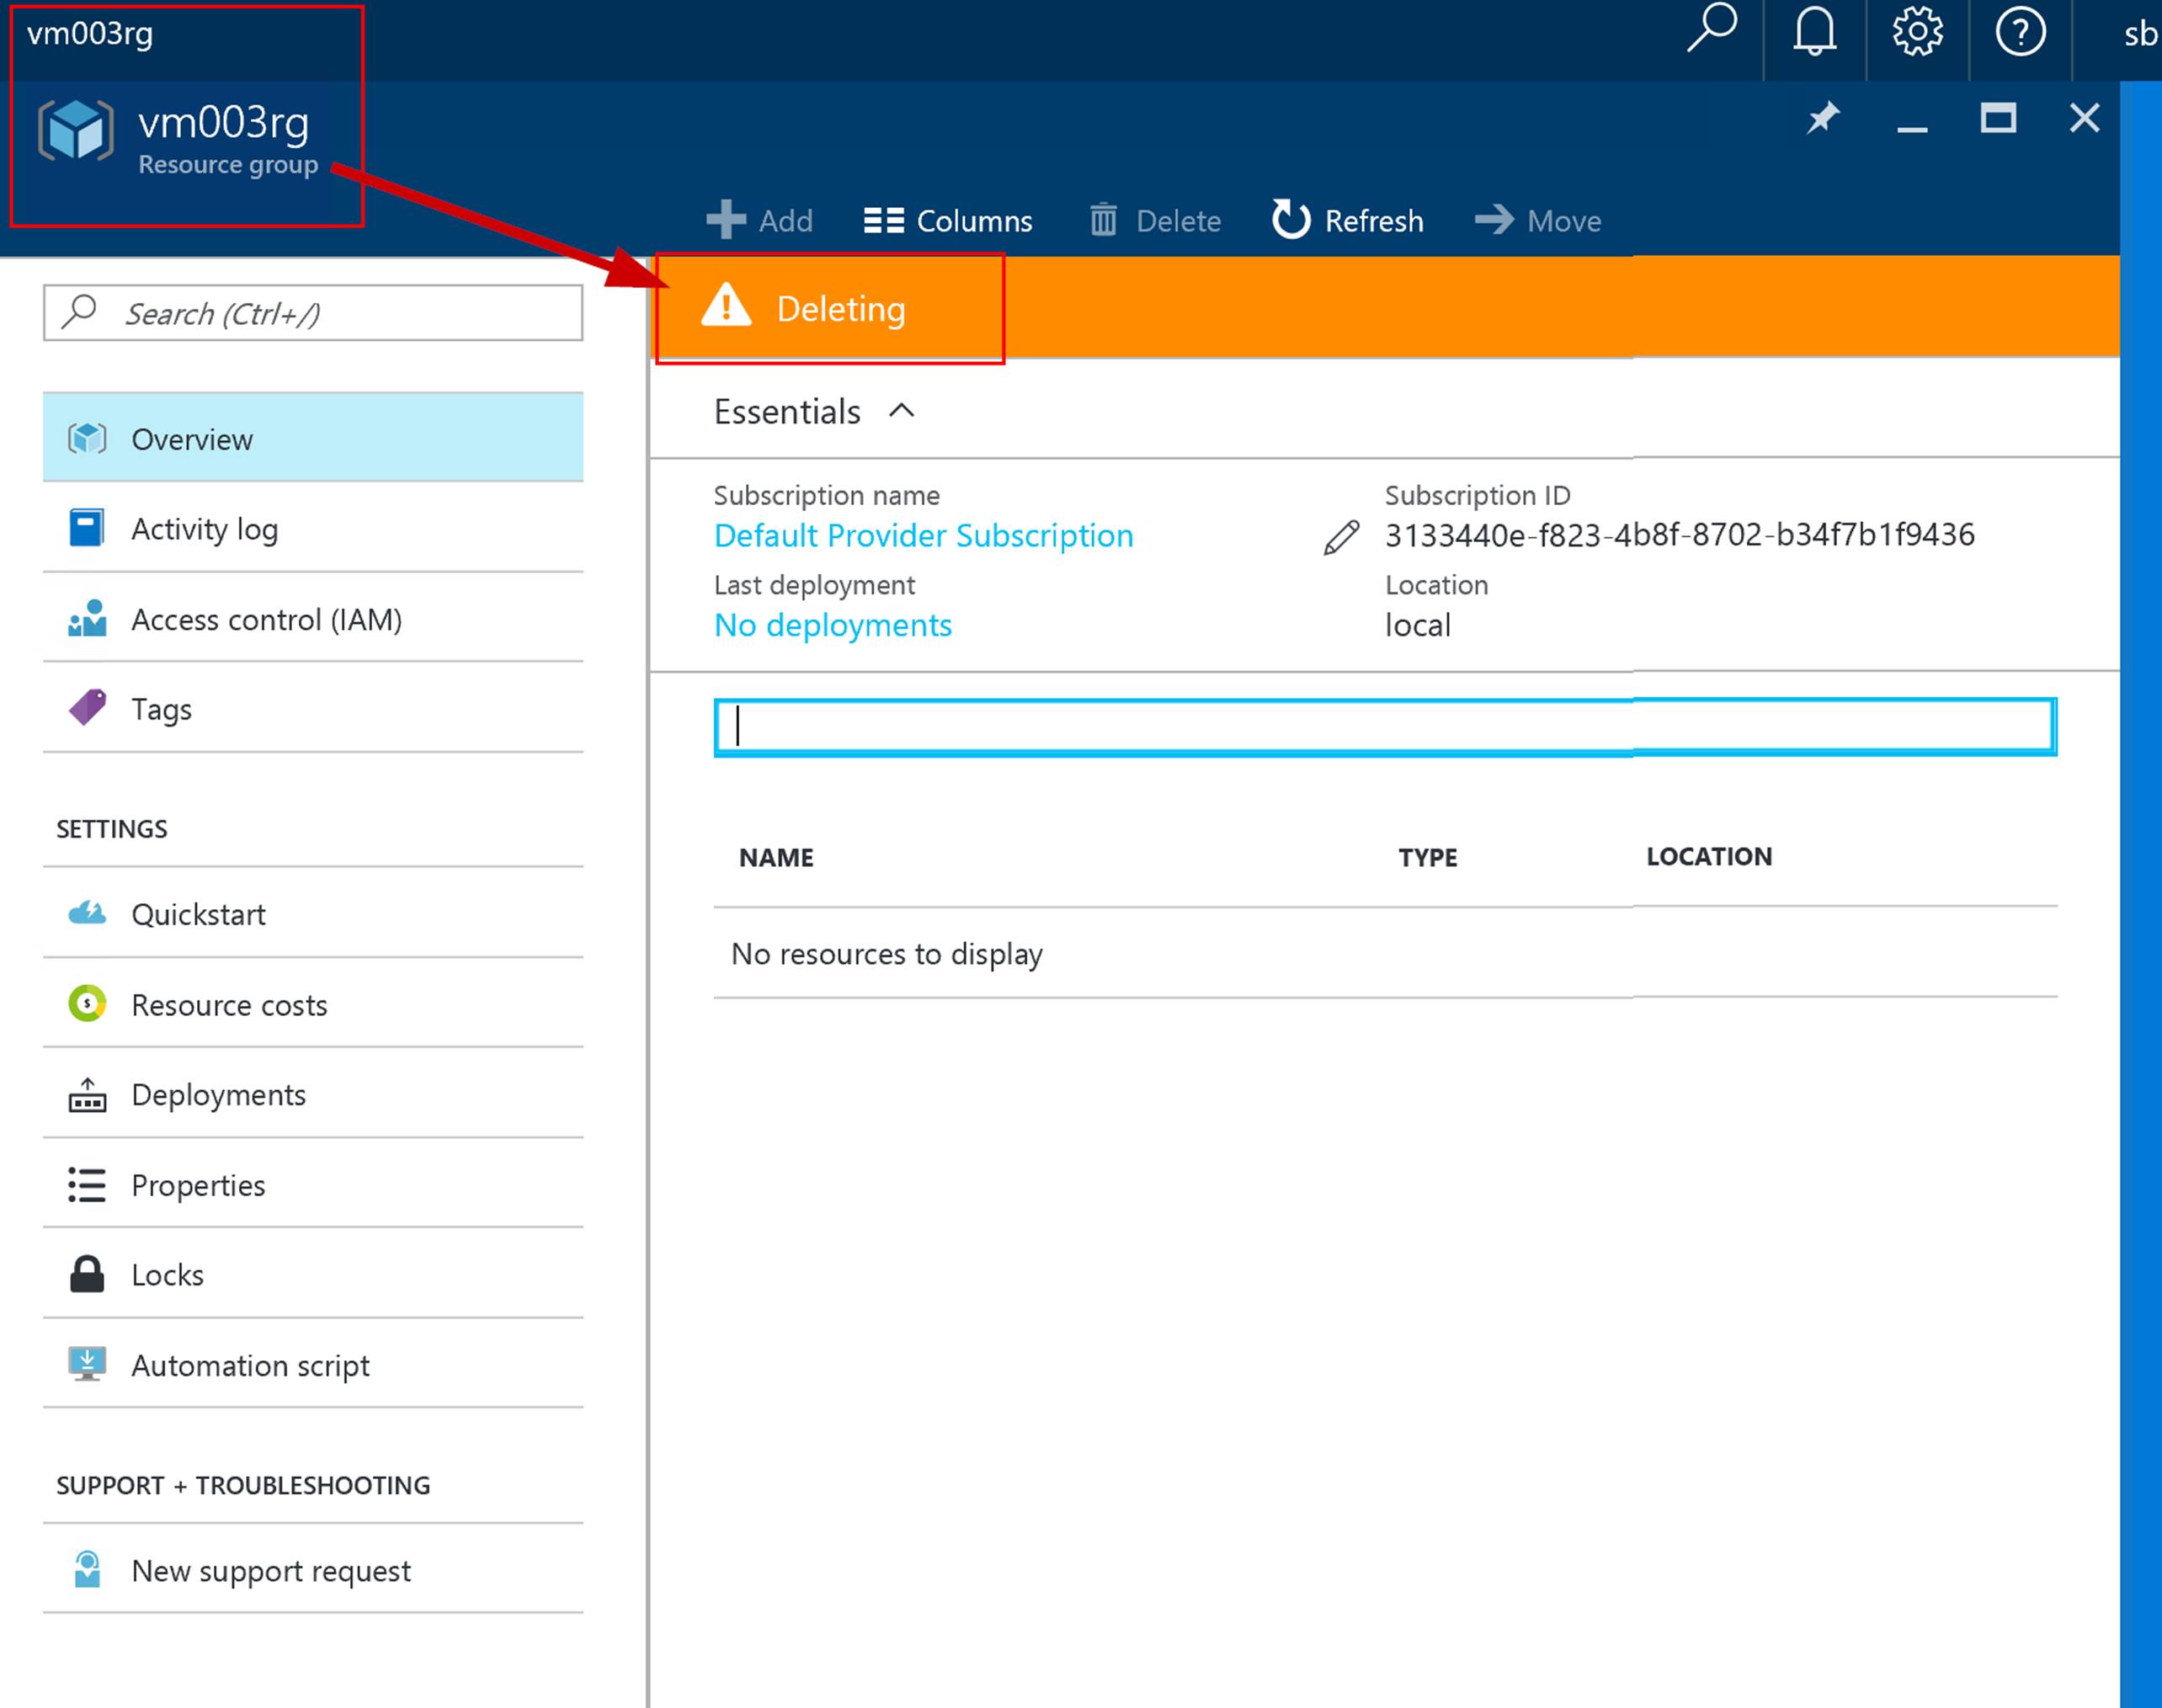
The following screenshot shows VM003RG being deleted in the Azure Stack portal.

rgcleanup-2

#2

#Create Variable of RG’s from GUI selection
$selectedrgs = (Get-AzureRmResourceGroup | Out-GridView ` -Title “Select ResouceGroups you want to remove.”` -PassThru).ResourceGroupName

#Loop to remove each resource group in the array
ForEach(
$rg in $selectedrgs
)
{
Get-AzureRmResourceGroup -Name $rg -ErrorAction SilentlyContinue | Remove-AzureRmResourceGroup -Force -Verbose
}

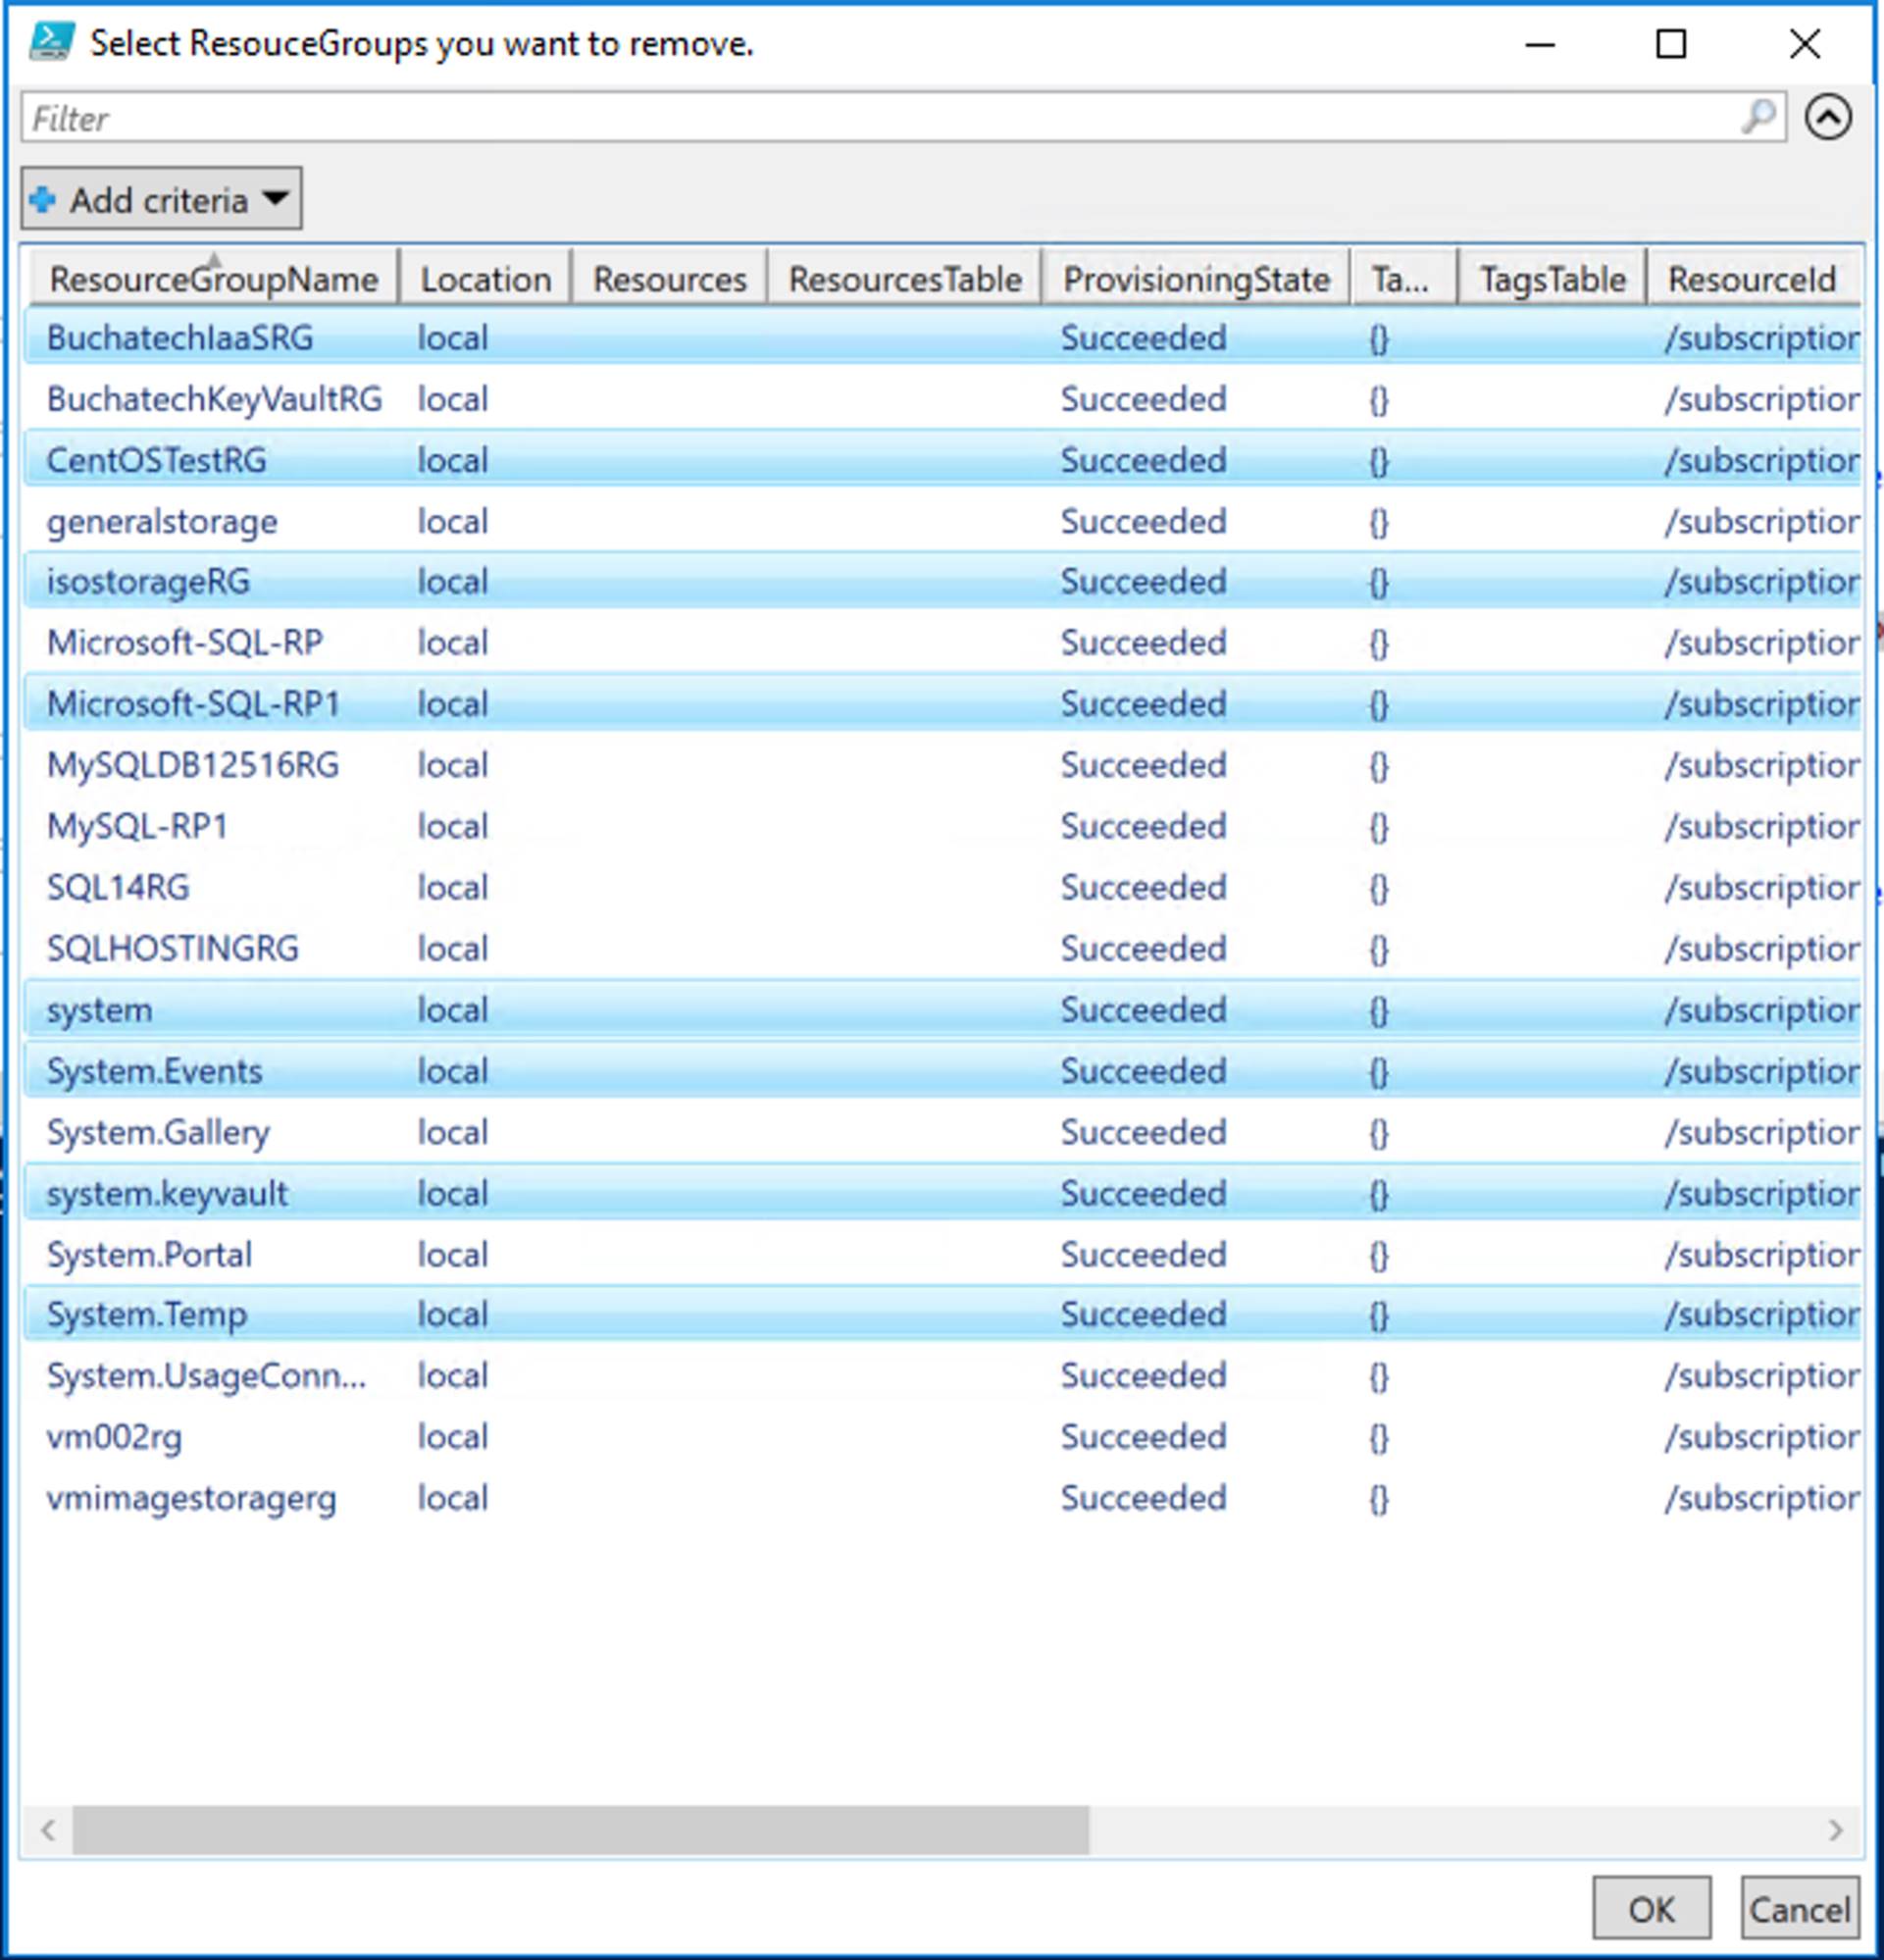
After running the Create Variable of RG’s from GUI selection part of the code a window as shown in the following screenshot will pop up. Select the RG’s you want to remove, click Ok and they will be placed into an array.

rgcleanup-3

Below if the output of the array. Run the Loop to remove each resource group in the array part of the code and each of the RG’s will be removed.

rgcleanup-4

I have also used this when a resource group would not delete from the portal. On some stubborn resource groups I have had to run this a couple of times. This is a short post. I hope this helps someone out!

Read more

Azure Stack Deployment…No KVM…No Problem

When deploying Azure Stack (TP2) you may not have a KVM, a physical monitor, or maybe you just don’t want to use either with the host. Well there is a solution for this. You can utilize a Windows setup answer file for an unattended installation. What this will do is automate the Windows Setup for you. For Azure Stack you basically just need to input the administrator password. 🙂

Microsoft has put together an answer file and a PowerShell script that enables you to inject an answer file into CloudBuilder.vhdx before deploying Azure Stack. What this will do is enter info on the Windows setup screen for you so that you don’t have to have a KVM or physical monitor attached to the host.  You can just wait for the host to reboot and then RDP in. This unattended answer file and script is a part of the AzureStack-Tools. The AzureStack-Tools have some great resources in the repository and I will be blogging about more of them in the future.

There are basically 2 steps to inject this answer file into your Azure Stack VHDX. These are:

Step 1:

Go and download the Deployment tools files manually onto your Azure Stack host from here:

https://github.com/Azure/AzureStack-Tools/tree/master/Deployment

Or run this PowerShell from your Azure Stack host:

# Variables
$Uri = ‘https://raw.githubusercontent.com/Azure/AzureStack-Tools/master/Deployment/
$LocalPath = ‘YOURLOCATION:\AzureStack_TP2_SupportFiles’

# Create folder
New-Item $LocalPath -Type directory

# Download files
‘BootMenuNoKVM.ps1’, ‘PrepareBootFromVHD.ps1’, ‘Unattend.xml’, ‘unattend_NoKVM.xml’ | foreach { Invoke-WebRequest ($uri + $_) -OutFile ($LocalPath + ‘\’ + $_) }

Be sure to set $LocalPath to your location.

Step 2:

NOTE: You need to have the CloudBuilder.vhdx downloaded to your Azure Stack host and it cannot be mounted.

From within PowerShell navigate to the directory you downloaded the deployment tools to and run this

.\PrepareBootFromVHD.ps1 -CloudBuilderDiskPath YOURDRIVE:\CloudBuilder.vhdx -ApplyUnattend

Be sure to point the script to the location containing your CloudBuilder.vhdx before running this.

You will be prompted to enter the password you want to use for the local administrator account.

applyasunattended1

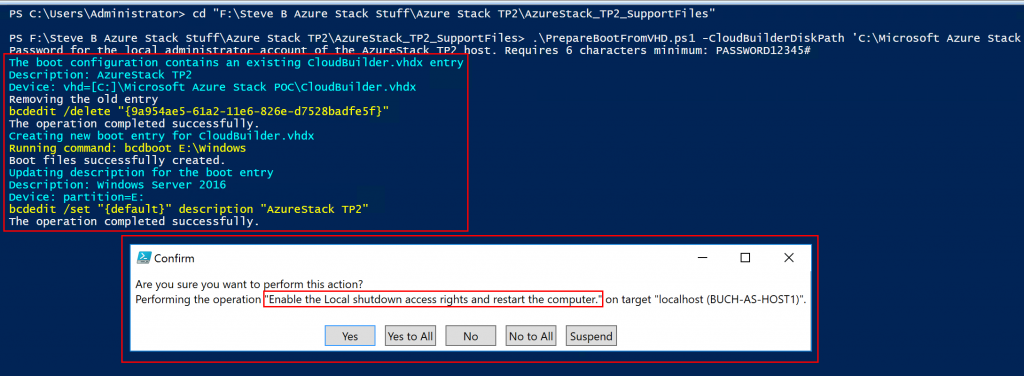
You will see the bcdedit command execution and output as shown in the following screenshot. This saves you the step of modifying the bcdedit. The CloudBuilder.vhdx will also be mounted. You will then be asked to confirm a reboot also as shown in the following screenshot.

applyasunattended2

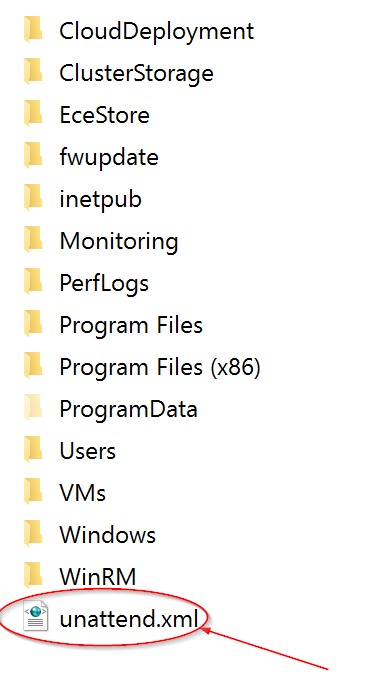
Before you reboot if you are interested you can go see the unattend.xml file that was created. This is the answer file that will be used. This is shown in the following screenshot.

applyasunattended3

The host will be rebooted. When it comes back online you will be able to RDP in. You will then be able to kick off the Azure Stack deployment.

Happy Azure Stacking!!!

Read more

Azure Stack TP2 deployment failure 60.120.123

I recently deployed the new Azure Stack TP2 release. This install is way better. I did run into one small issue during the deployment. Below is what I ran into and the solution.

Failure in Deployment log:

2016-11-18 02:18:36 Error    1> Action: Invocation of step 60.120 failed. Stopping invocation of action plan.

Finding the root of the failure:

When walking back the step index in the summary xml log the error landed on step 60.120.123.

-<Task EndTimeUtc="2016-11-18T08:15:23.1042963Z" Status="Error" StartTimeUtc="2016-11-18T08:10:40.5896841Z" ActionType="Deployment-Phase4-ConfigureWAS" RolePath="Cloud">

-<Action EndTimeUtc=”2016-11-18T08:15:23.1042963Z” Status=”Error” StartTimeUtc=”2016-11-18T08:10:40.5896841Z” Type=”Deployment-Phase4-ConfigureWAS” Scope=”Internal”>

-<Steps>

-<Step EndTimeUtc=”2016-11-18T08:15:23.1042963Z” Status=”Error” StartTimeUtc=”2016-11-18T08:10:40.5896841Z” Name=”(Katal) Configure WAS VMs” Description=”Configures Windows Azure Stack on the guest VMs.Index=”123“>

-<Task EndTimeUtc=”2016-11-18T08:15:23.1042963Z” Status=”Error” StartTimeUtc=”2016-11-18T08:10:40.5896841Z” RolePath=”Cloud\Fabric\WAS” InterfaceType=”Configure”>

-<Exception>

<Message>Function ‘ConfigureWAS’ in module ‘Roles\WAS\WAS.psd1’ raised an exception: Time out has expired and the operation has not been completed. at Stop-WebServices, D:\WAP\Setup\Scripts\Configure-AzureStackMasd.ps1: line 699 at Restart-WebServices, D:\WAP\Setup\Scripts\Configure-AzureStackMasd.ps1: line 712 at Invoke-Main, D:\WAP\Setup\Scripts\Configure-AzureStackMasd.ps1: line 649 at <ScriptBlock>, D:\WAP\Setup\Scripts\Configure-AzureStackMasd.ps1: line 738 at <ScriptBlock>, <No file>: line 21</Message>

<StackTrace> at CloudEngine.Actions.PowerShellHost.Invoke(InterfaceParameters parameters, Object legacyConfigurationObject, CancellationToken token) at CloudEngine.Actions.InterfaceTask.Invoke(Configuration roleConfiguration, Object legacyConfigurationObject, MultiLevelIndexRange indexRange, CancellationToken token, Dictionary`2 runtimeParameter)</StackTrace>

<Raw>CloudEngine.Actions.InterfaceInvocationFailedException: Function ‘ConfigureWAS’ in module ‘Roles\WAS\WAS.psd1’ raised an exception: Time out has expired and the operation has not been completed. at Stop-WebServices, D:\WAP\Setup\Scripts\Configure-AzureStackMasd.ps1: line 699 at Restart-WebServices, D:\WAP\Setup\Scripts\Configure-AzureStackMasd.ps1: line 712 at Invoke-Main, D:\WAP\Setup\Scripts\Configure-AzureStackMasd.ps1: line 649 at <ScriptBlock>, D:\WAP\Setup\Scripts\Configure-AzureStackMasd.ps1: line 738 at <ScriptBlock>, <No file>: line 21 at CloudEngine.Actions.PowerShellHost.Invoke(InterfaceParameters parameters, Object legacyConfigurationObject, CancellationToken token) at CloudEngine.Actions.InterfaceTask.Invoke(Configuration roleConfiguration, Object legacyConfigurationObject, MultiLevelIndexRange indexRange, CancellationToken token, Dictionary`2 runtimeParameter)</Raw>

</Exception>

</Task>

</Step>
Solution:

The first option is to re-run the deployment from the specific failed step. Do this by using the following syntax:

Import-Module C:\CloudDeployment\CloudDeployment.psd1 -Force

Import-Module C:\CloudDeployment\ECEngine\EnterpriseCloudEngine.psd1 -Force

Invoke-EceAction -RolePath Cloud -ActionType Deployment -Start 60.120.123 -Verbose

The second option for this specific issue is to re-run the deployment with network parameters included. Use the following Syntax:

.\InstallAzureStackPOC.ps1 -AdminPassword $adminpass -AADAdminCredential $aadcred -AADDirectoryTenantName X.onmicrosoft.com -NatIPv4Subnet 192.168.5.0/24 -NatIPv4Address 192.168.5.3 -NatIPv4DefaultGateway 192.168.5.1 -EnvironmentDNS 192.168.5.1 -Verbose

Read more

Fun @ the MVP Summit 2016

This year at the MVP Summit was a great one.

I learned a lot of stuff mostly about OMS, System Center, and Azure Stack.

I cannot talk about any of it. 🙂

I can however talk about some of the fun times we had and share some pictures.


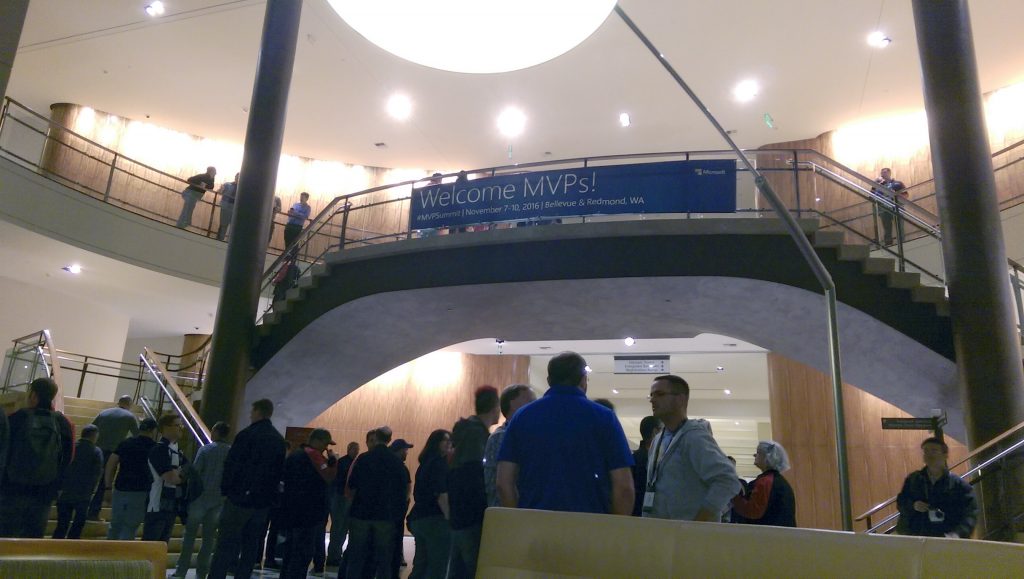
First picture….a warm welcome to MVP’s from around the world.

image001

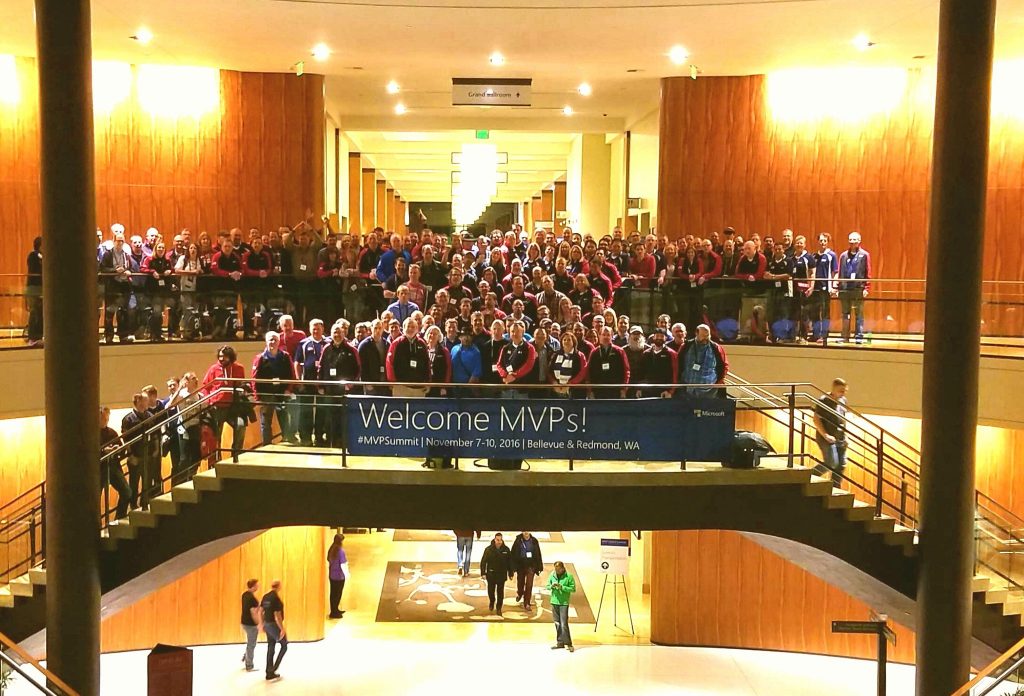
Here is a picture of the US MVPs at the summit!

all-us-mvps

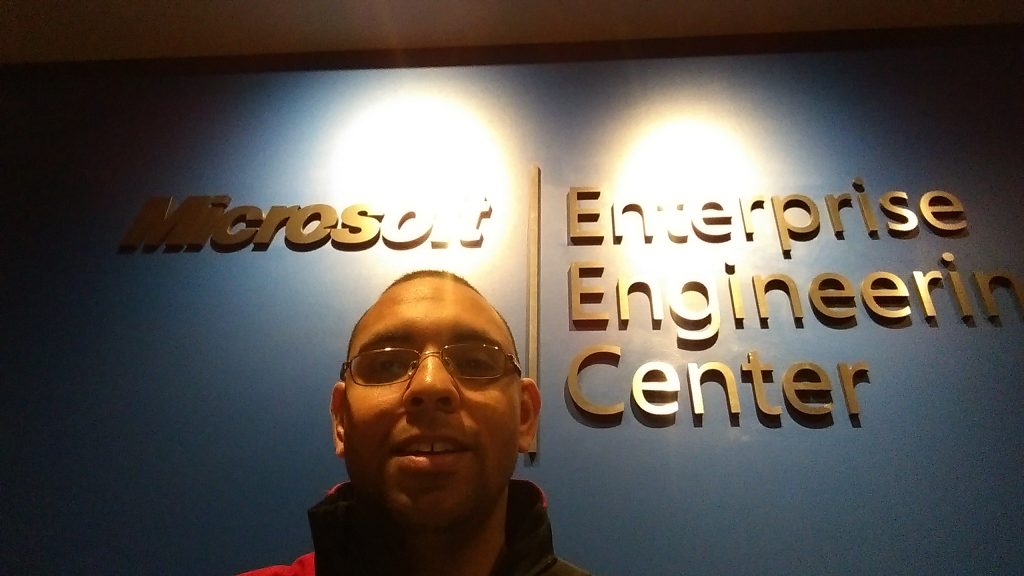
Me at the Microsoft Enterprise Engineering Center in Redmond.

image003

image005

Read more

Download all Azure Stack Ignite 2016 decks

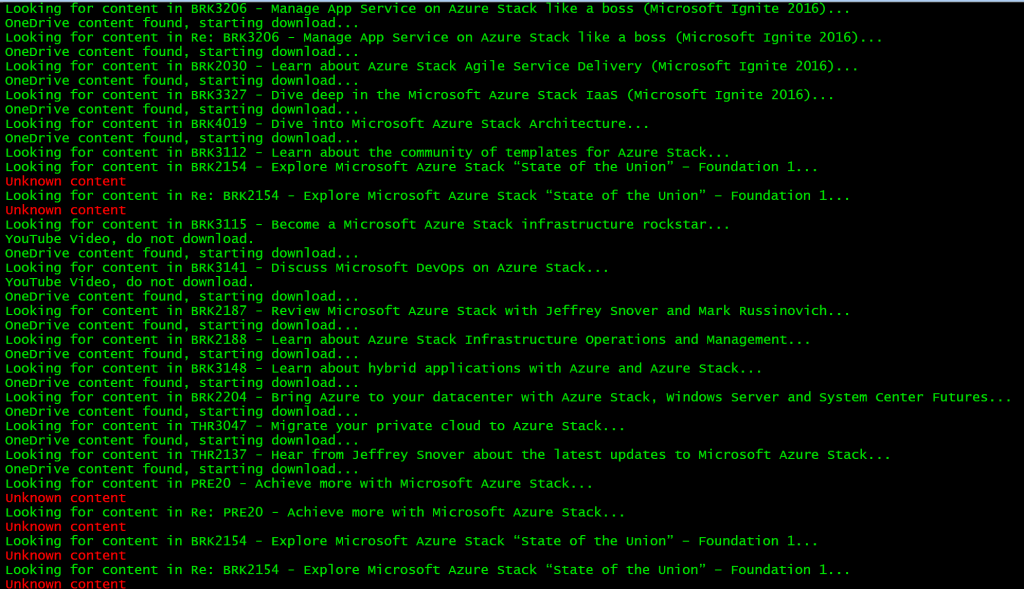
Mattias Fors has a post with a PowerShell script that can be used to download all Microsoft Ignite 2016 slide decks. The blog post is here: https://deploywindows.info/2016/09/30/download-ignite-2016-slidedecks,

You can use this script to download all the Azure Stack session decks.

2016-10-04-14_59_34-windows-powershell-ise

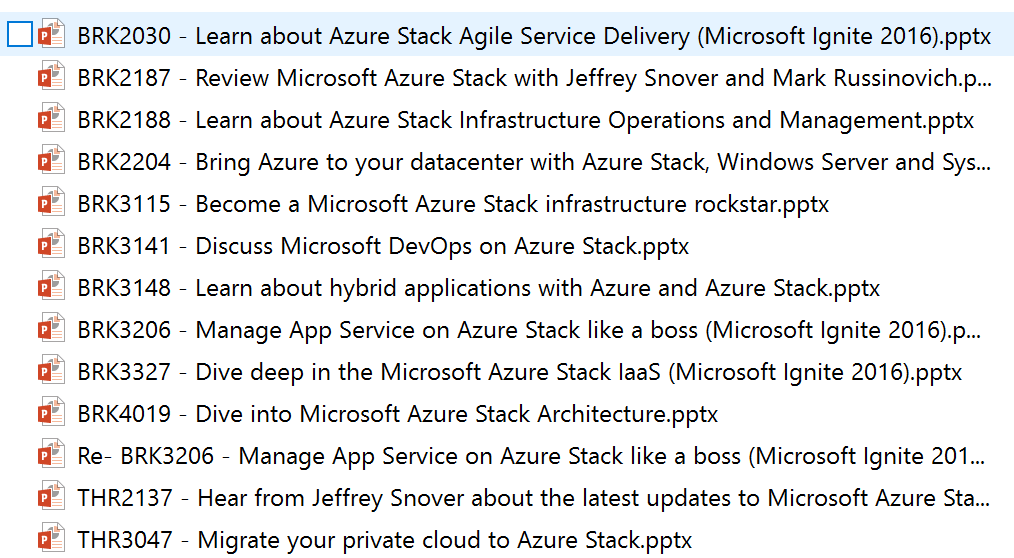
Just change if ($item.title –notlike “Re:*”) to if ($item.title -like “*Azure Stack*”) in the script and run it. It will place them in C:\Ignite2016Slidedecks.

2016-10-04-15_01_47-c__ignite2016slidedecks

Enjoy!

Read more

New Azure Stack Survival Guide

As shown this week at Microsoft Ignite 2016 Azure Stack has come along way. TP2 has been released with new functionality and a timeline for Azure Stack has been announced.

Also we have seen some new blogs on TP2, some third party solutions coming, vendors demoing it on their hardware, and some new scripts and tools.

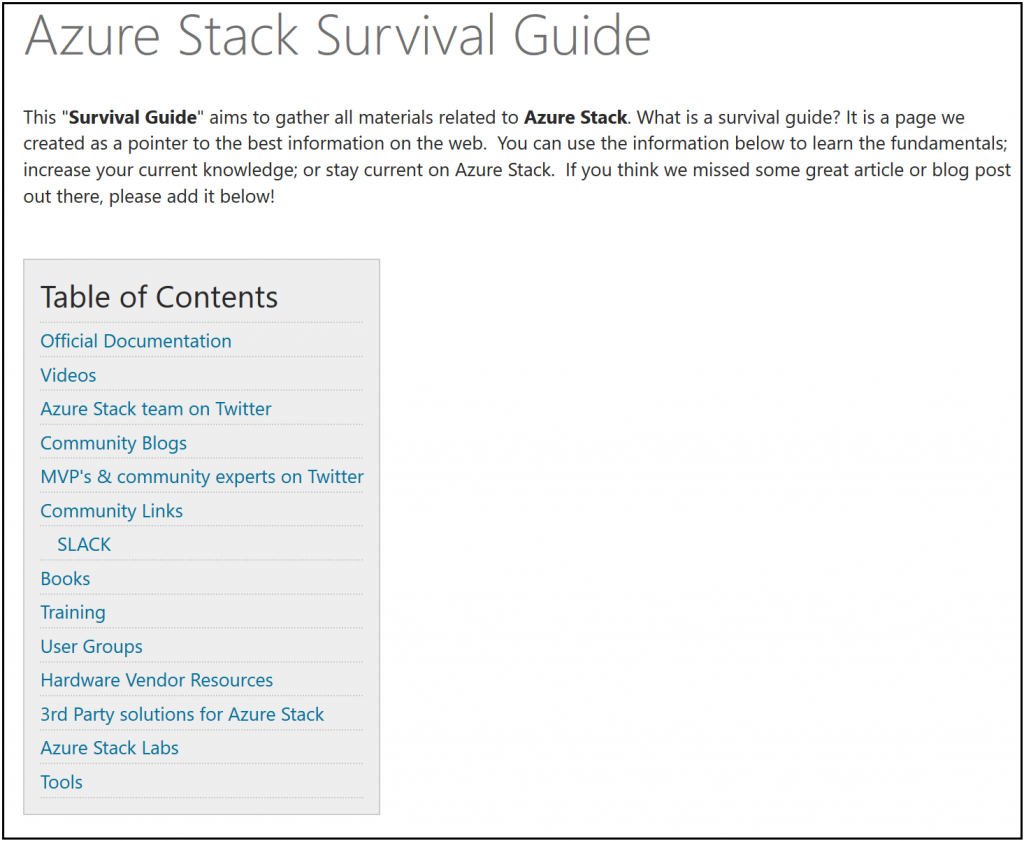
There is so much movement now around Azure Stack both from Microsoft and the community. It can be hard to keep up with all the information and resources for Azure Stack. To help with this I have started an Azure Stack Survival Guide on TechNet. Please go contribute to this and use it as a reference. Here is the link:

http://social.technet.microsoft.com/wiki/contents/articles/35810.azure-stack-survival-guide.aspx

2016-09-29-01_28_55-clipboard

Read more

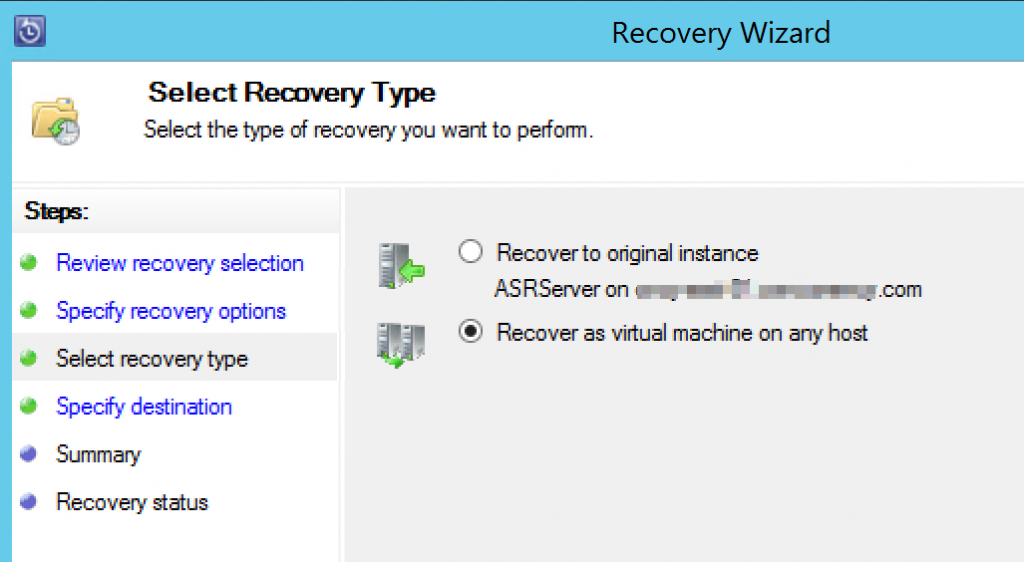
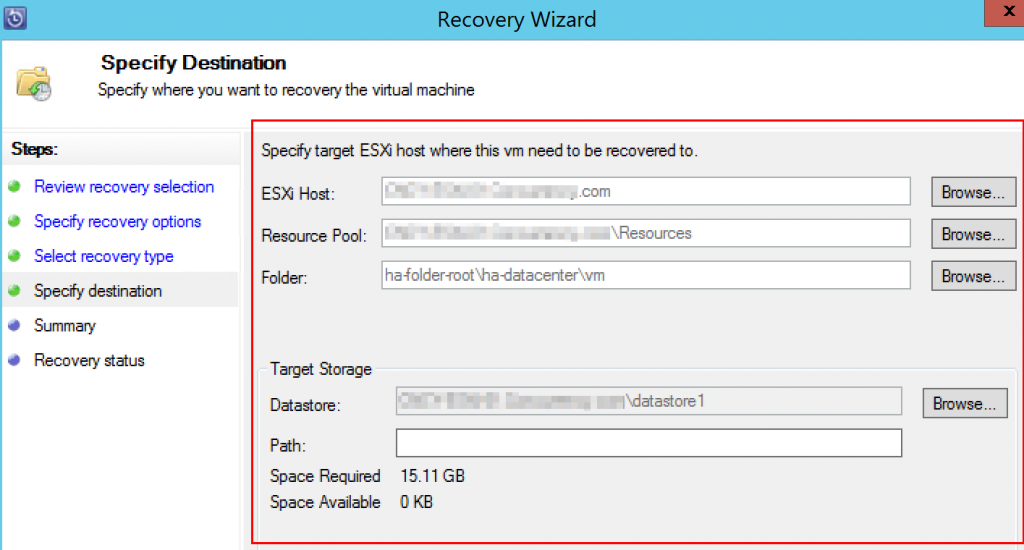
VMware VM Backup in DPM Setup

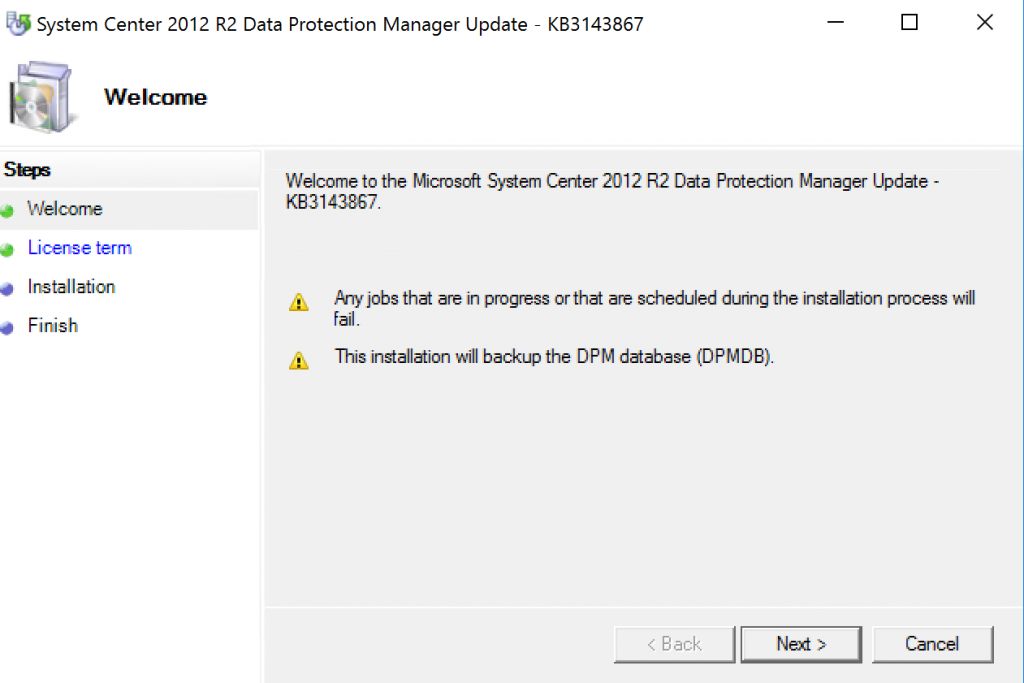
Today Microsoft released the availability to protect VMware virtual machines with System Center Data Protection Manager (DPM). This is a feature the community has been asking to get for a long time. Again the DPM team continues to deliver! Again the team has brought this new functionality to existing customers via an update rollup. You do not have to wait for a new version of DPM to start protecting VMware. This functionality is enabled in DPM 2012 R2 through update rollup 11. Download DPM 2012 R2 UR 11 from this link:

http://catalog.update.microsoft.com/v7/site/search.aspx?q=3162908

For DPM 2016 this funcionalty will come out of the box.

Now lets look at the install, setup, and recovery of VMware VM’s.

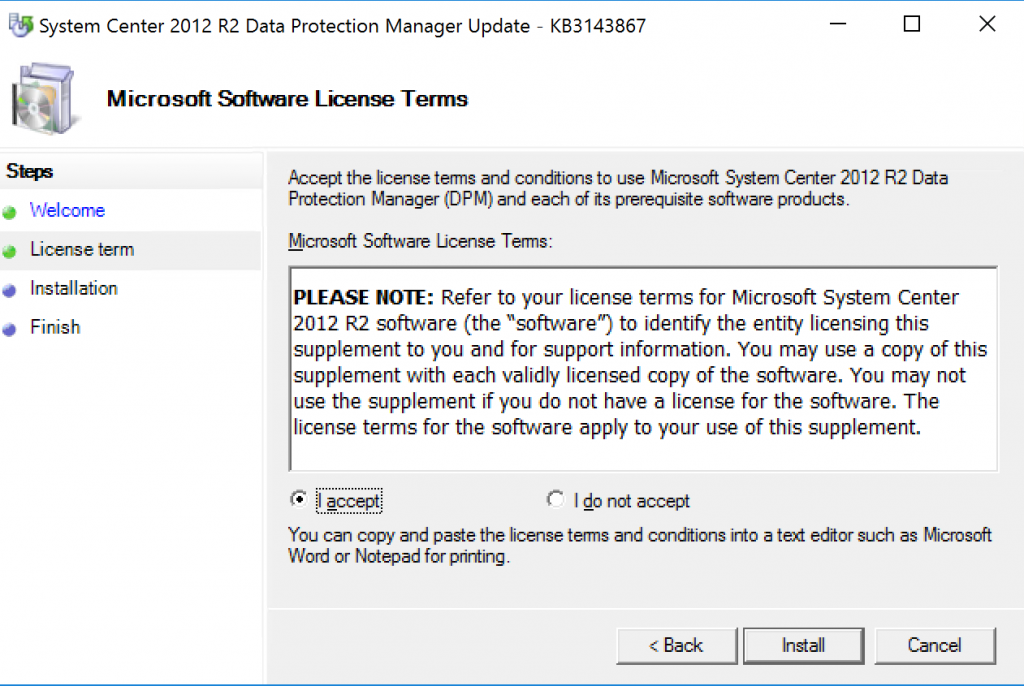
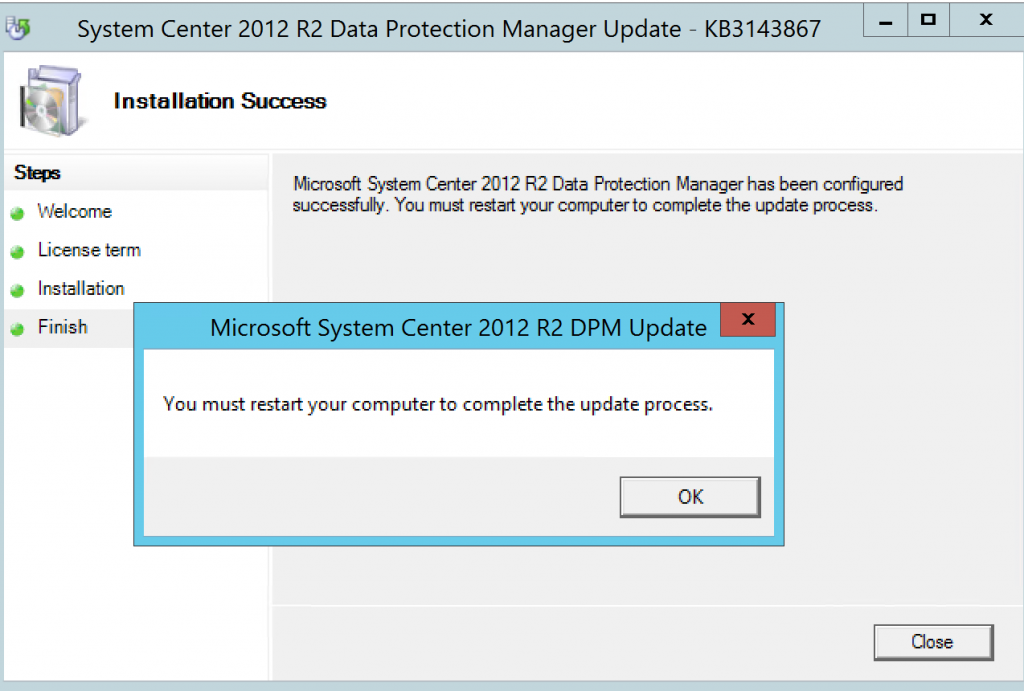
INSTALL THE UPDATE:

VMwareinDPM (17)

VMwareinDPM (1)

VMwareinDPM (2)

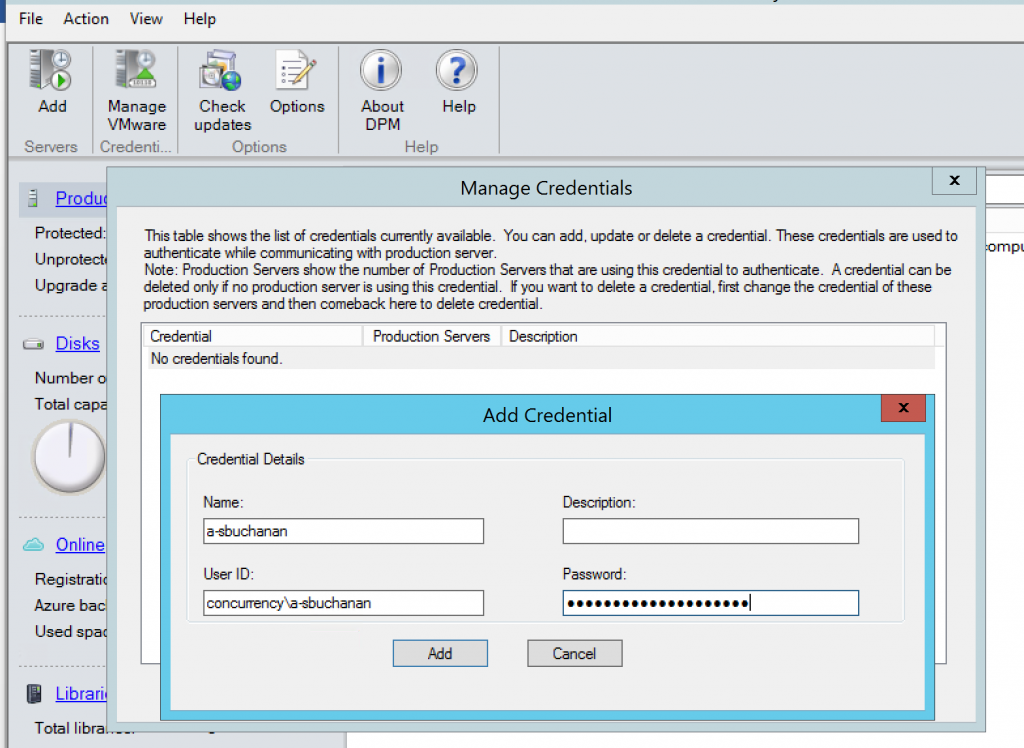
ADD VMWARE CREDENTIALS:

VMwareinDPM (3)

NOTE: This is an agentless backup. DPM does not install and agent here. It only connects to the VMWare host.


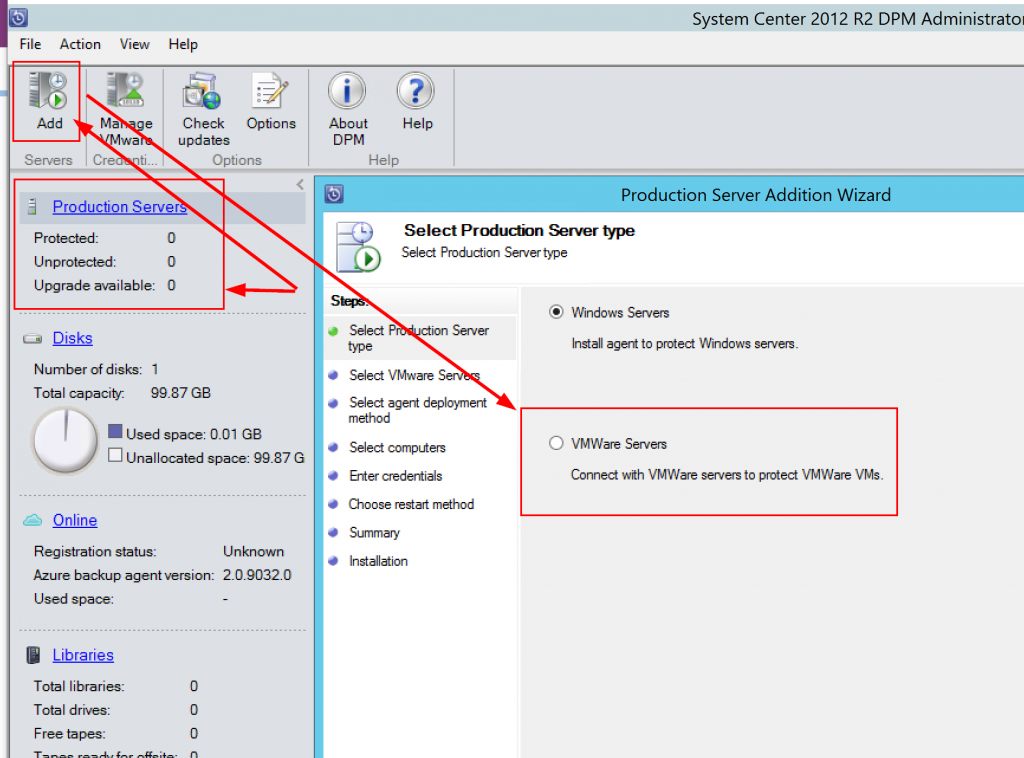
ADD VMWARE SERVER TO DPM:

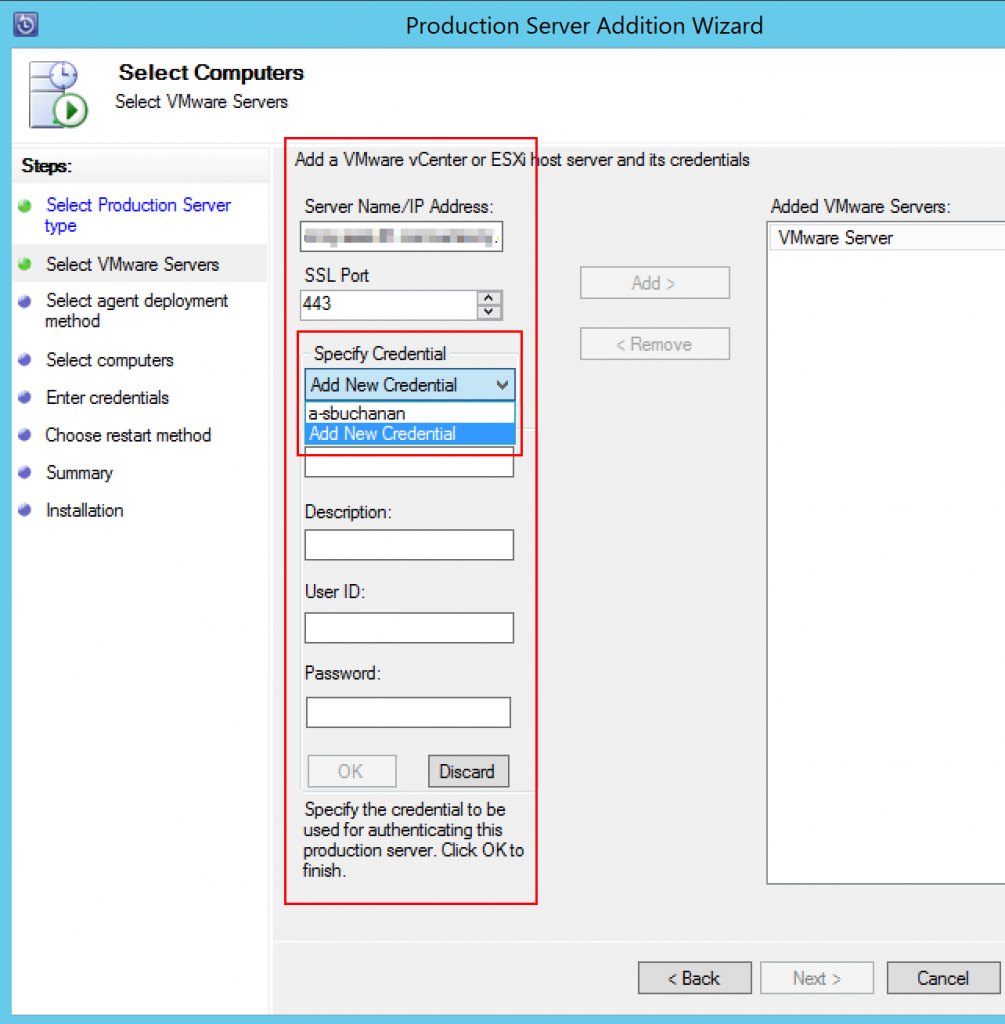
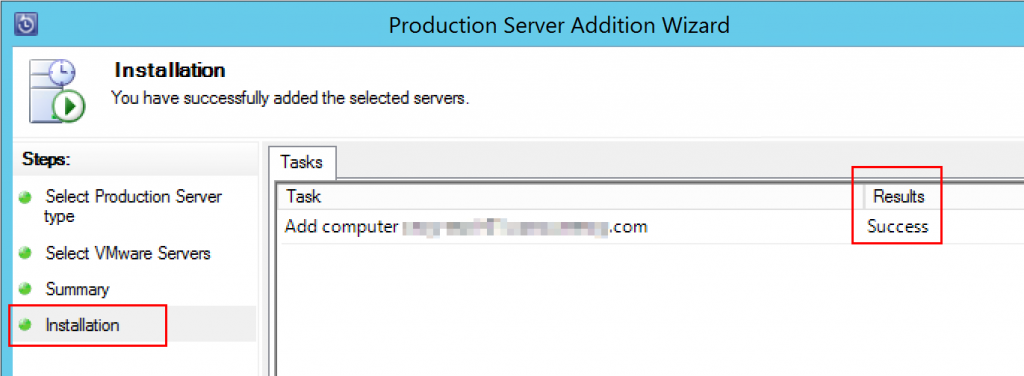
VMwareinDPM (4)

VMwareinDPM (5) VMwareinDPM (6)

My VMWare server did not have a proper certificate. I had to add the following reg key:

DisableSecureAuthentication.reg
Windows Registry Editor Version 5.00
[HKEY_LOCAL_MACHINE\SOFTWARE\Microsoft\Microsoft Data Protection Manager\VMWare]
“IgnoreCertificateValidation”=dword:00000001

It worked after that.


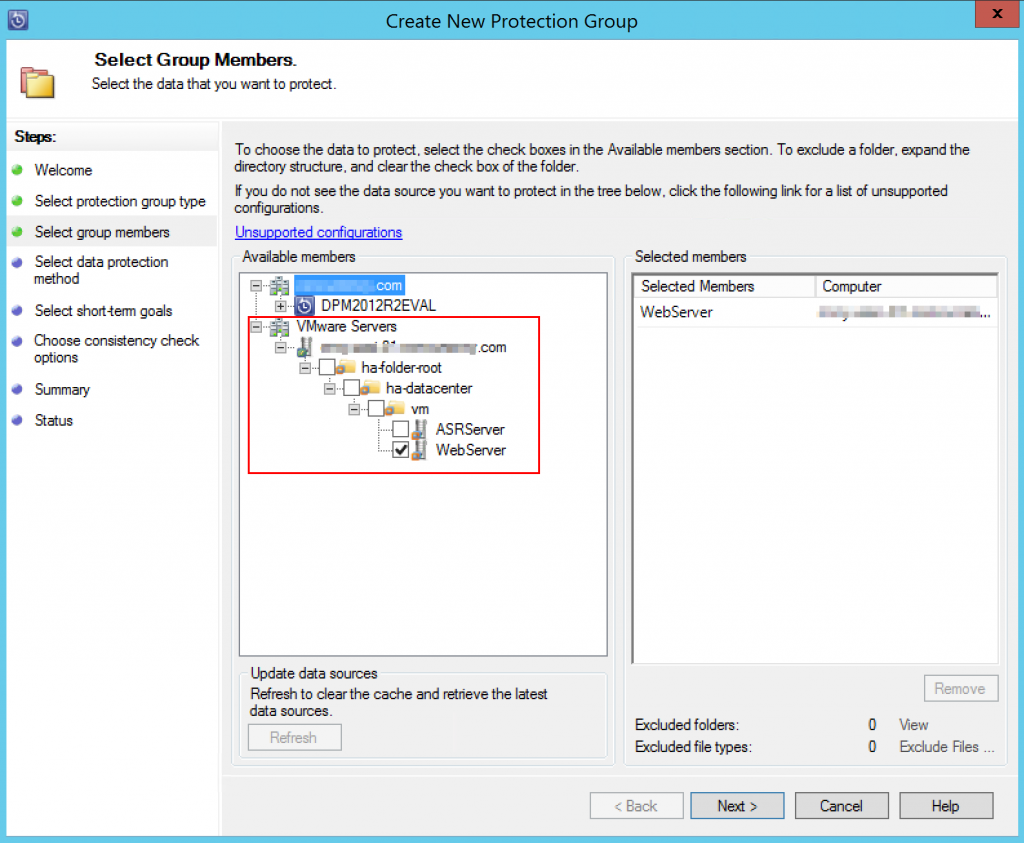
PROTECTING VMS:

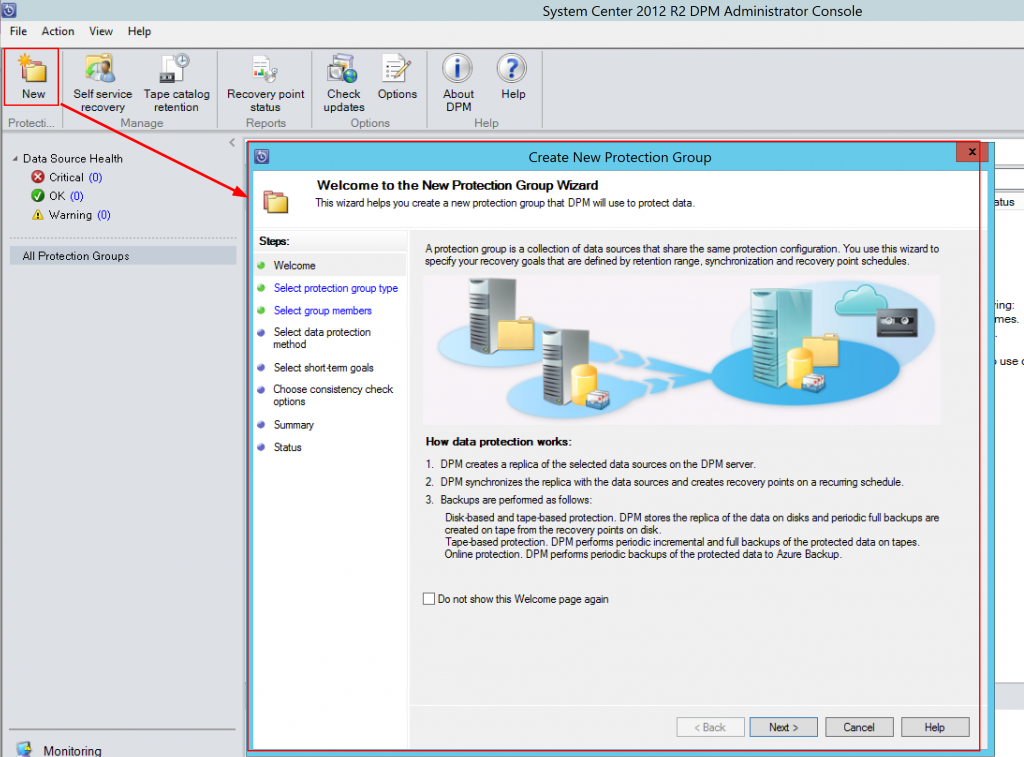
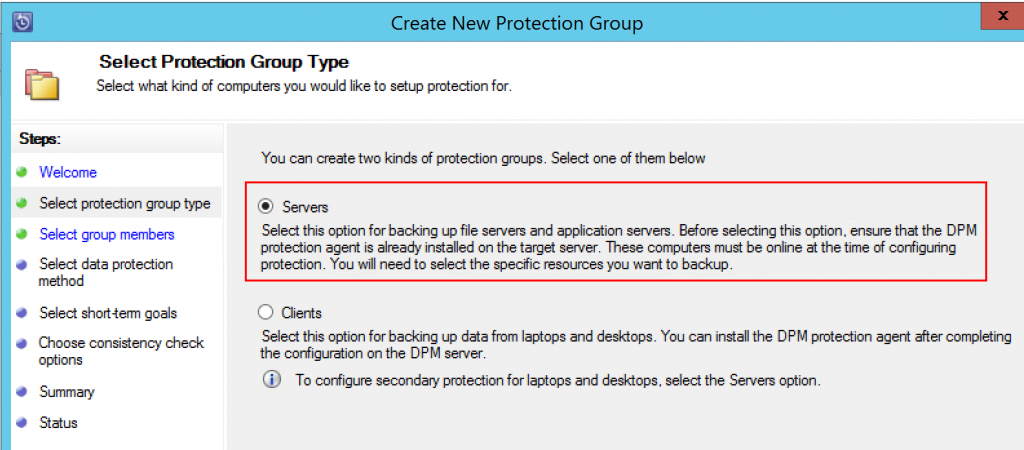
VMwareinDPM (8) VMwareinDPM (9)

You can add a single VM as shown in the following screenshot.

VMwareinDPM (10)

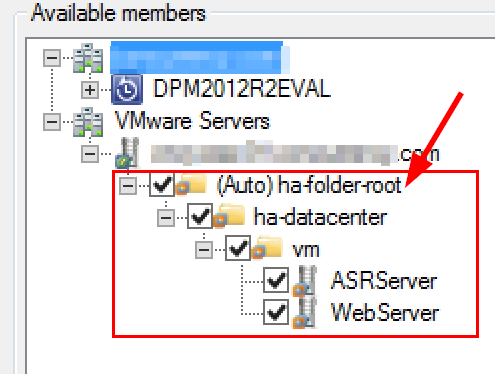
Or set the protection to Auto.

VMwareinDPM (11)

If set to auto VM’s that are added to this host will automatically be protected.

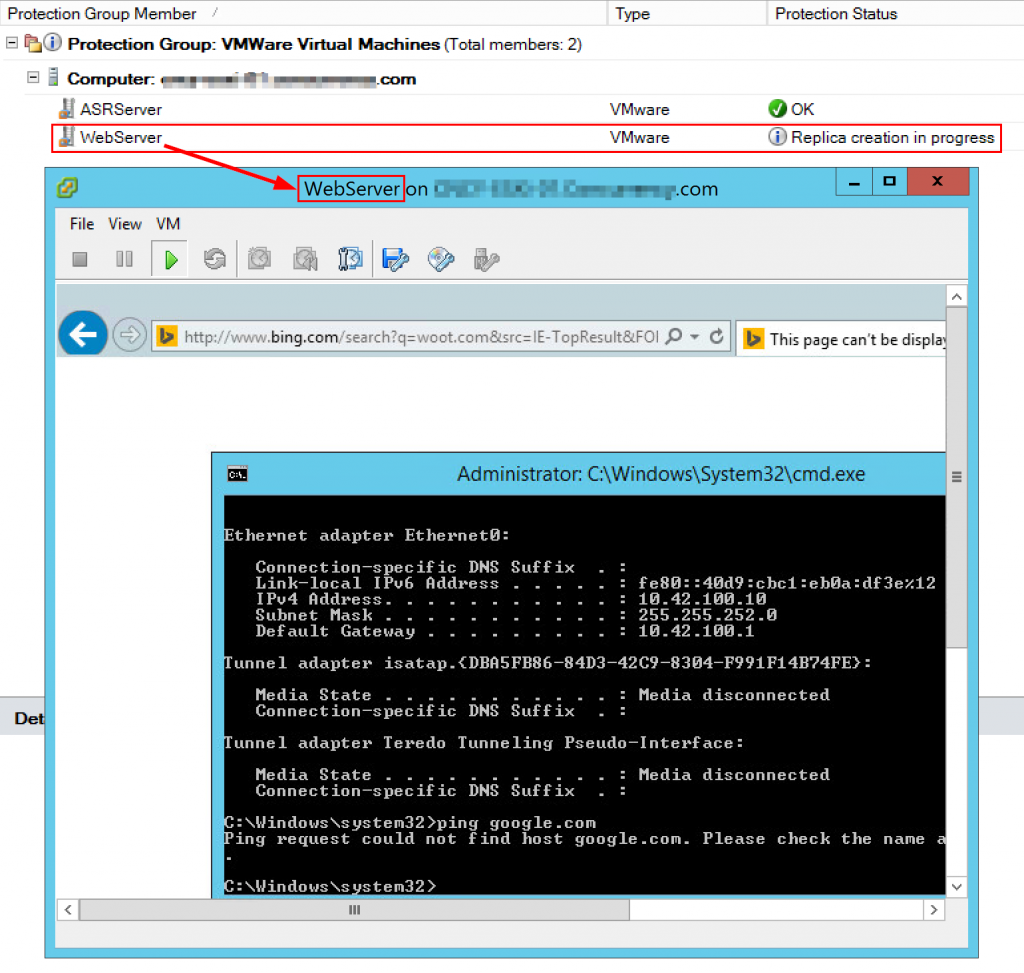
There was no downtime during the protection of the VMWare VMs.

VMwareinDPM (12)


RECOVERING VMS:

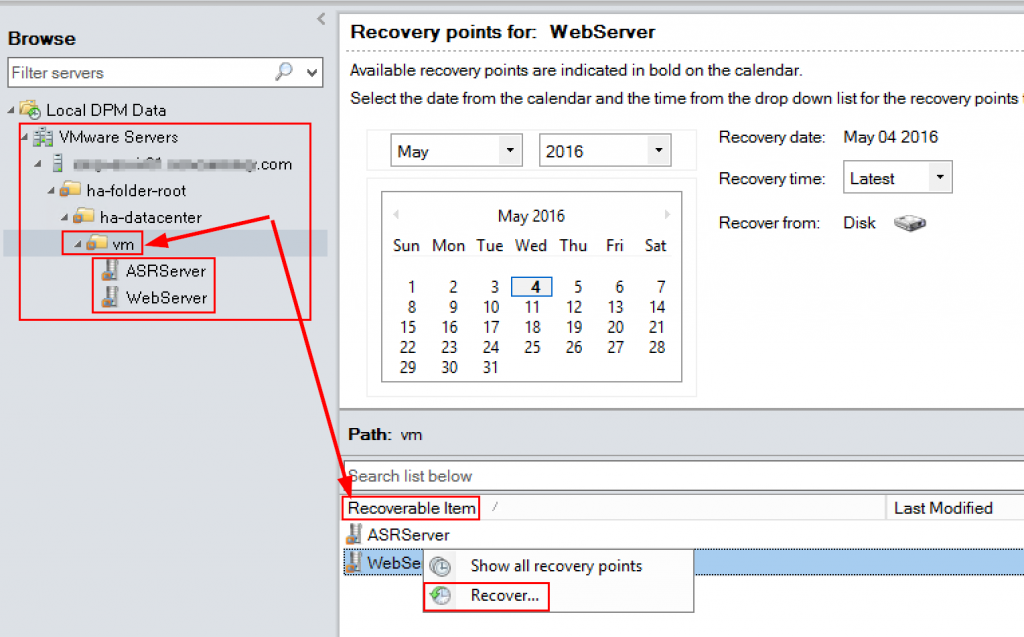
You can see we can recover VM’s just like we can with Hyper-V.  You need to click on the VM folder to make the Recover option show.

VMwareinDPM (13)

If you click on a VM you will see the .vmdk files and can recover them.

VMwareinDPM (14)

The rest of the recovery process is the same as recovering a VM in Hyper-V.

VMwareinDPM (15) VMwareinDPM (16)

That concludes this post! Enjoy your ability to protect VMware with DPM.

Read more

WordPress as front-end for Azure Automation

With Azure Automation there are cases where you will need to have a form that end users can go fill out to kick off an automation runbook. Back with System Center Orchestrator we could use Service Manager’s self-service portal as the front end for our automations. This was a solution that worked well. With Azure Automation we do not have that luxury at least not yet we don’t. There is a community based Azure automation webhook Service Manager (SCSM) connector in the works. One of my colleagues Rob Plank is a part of this project and says it should ready to release very soon. This connector will allow you to use the SCSM portal as the frontend of Azure Automation via webhooks, know when a webhook expires, and see a runbooks job status. Here are some teaser screenshots of the  connector.
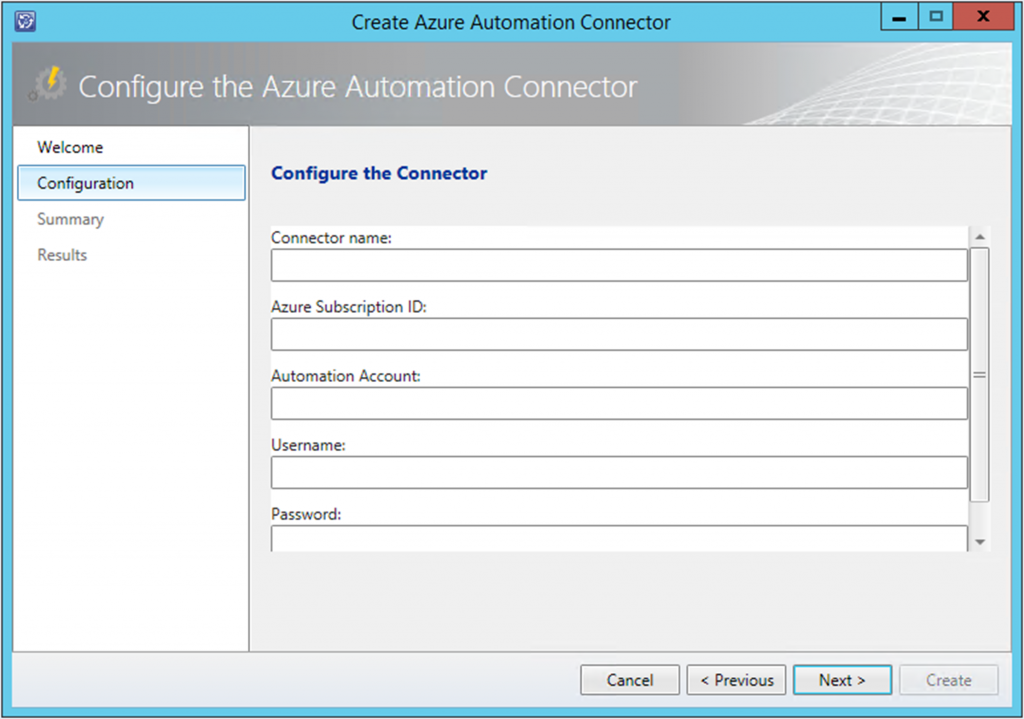
image001

image002

There also are a few posts out there on how to leverage other platforms as the frontend for Azure Automation these are “how to use SharePoint as the frontend of Azure Automation” by Anders Bengtsson and “how to use an ASP website as the frontend to Azure Automation” by a friend of mine and fellow Microsoft MVP Florent Appointaire. Well in this post I am going to show you how to use the popular platform WordPress as the frontend for Azure Automation. The cool thing here is that this is another instance of showcasing the ability to utilize Microsoft and Open Source technologies together. 🙂

Here are the steps at a high level

  • Have an Azure Automation account on Azure
  • Setup your runbook/s in Azure Automation
  • Setup a webhook on your runbook/s in Azure Automation
  • Have a WordPress instance
  • Install Ninja Forms plugin in the WordPress instance
  • Install the Webhooks add on for Ninja Forms
  • Setup your runbook frontend form/s
  • Configure the runbook frontend form/s to connect to the Azure Automation webhook

Let’s get started!

Step 1: Have an Azure Automation account on Azure

To get started with Azure Automation go here: https://azure.microsoft.com/en-us/documentation/articles/automation-intro. I am not going to cover this within this blog post.

Step 2: Setup your runbook/s in Azure Automation

For this testing this scenario and this post I grabbed a couple of Azure Automation runbooks built by the Microsoft AzureAutomationTeam and made available in the Azure Automation Runbook Gallery. These runbooks start and stop Azure virtual machines.

Runbook #1 Name:

Start-AzureV2VMs

Description:

This runbook connects to Azure and starts all VMs in an Azure subscription or resource group.

Runbook #2 Name:

Stop-AzureV2VMs

Description:

This runbook connects to Azure and stops all VMs in an Azure subscription or resource group.

Both runbooks have two parameters they need. These are:

param (

[Parameter(Mandatory=$false)]

[String]  $AzureConnectionAssetName = “AzureRunAsConnection”,

[Parameter(Mandatory=$false)]

[String] $ResourceGroupName

We need to pay attention to these when setting up the webhooks and these often become your fields on your front end form.

Step 3: Setup a webhook on your runbook/s in Azure Automation

Here are the steps to setup a webhook for an Azure Automation Runbook.

First off make sure your runbook/s are in a published authoring status.

image003

Within https://portal.azure.com Navigate to

YOURAZUREAUTOMATIONACCOUNT

Runbooks

YOURRUNBOOK (Start-AzureV2VMs)

Webhooks

From here click on the Add Webhook button.

image004

The Add Webhook blade will fly out. Here you will want to click on Create new webhook to make the next blade flyout.

Here you need to give your webhook a name, set to enabled, set when it will expire and COPY THE URL TO A SAFE PLACE.

NOTE: You will not be able to access the webhook URL after this.
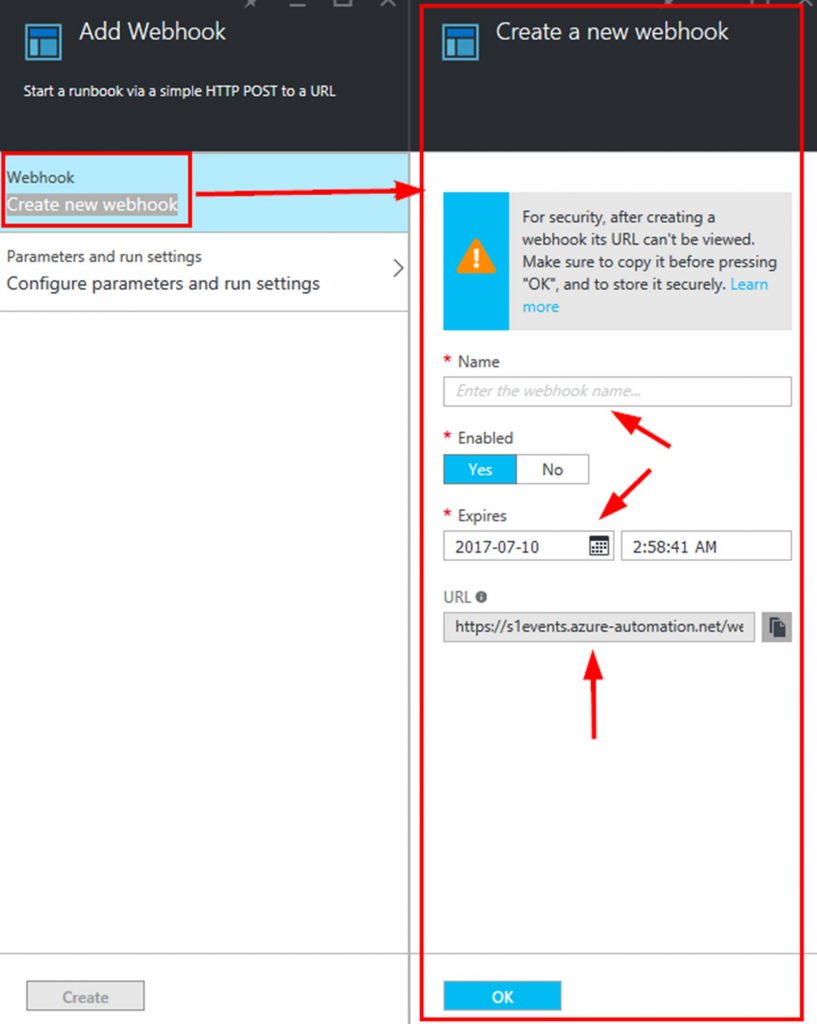
image005

Click OK.

Next you need to click on Configure parameters and run settings. This is where you set the parameters from the runbook.

If your parameters are required you have to set them here. If they are optional you can leave them blank here and pass the data into the runbook from the frontend form via a $WebhookData object.

In my case I put AzureRunAsConnection directly in the webhook. I created a credentials asset in Azure Automation with the account containing the needed permissions to perform the actions from the runbook in my Azure account (Start/Stop VM’s).

I left the resourcegroupname blank as I will pass this in from the front end form. I left the Run Settings to run on Azure as I do not have a Hybrid Worker setup.

NOTE: A Hybrid Worker lets you run automation runbooks on premises in your data center.
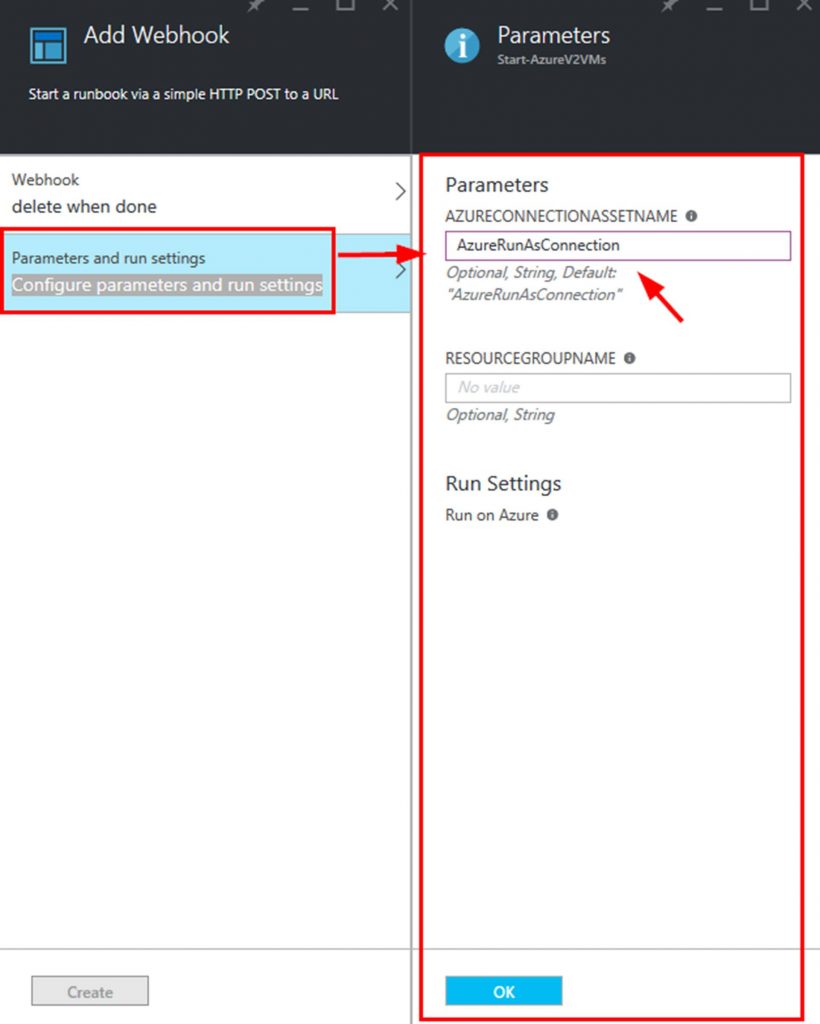
image006

One you have the Webhook and parameters configured click on the Create button to actually create the webhook.
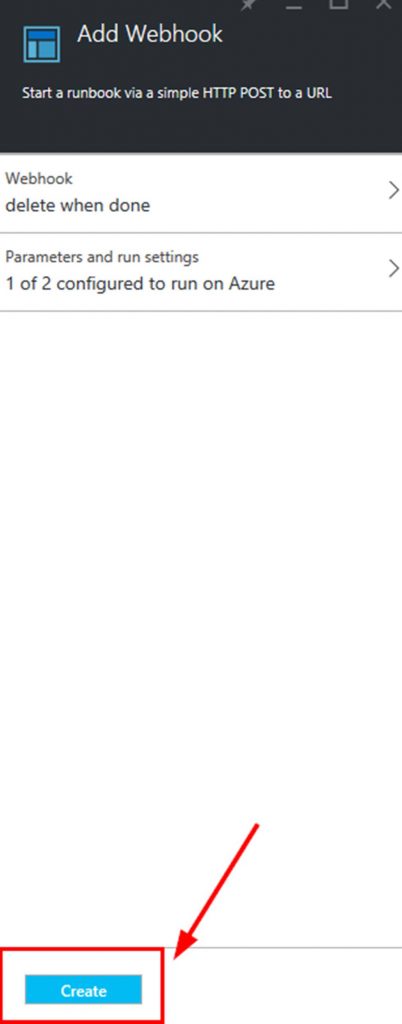
image007

You will now see your new webhook in the webhooks blade.
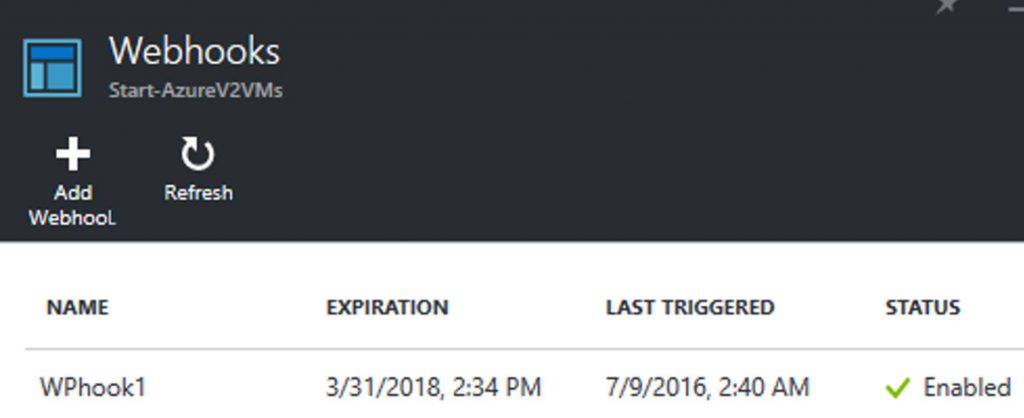
image008

Note that if you click on a webhook you will not see the URL. You can enable or disable the webhook, see when it expires, and access the parameters. This is shown in the following screenshot.
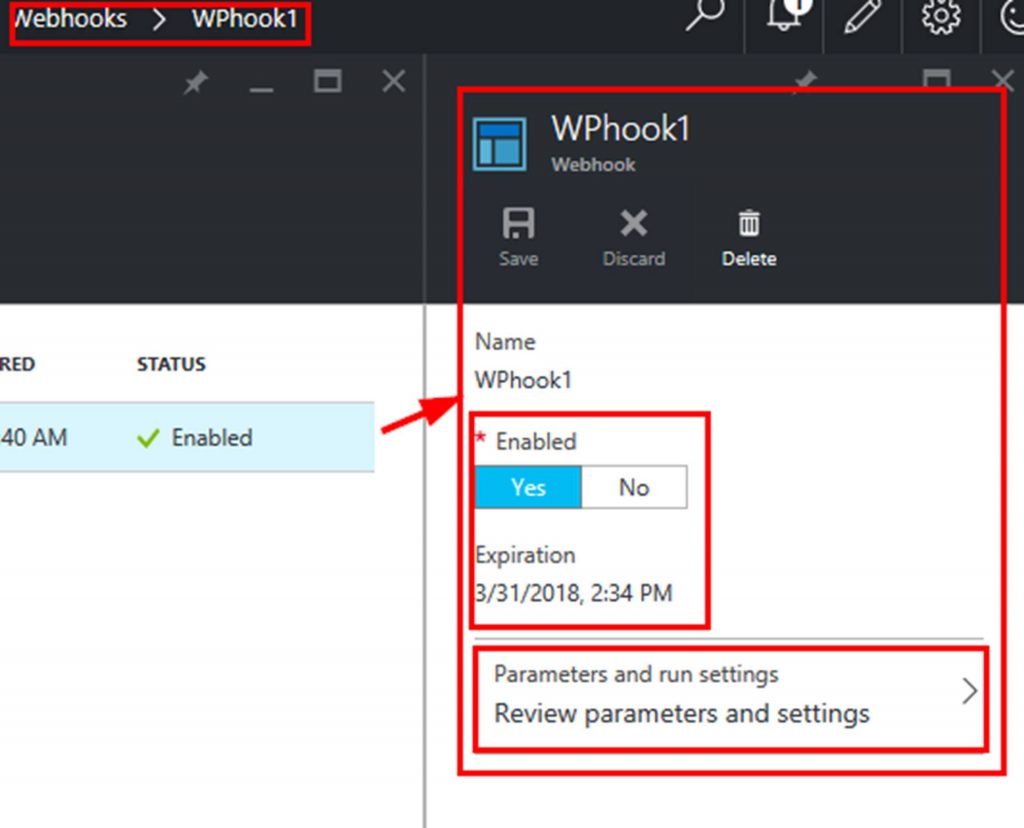
image009

Step 4: Have a WordPress instance

You can host WordPress on WordPress.org on a hosting account, internally or even on Azure. Here is a link to a tutorial on how to run WordPress on Azure. https://azure.microsoft.com/en-us/documentation/articles/app-service-web-create-web-app-from-marketplace.  I am not going to cover how to setup a WordPress instance within this blog post.

Step 5: Install Ninja Forms plugin in the WordPress instance

Here are the steps to install Ninja Forms WordPress plugin.

From within the WordPress admin dashboard click on Plugins.

Click on Add New.

image010

Search for Ninja Forms. Click on the Install button to add the plugin. Make sure you activate the plugin.
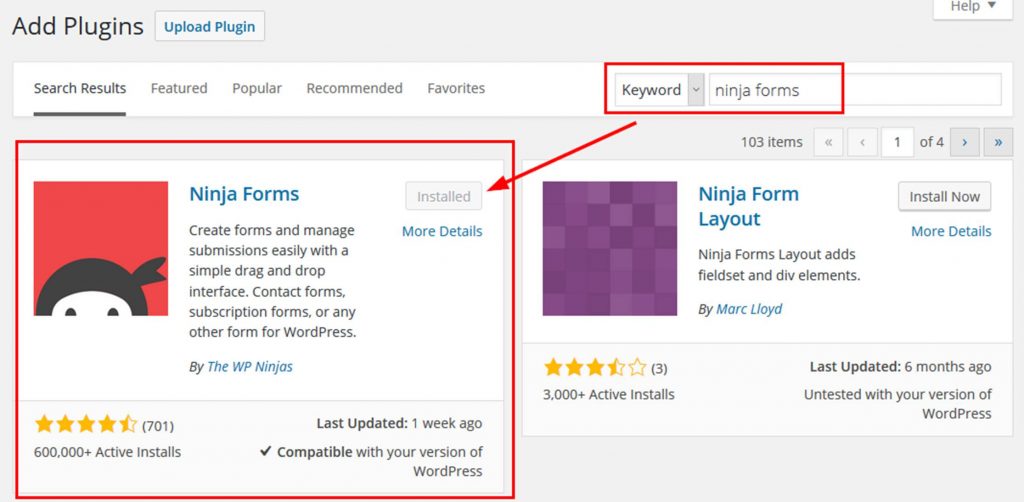
image011

You also could manually download and upload the plugin or load it directly into the plugins directory. I have shown you the steps for the easiest way to install it.

The Ninja Forms plugin page can be found here:

https://wordpress.org/plugins/ninja-forms

Step 6: Install the Webhooks add on for Ninja Forms

The Webhooks for Ninja Forms add on can be found here:

https://ninjaforms.com/webhooks-for-ninja-forms

This add on has to be purchased. It is $39 by itself for 1 WordPress instance.

After you buy it you will get the files for download. Again from within the WordPress admin dashboard click on Plugins.

Click on Add New. This time click on the Upload Plugin button and browse to your downloaded Webhooks for Ninja Forms zip folder.

After it is uploaded be sure to activate it.

The final step is to install the license for the add on. To do this Click on Forms>Settings>Licenses and input the key that Ninja Forms sent in the Webhooks Key field. Click on Save & Activate.
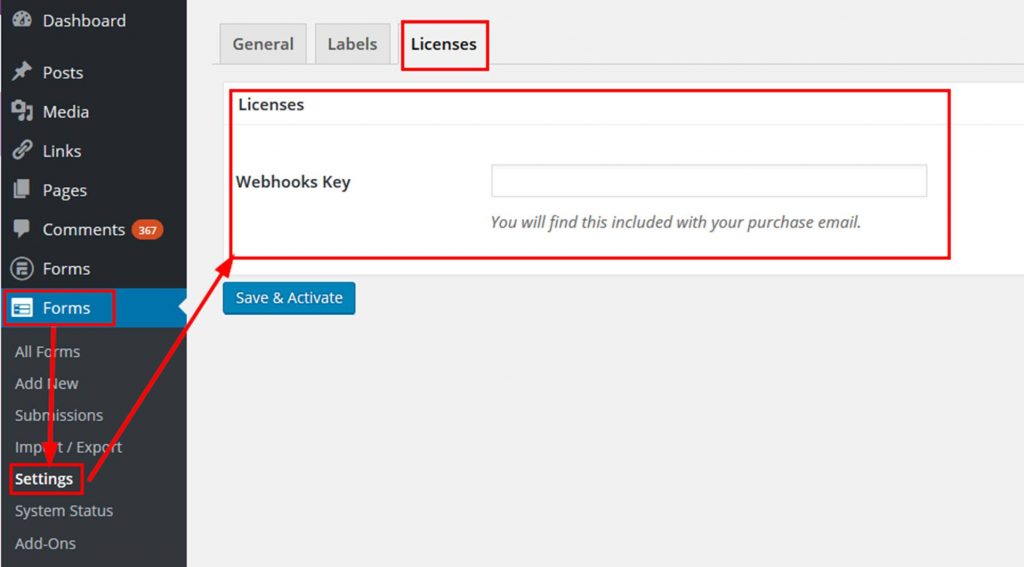
image013

Step 7: Setup your runbook frontend form/s

Next we need to build the actual form. To do this follow the list of steps.

Click on Forms>Add New. Give your form a Title.

Add a Textbox and put in the label of ResourceGroupName.

I like to make it Required.
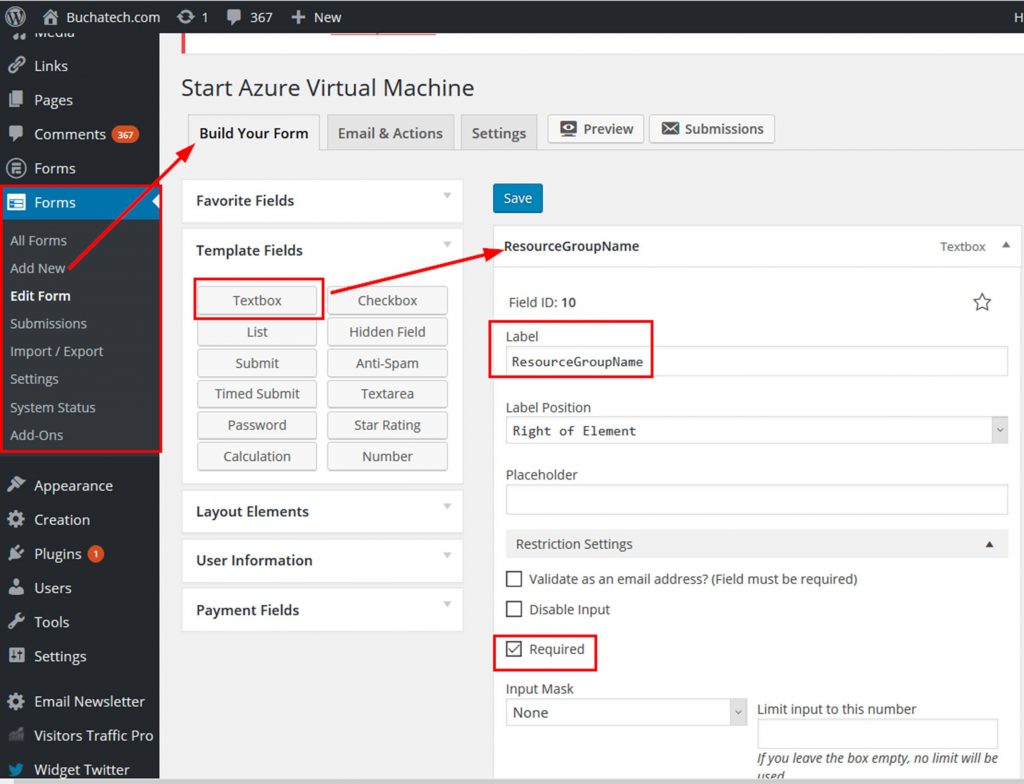
image014

Add a Submit button to your form. I labeled it Start.
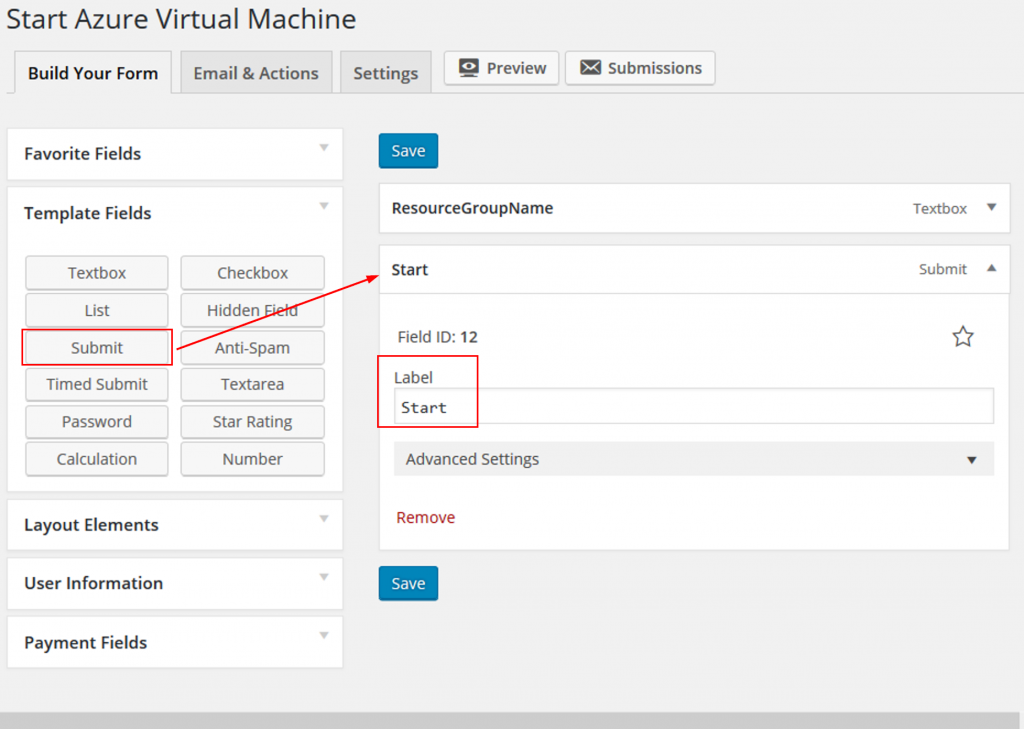
image015

In the following screenshot is what the form looks like. Note that I have both forms loaded on the same page.
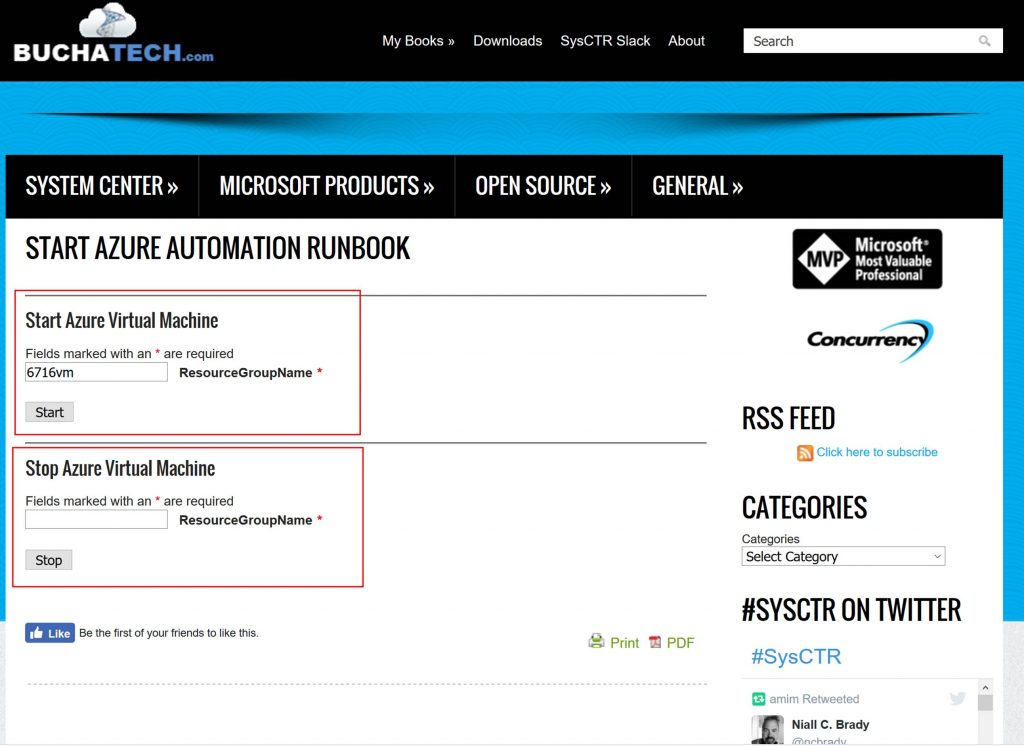
image016

Step 8: Configure the runbook frontend form/s to connect to the Azure Automation webhook

Now is the last step. This is the step in which we configure the form to send data to the Auzre Automation webhook upon submission. This is doing it via POST method.

When editing the form click on the Email & Actions tab. Click on the Add New button.

Give this Action a name.

In the Type dropdown select Webhook.

Enter the Azure Automation webhook URL in the Remote Url field.

Select Post for the Remote Method.

For Args select enter the name of and select the field from your form of the parameters you need to send to the Azure Automation runbook.

You can see this all represented in the following screenshot.
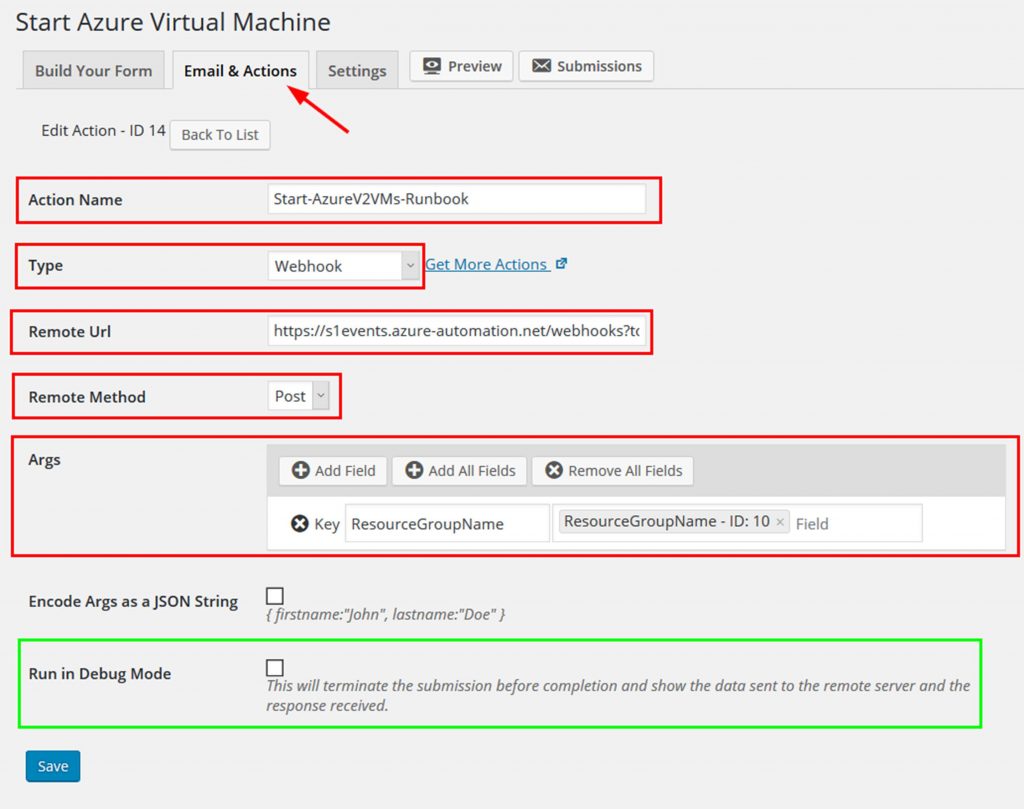
image017

One of the cool things about this solution is we can test the webhook action before actually submitting it to make sure it will work as expected. This testing can be turned on by checking the Run in Debug Mode field. I have highlighted this in the screenshot in green. Checking this box and submitting the form will show debugging information like data sent and response.

Here is an example of what the result in Debug mode will look like:
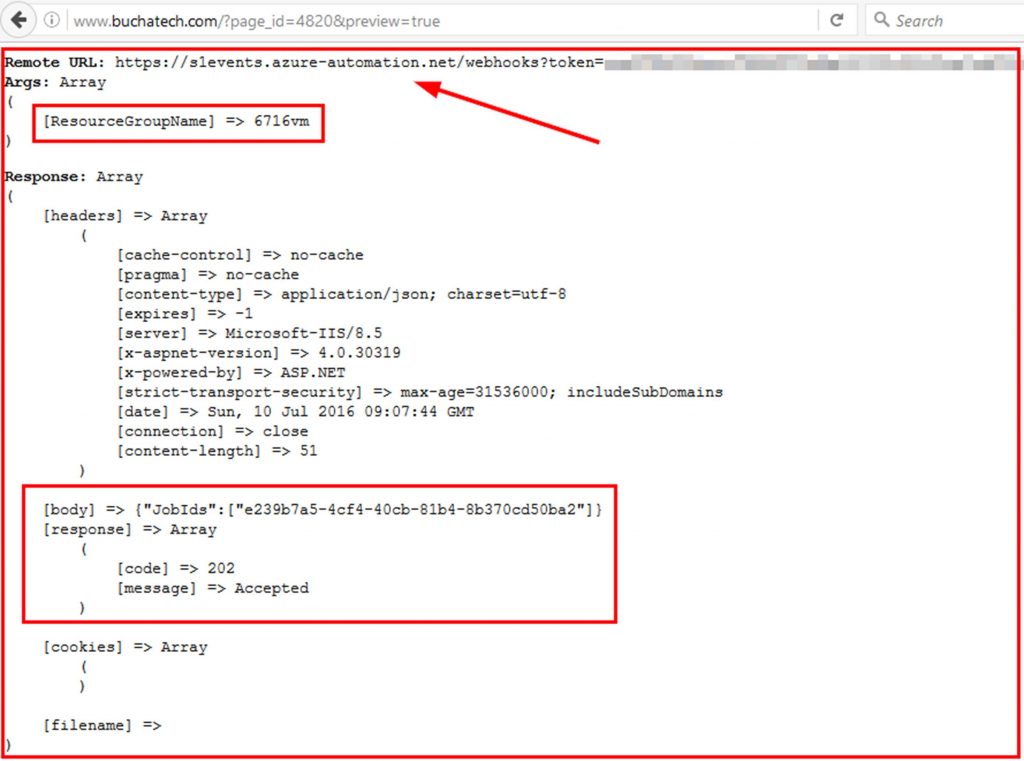
image018

Make sure you uncheck the Run in Debug Mode field when you are ready to actually start your runbook/s.

Now let’s see what this looks like in Azure Automation when we submit the form.

I have a resource group named 6716vm with one VM in it named 6716vm. So I will enter 6716vm on the form. 6716vm will be passed to the runbook as the resourcegroupname.
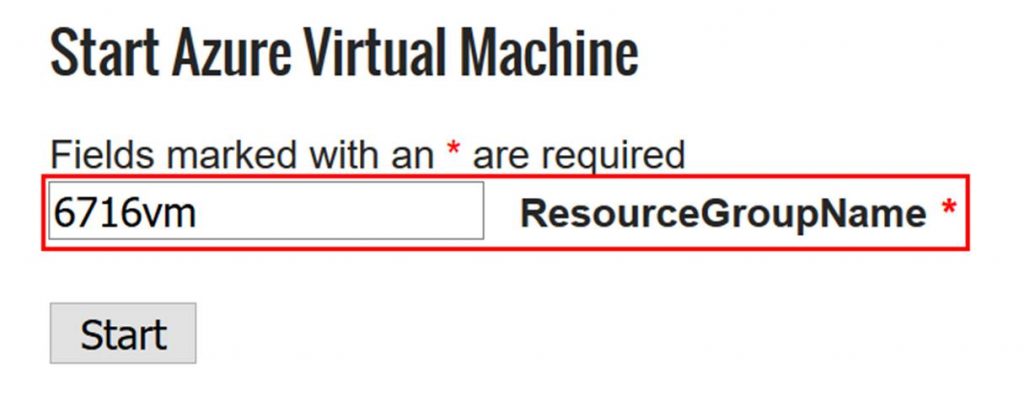
image019

You can see the job running in Azure now.
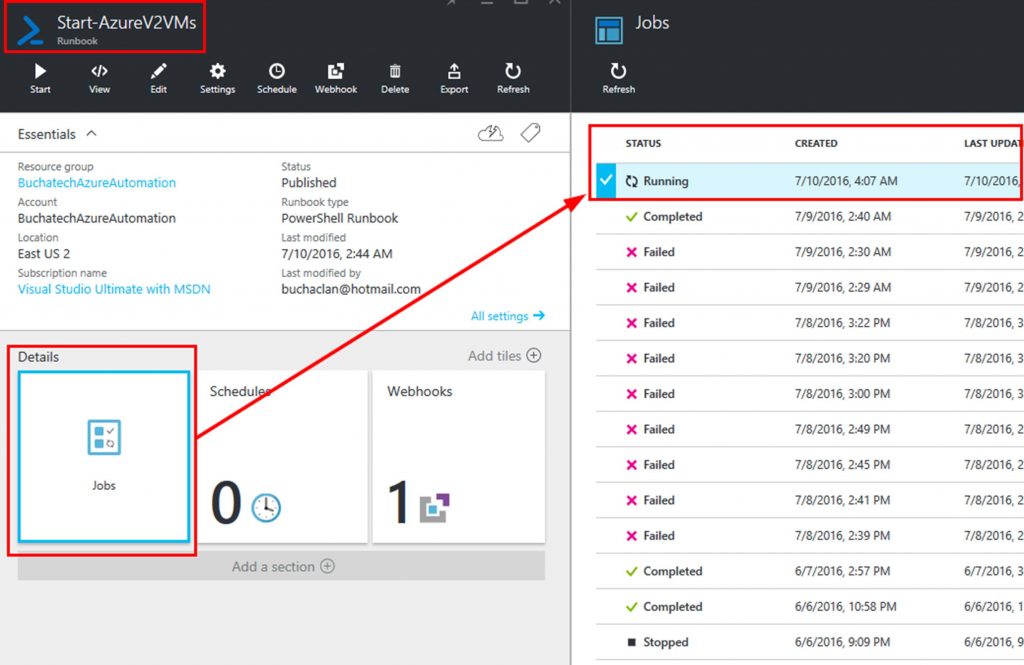
image020

Within the job if you click on Input you can see it has 2 inputs. One is Webhookdata. This is where the 6716vm is located. The other is the Azureconnectionassetname. Remember we hardcoded this into the webhook itself. We can also see in the following screenshot that the job completed.
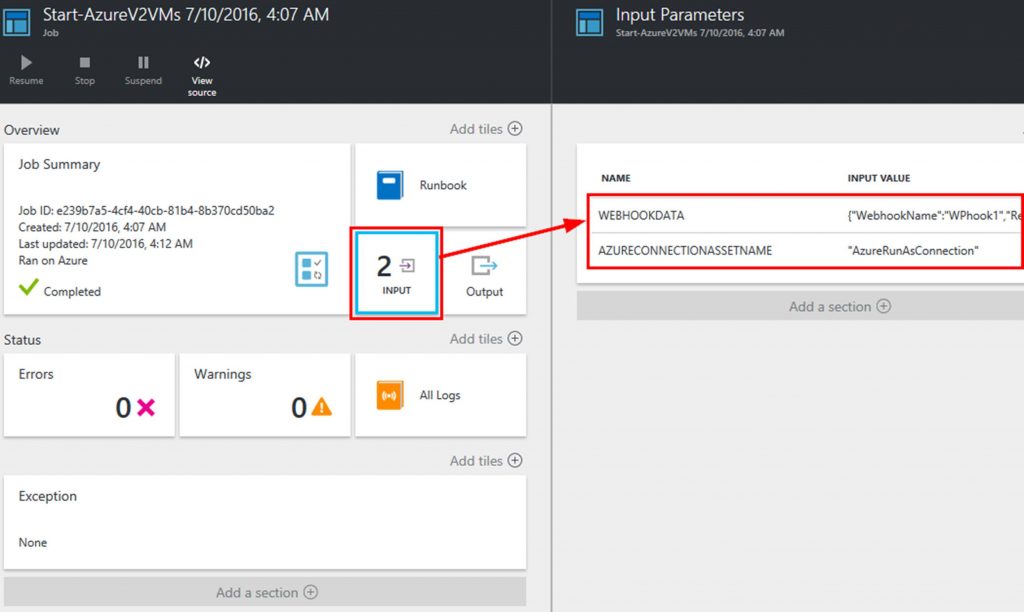
image021

If we look further at the webhookdata we can see several interesting things. We can see exactly where it put the 6716vm parameter for the resourcegroupname and we can see that this request came from my blog at www.buchatech.com.
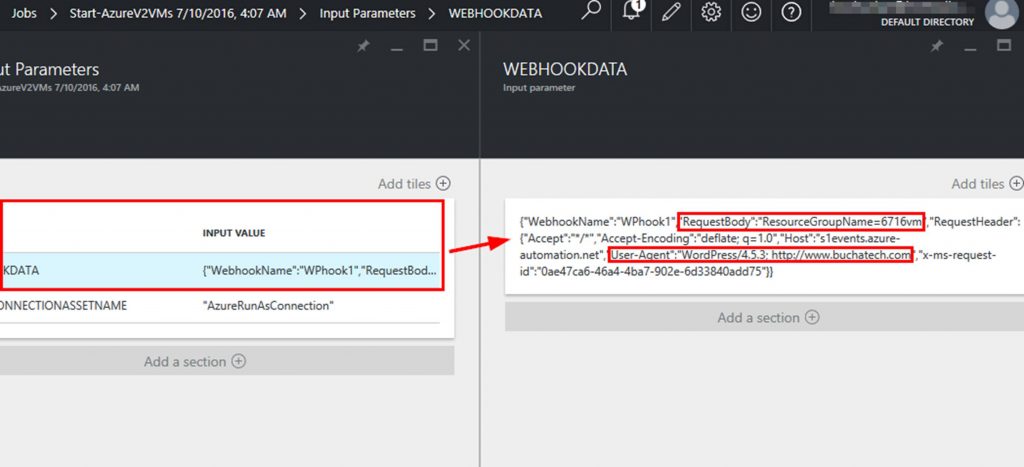
image022

{“WebhookName”:”WPhook1″,”RequestBody”:”ResourceGroupName=6716vm”,”RequestHeader”:{“Accept”:”*/*”,”Accept-Encoding”:”deflate; q=1.0″,”Host”:”s1events.azure-automation.net”,”User-Agent”:”WordPress/4.5.3; https://www.buchatech.com”,”x-ms-request-id”:”0ae47ca6-46a4-4ba7-902e-6d33840add75“}}

Pretty cool right? Check out the VM now running:
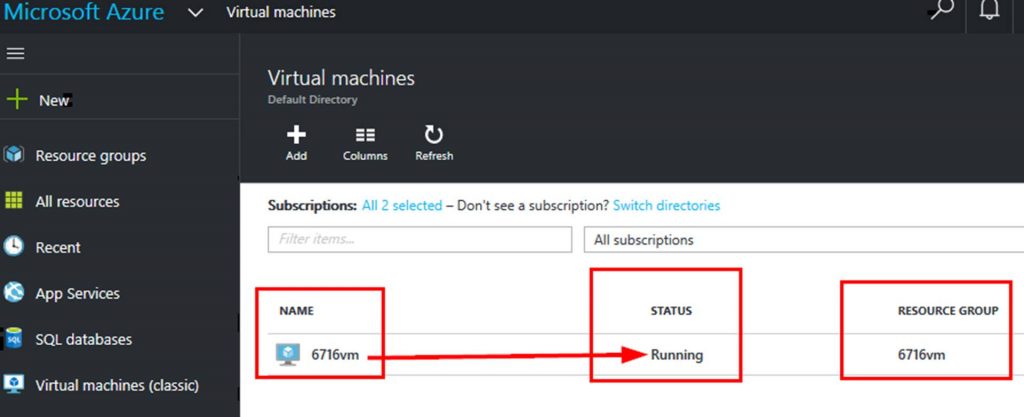
image023

Now to shut it down I can go back to my WordPress and use the Stop Azure VM form. The possibilities here are endless. I know some of you may be thinking this is great but what if I want to control who can login to see this form and will it work with Active Directory. The answer is YES. WordPress has several plugins that integrate with Active Directly and even have SSO. A couple of these are Active Directory/LDAP Login for Intranet sites and Active Directory Integration. 

You can see that WordPress can make a great frontend for your Azure Automation runbooks. That is the end of the post. Happy automating!

Read more

5th Year Microsoft MVP!

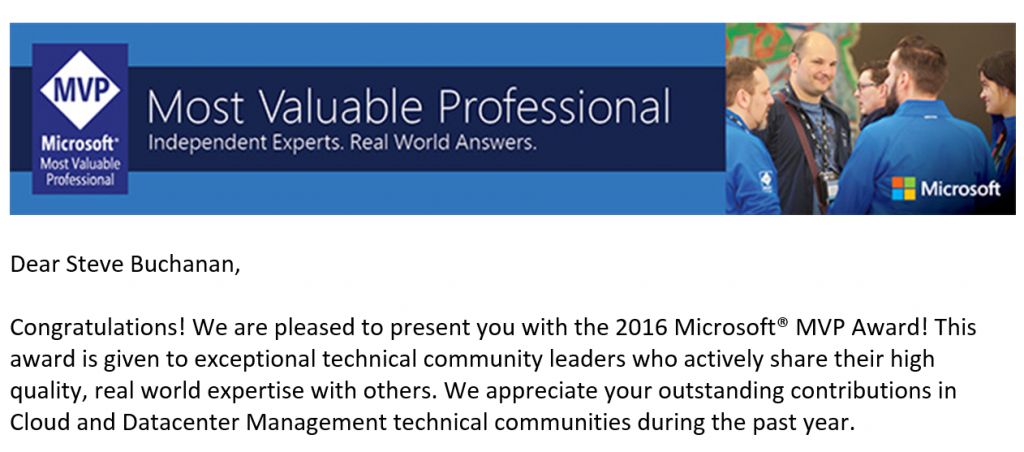
Today was a special day as I received an email from Microsoft stating I was awarded as an MVP for the 5th year! Here is the email:

5th Year Microsoft MVP

This marks a special year. Microsoft awards you the special 5 year chip to add to your award. Here is a picture of the chip:

5th Year Microsoft MVP Chip

I am humbled to make it this long in the MVP program. A huge thanks goes out to everyone in the community and Microsoft. And as always I am honored to still be a part of such a great group of people. I have made many friends all over the world with other MVP’s, community, and Microsoft. I am looking forward to another exciting year of contributing to the community.

I will continue to do all that I can in the System Center community this year. Something new you will see from me this year is I will be contributing as much as I can also in the OMS and Azure Stack space. I am very excited about the new opportunities that are coming out of the growth of cloud.

My Microsoft MVP Profile: http://mvp.microsoft.com/en-us/mvp/Steve%20Buchanan-4039736

Congrats to all the other new and renewed MVP’s!

Read more
Azure Stack Round Table Video

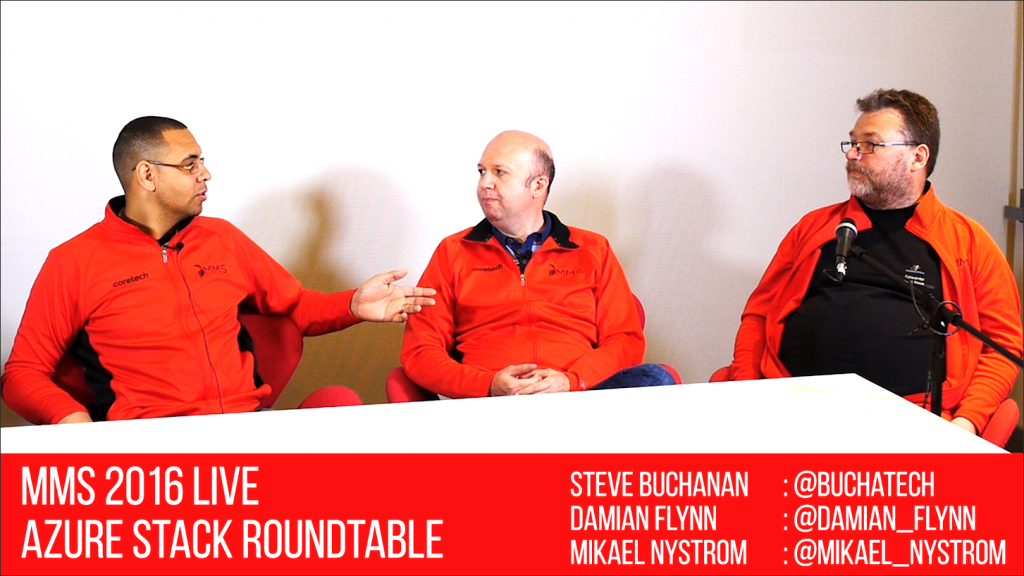
Microsoft MVP Lee Berg @LeeAlanBerg just finished the Azure Stack Roundtable video from MMS. This video has me and two other Microsoft MVP’s  Damian Flynn @damian_flynn and Mikael Nystrom @mikael_nystrom having a great discussion about many Azure Stack topics. In the video questions such as “does VMM still have a purpose in an Azure Stack?” world, “how is Azure Stack compared to Open Stack?”, and “how can an IT Pro get management to invest in DevOps and Azure Stack?”.

Check out the video here:

https://youtu.be/98fA4In9TSc

ASRoundtablepic

Here are links to Azure Stack sessions from MMS:

http://mms2016.sched.org/type/azure+stack

You can download all the slide decks.

Read more