Today I will be speaking at the Omaha Azure User Group. I will be speaking on Azure Arc enabled Kubernetes and GitOps.
I am really looking forward to this user group meeting! I will be speaking on & showing real-time the power of using Microsoft Azure Arc enabled Kubernetes and GitOps, deploying a Container app to a Google Kubernetes Engine (GKE) cluster on the Google Cloud Platform (GCP). More info on my session:
Session title: Push Code, Not Containers with Azure Arc enabled Kubernetes and GitOps
Session details: Use Azure Arc enabled Kubernetes to manage Kubernetes clusters across Google Cloud Platform and Azure without running a single Kubectl command! In this session, Steve Buchanan will take you into the world of GitOps. He will show you how to deploy applications and configuration to GKE clusters and AKS clusters from a GitHub repository. Explore how we can use this new operating model for Kubernetes and cloud-native apps to declaratively describe and ensure the state of our applications and Kubernetes environments.
There is another wave coming. This wave is GitOps. GitOps is a technology pattern and operational framework. It is often used for Kubernetes however is really for cloud-native applications in general. Being that a large amount of cloud-native applications these days are designed and built to run on Kubernetes it is no surprise that GitOps is commonly adopted in Kubernetes environments. If you are running Kubernetes or looking at it chances are you may have heard of GitOps. This is how I define GitOps:
“GitOps is an operating model pattern for cloud native applications storing application & declarative infrastructure code in Git as the source of truth used for automated continuous delivery.”
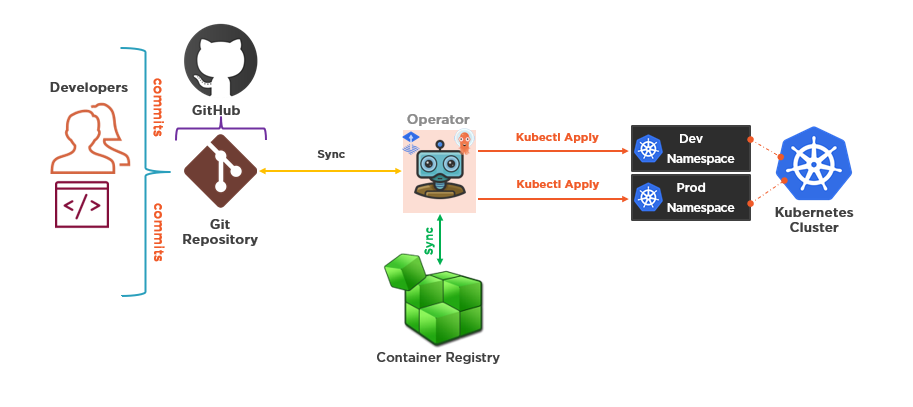
Well, that sums up with GitOps is but it still is a mouthful and can take a bit to wrap ones head around it. In a nutshell GitOps is shifting everything to code, storing everything in Git, making Git the source of truth, and using an operator deploy what is described in Git in your environment including the application and the configuration. With GitOps you describe the desired state of your entire system and GitOps makes it so. It simplifies operations and makes the experience for developers much better allowing them to work out of a tool they are familiar with (Git). Here is a basic sample diagram to give you a visual idea about what GitOps is and how it works:
So in the case of Kubernetes you would have your app code in Git, your container images in Git, and your Kubernetes manifest files. Now there is more to it and how it works but we will not get into all of that in this blog post. This is a good Segway to purpose of this blog post.
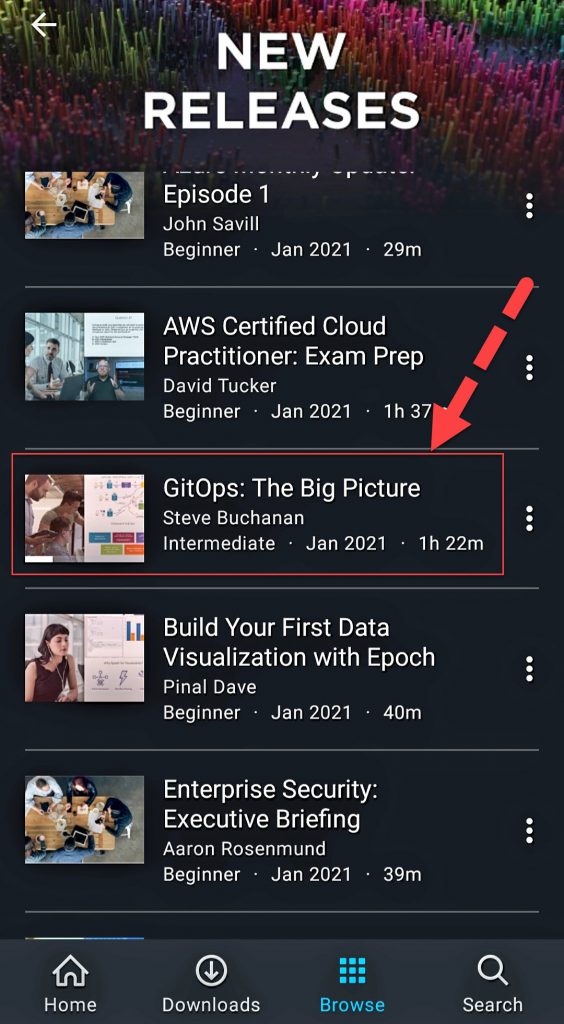
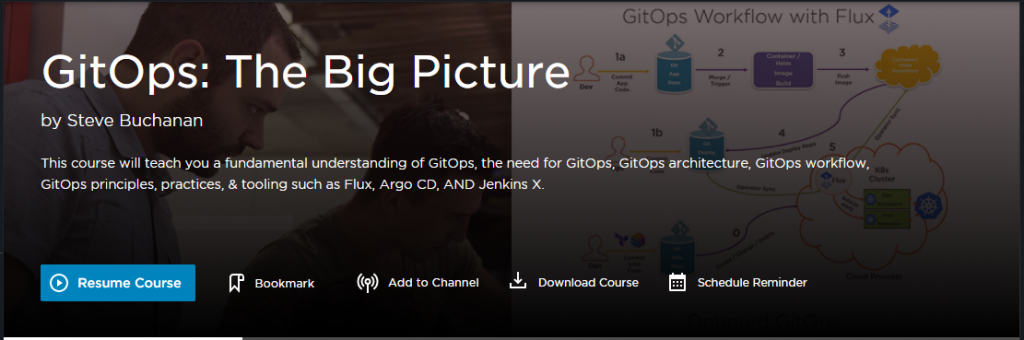
The purpose of this blog post is that I just dropped my 7th Pluralsight course GitOps: The Big Picture! This was a fun course to build as I am passionate about and like working with Containers, Kubernetes, and cloud.
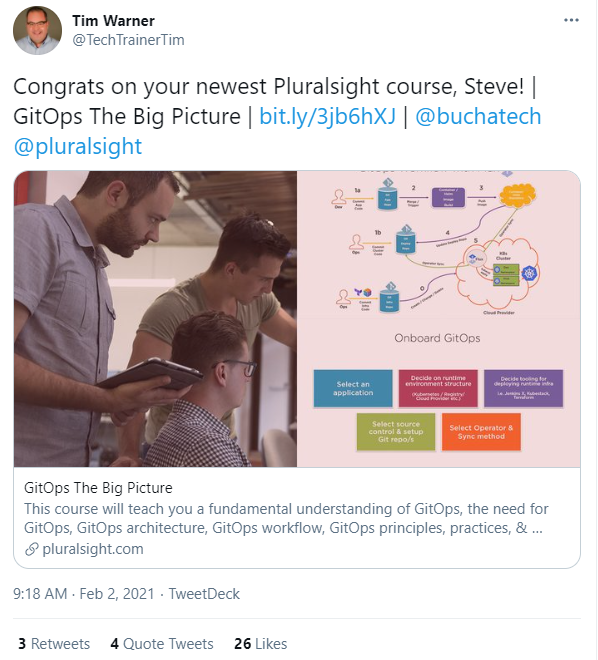
A quick shoutout to both Fellow Microsoft MVP/Pluralsight Author Tim Warner and Jason Alba for amplifying my new course!
This course teaches the fundamentals of GitOps, the need for GitOps, GitOps architecture, GitOps workflow, GitOps principles, practices, & tooling such as Flux, Argo CD, AND Jenkins X. Also in this course, GitOps: The Big Picture, you’ll learn what it takes to adopt GitOps. First, you’ll explore what GitOps is and its benefits. Next, you’ll discover GitOps Tooling NS Architecture. Finally, you’ll learn how to use GitOps Workflows. When you’re finished with this course, you’ll have the skills & knowledge of the GitOps framework needed to take the next steps with GitOps.
In the course I give a couple of demos so you can see GitOps in action. The first demo is on “deploying an application using Argo CD” and the second demo is on “GitOps in Action with Azure Arc Enabled Kubernetes using Flux”. Another interesting fact about GitOps is we are starting to see the major cloud providers bring GitOps into their offerings such as Azure Arc and or couple GitOps with their services like with GCP GKE as well as create content on using GitOps with their managed Kubernetes services like with AWS EKS.
GitOps is going to continue to grow right along with the continued growth of Containers, Kubernetes, and Cloud. I am all in and you will see blogs, books, courses, speaking at events, and more from me around GitOps as I continue on my personal journey with it.
Be sure to follow my profile on Pluralsight so you will be notified as I release new courses! I will be releasing more courses soon on topics around Azure, GitOps, SAP on Azure, & Kubernetes courses soon!
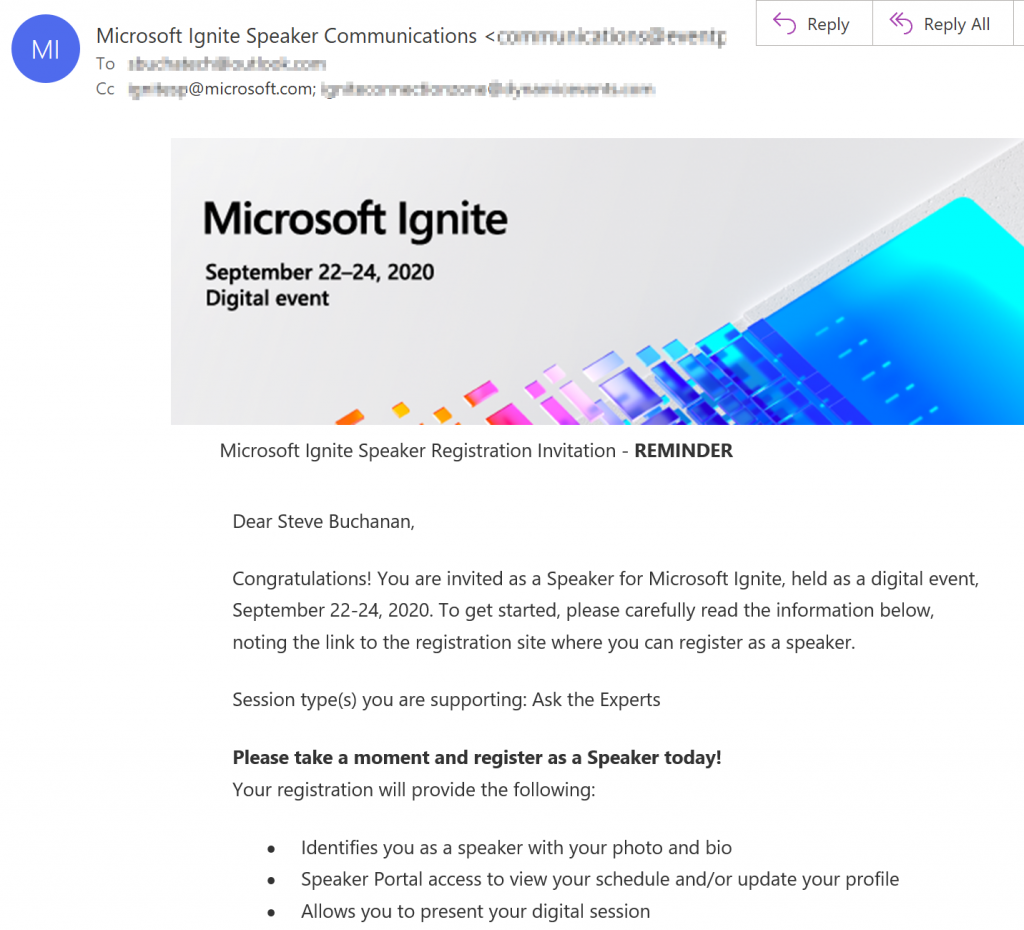
I am excited to announce that I am one of the experts in several Ask the Expert sessions during Microsoft Ignite 2020 this week.
I will be a part of a variety of sessions with topics ranging from Linux and PowerShell on Azure, Kubernetes on Azure, Azure Migration, and Transforming Windows Server workloads in Azure.
Here is the link to the Ignite home page myignite.microsoft.com. I hope to see you on the digital Ignite event and in one of the Ask the Expert Sessions!
Update 9/30/2020
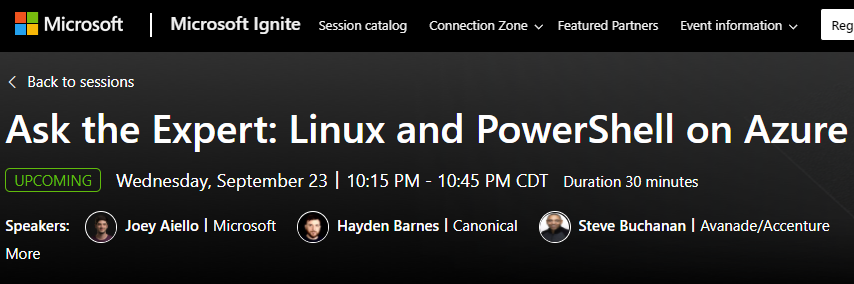
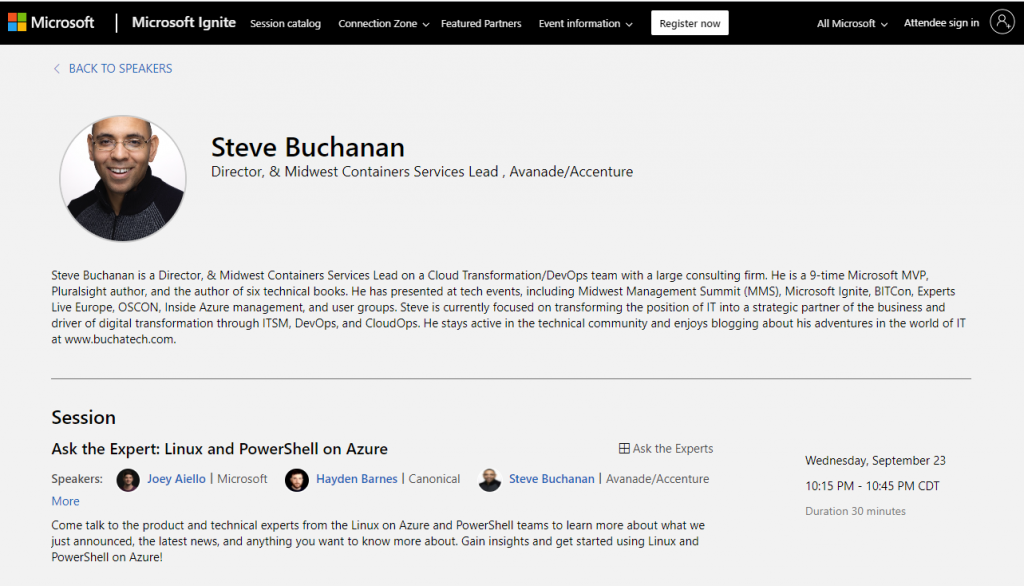
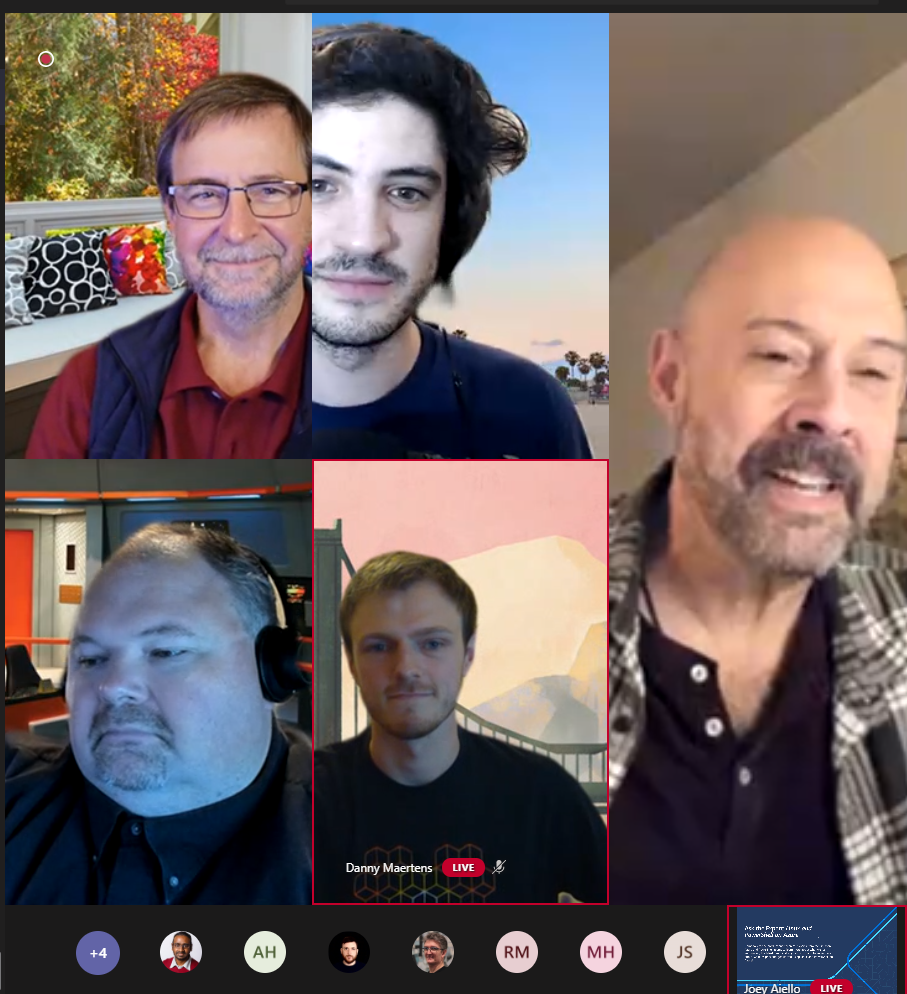
Being a part of several Ask the Expert sessions was really fun! My most memorable session was the Ask the Expert: Linux and PowerShell on Azure session.
This session was packed full of superstars from Microsoft product groups and fellow MVPs including; Jeffery Snover, Jason Helmick, Janaka Rangama, and Alexander Nikolić. Here is a screenshot from the session:
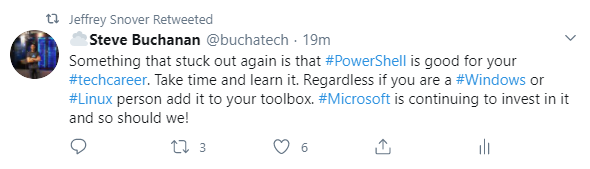
After the session, I tweeted about the session and shared some wisdom about PowerShell, and both Jeffery Snover and Jason Helmick retweet my tweet!
2020 is not all bad. It’s pretty cool when the inventor of PowerShell and the PowerShell Program Manager retweet you!
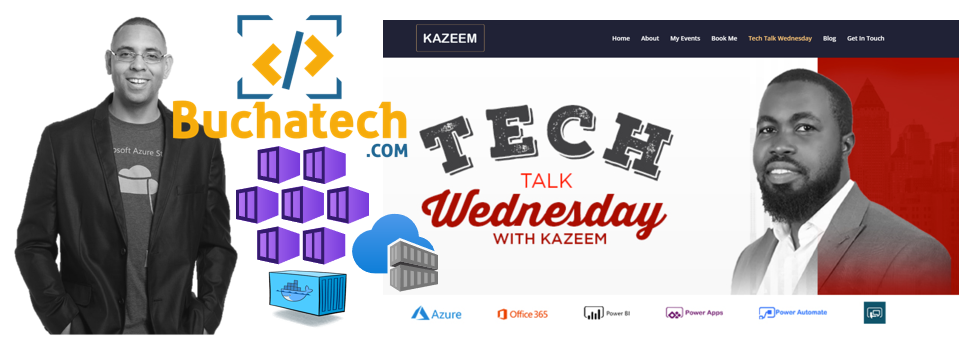
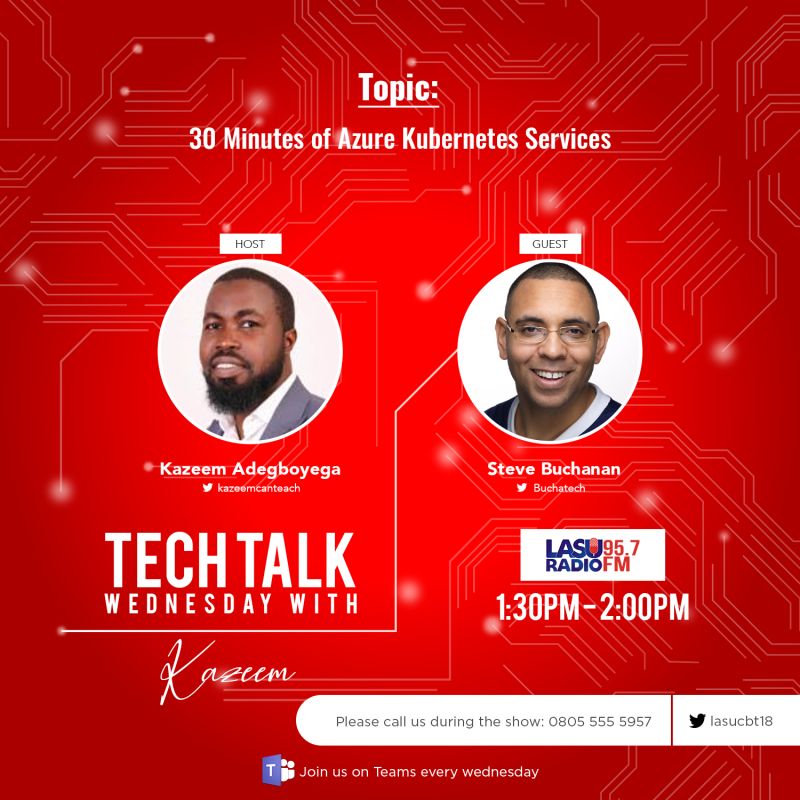
Today I went on “Tech Talk Wednesday” a podcast and radio show with Kazeem Adegboyega The topic was “30 Minutes of Azure Kubernetes Services (AKS)“. It streamed online via Microsoft Teams and aired in Lagos, Nigeria on Lagos State University (LASU) radio (95.7).
I had a great time talking with Kazeem! Even Sam Erskine made a guest appearance. If you missed the live show you can watch it on YouTube:
I am honored to be a guest next Wednesday, August 26th on the “Tech Talk Wednesday” podcast and radio show with Kazeem Adegboyega (@KazeemCanTeach)! We will be chatting about Azure Kubernetes Service (AKS).
This show will be streamed online via Microsoft Teams and will air in Lagos, Nigeria on Lagos State University (LASU) radio (95.7)!
One of my goals is to help spread knowledge about tech in Africa and showcase African technologists in the US. This is the first step in that journey.
I recently had the honor of being a guest on the “Lisa at the Edge” Podcast. Lisa is a Microsoft Hybrid Cloud Strategist and an influencer in the hybrid cloud community based out of Scotland. She runs a blog and this year she started a popular podcast.
On Lisa’s podcast, she covers Careers in Tech and Microsoft Hybrid Cloud and a range of other topics with experts across the tech community.
This is an episode you don’t want to miss. This was one of the most entertaining podcasts I have been on. It took some interesting turns in regards to topics and very engaging. In the podcast episode Lisa and I talk about:
Evolving your career as technology evolves
Transformation of IT dept to Strategic Business Partner
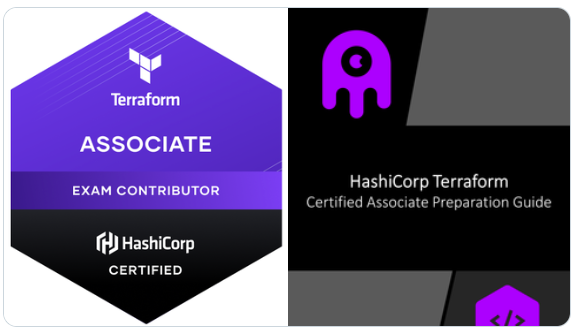
I am also happy to announce that I was a tech reviewer on the first study guide for this cert titled “HashiCorp Terraform Certified Associate PreparationGuide“. You can find it here: https://leanpub.com/terraform-certified/. This guide was authored by fellow Microsoft MVP Ned Bellavance and Microsoft CSA Adin Ermie. Huge thanks guys for letting me be a part of this project!
If you work with Terraform I hope you get certified and be sure to use the study guide!
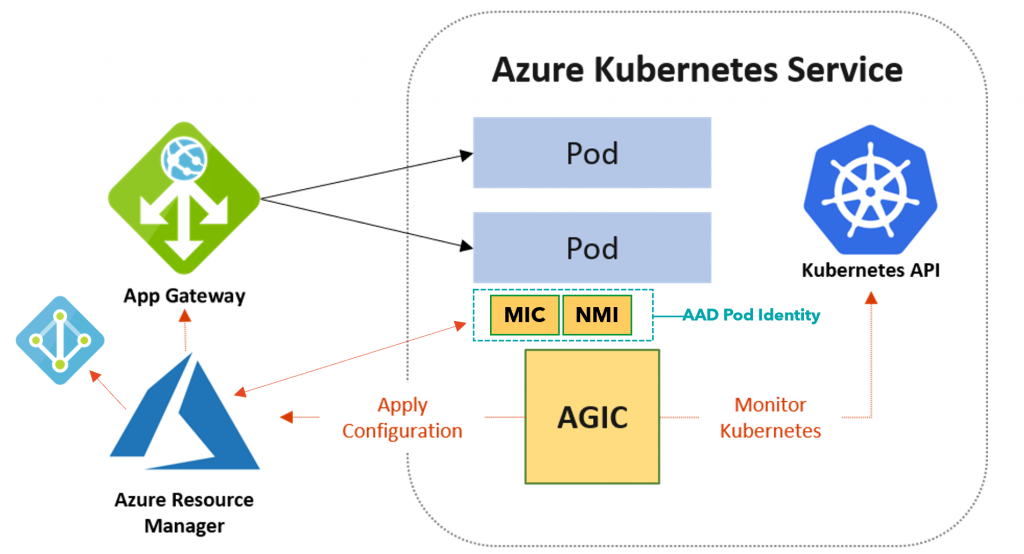
In Kubernetes, you have a container or containers running as a pod. In front of the pods, you have something known as a service. Services are simply an abstraction that defines a logical set of pods and how to access them. As pods move around the service that defines the pods it is bound to keeps track of what nodes the pods are running on. For external access to services, there is typically an Ingress controller that allows access from outside of the Kubernetes cluster to a service. An ingress defines the rules for inbound connections.
Microsoft has had an
Application Gateway Ingress Controller for Azure Kubernetes Service AKS in
public preview for some time and recently released for GA. The Application
Gateway Ingress Controller (AGIC) monitors the Kubernetes cluster for ingress
resources and makes changes to the specified Application Gateway to allow
inbound connections.
This allows you to leverage the Application Gateway service in Azure as the entry into your AKS cluster. In addition to utilizing the Application Gateway standard set of functionality, the AGIC uses the Application Gateway Web Application Firewall (WAF). In fact, that is the only version of the Application Gateway that is supported by the AGIC. The great thing about this is that you can put Application Gateways WAF protection in front of your applications that are running on AKS.
This blog post is not a detailed deep dive into AGIC. To learn more about AGIC visit this link: https://azure.github.io/application-gateway-kubernetes-ingress. In this blog post, I want to share a script I built that deploys the AGIC. There are many steps to deploying the AGIC and I figured this is something folks will need to deploy over and over so it makes sense to make it a little easier to do. You won’t have to worry about creating a managed identity, getting various id’s, downloading and updating YAML files, or installing helm charts. Also, this script will be useful if you are not familiar with sed and helm commands. It combines PowerShell, AZ CLI, sed, and helm code. I have already used this script about 10 times myself to deploy the AGIC and boy has it saved me time. I thought it would be useful to someone out there and wanted to share it.
I typically deploy RBAC enabled AKS clusters so this script is set up to work with an RBAC enabled AKS cluster. If you are deploying AGIC for a non-RBAC AKS cluster be sure to view the notes in the script and adjust a couple of lines of code to make it non-RBAC ready. Also note this AGIC script is focused on brownfield deployments so before running the script there are some components you should already have deployed. These components are:
VNet and 2 Subnets (one for your AKS cluster and one for the App Gateway)
AKS Cluster
Public IP
Application Gateway
The script will
deploy and do the following:
Deploys the AAD Pod Identity.
Creates the Managed Identity used by the AAD Pod Identity.
Gives the Managed Identity Contributor access to Application Gateway.
Gives the Managed Identity Reader access to the resource group that hosts the Application Gateway.
Downloads and renames the sample-helm-config.yaml file to helm-agic-config.yaml.
Updates the helm-agic-config.yaml with environment variables and sets RBAC enabled to true using Sed.
Adds the Application Gateway ingress helm chart repo and updates the repo on your AKS cluster.
Installs the AGIC pod using a helm chart and environment variables in the helm-agic-config.yaml file.
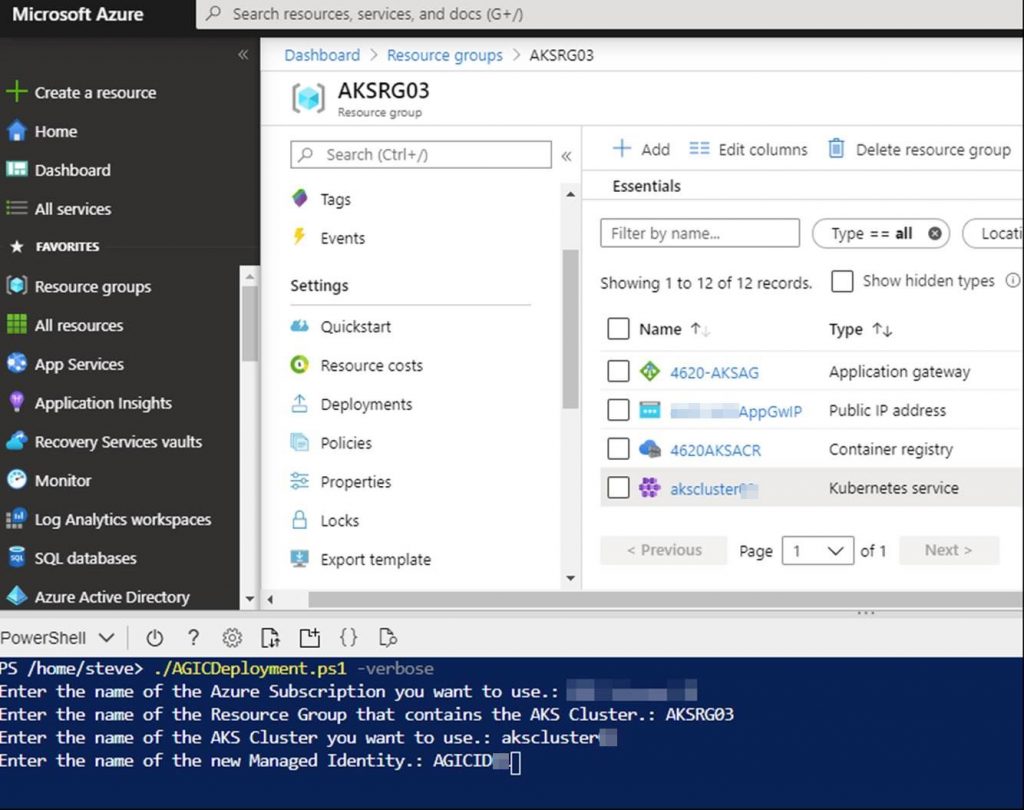
Now let’s take a look at running the script. It is recommended to upload to and run this script from Azure Cloud shell (PowerShell). Run:
./AGICDeployment.ps1 -verbose
You will be prompted
for the following as shown in the screenshot:
Enter the name of the Azure Subscription you want to use.:
Enter the name of the Resource Group that contains the AKS Cluster.:
Enter the name of the AKS Cluster you want to use.:
Enter the name of the new Managed Identity.:
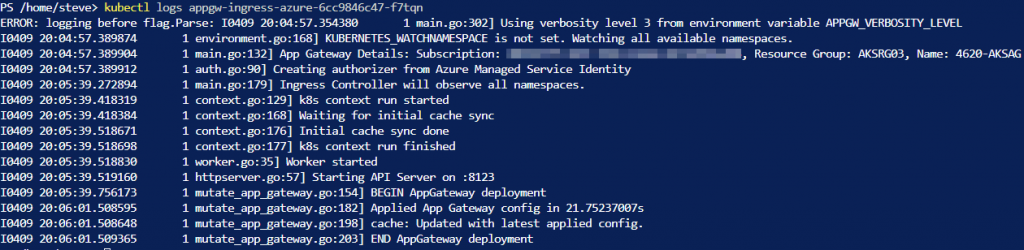
Here is a screenshot
of what you will see while the script runs.
That’s it. You don’t have to do anything else except entering values at the beginning of running the script. To verify your new AGIC pod is running you can check a couple of things. First, run:
kubectl get pods
Note the name of my
AGIC pod is appgw-ingress-azure-6cc9846c47-f7tqn.
Your pod name will be different.
Now you can check
the logs of the AGIC pod by running:
kubectl logs appgw-ingress-azure-6cc9846c47-f7tqn
You should not have
any errors but if you do they will show in the log. If everything ran fine the
output log should look similar to:
After its all said and done you will have a running Application Gateway Ingress Controller that is connected to the Application Gateway and ready for new ingresses.
This script does not deploy any ingress into your AKS cluster. That will need to be done in addition to this script as you need. The following is an example YAML code for an ingress. You can use this to create an ingress for a pod running in your AKS cluster.
I recently published a blog post on 4sysops.com about Web App for Containers on Azure here: https://4sysops.com/archives/web-app-for-containers-on-azure. That blog post is about the often-overlooked service in Azure that can be used to host a container/s on a web app in Azure App service.
This is a great service if you just need to run a single container or even a couple of containers that you have in Docker Compose. This service is PaaS and abstracts away an orchestration system like Kubernetes. If you need insight into the Azure App Service Web App for Containers service check out the blog post on 4sysops.
In this long blog post I am going to take things a step further and walk-through the build & release of a Container from Azure DevOps to Azure Web App for Containers. The overall goal of this post is to help someone else out if they want to setup a build and release pipeline for building and deploying a container to Azure App Service. We will use a very simple PHP web app I built that will run in the container.
Here are the components that are involved in this scenario:
Azure Container Registry (ACR): We will use this to store our container image. We will be pushing up the container image and pull it back down from the registry as a part of the build and release process.
Azure DevOps (ADO): This is the DevOps tooling we will use to build our container, push it up to ACR, pull it down into our release pipeline and then deploy to our Azure App Service.
App Service Web App for Containers: This is the web server service on Azure that will be used to host our container. Under the hood this will be a container that is running Linux and Apache to host the PHP web app.
Here is the data Flow for our containerized web app:
Deploy the Azure App Service Web App for Containers instance
Deploy the Azure Container Registry
Deploy the Azure DevOps organization and project, create repository to host the code, clone repository in VS Code (Not shown in this blog post. Assume you know how to this up.)
Update the application code (PHP code and Docker image) in Visual Studio code
Commit application code from Visual Studio code to the Azure DevOps repo (Not shown in this blog post. Assume you know how to this up.)
Setup build and then run container build and push the container image to ACR
Setup release pipeline and then kick off the release pipeline pulling down the container image from ACR and deploys the container to the App Service Web App for Containers instance.
Here is a diagram detailing out the build and release process we will be using:
Ok. Let’s get into the setup of core components of the solution and the various parts of the build and release pipeline.
For starters this solution will need a project in Azure DevOps with a repo. Create a project in Azure DevOps and a repo based on Git. Name the repo exerciseoftheday. Next up let’s create the core framework we need in Azure.
Deploy Azure App Service Web App for Containers
Let’s create the Azure App Service Web App for Containers that will be needed. We will need a resource group, an app service plan and then we can setup the app service. The PHP app we will be running is named Exercise Of The Day (EOTD) for short so our resources will use EOTD. Use the following steps to set all of this up.
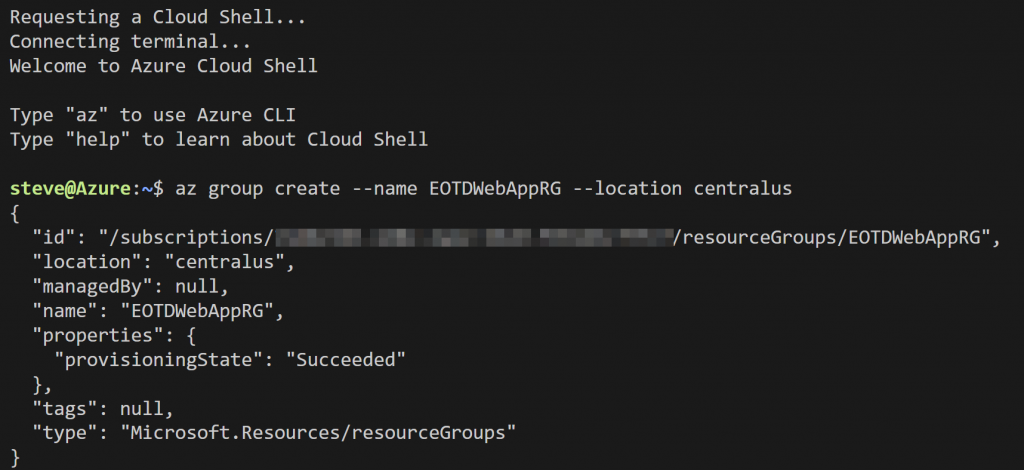
We will do everything via Azure Cloud Shell. Go to https://shell.azure.com/ or launch Cloud Shell within VS Code.
Run the following Syntax:
# Create a resource group
az group create –name EOTDWebAppRG –location centralus
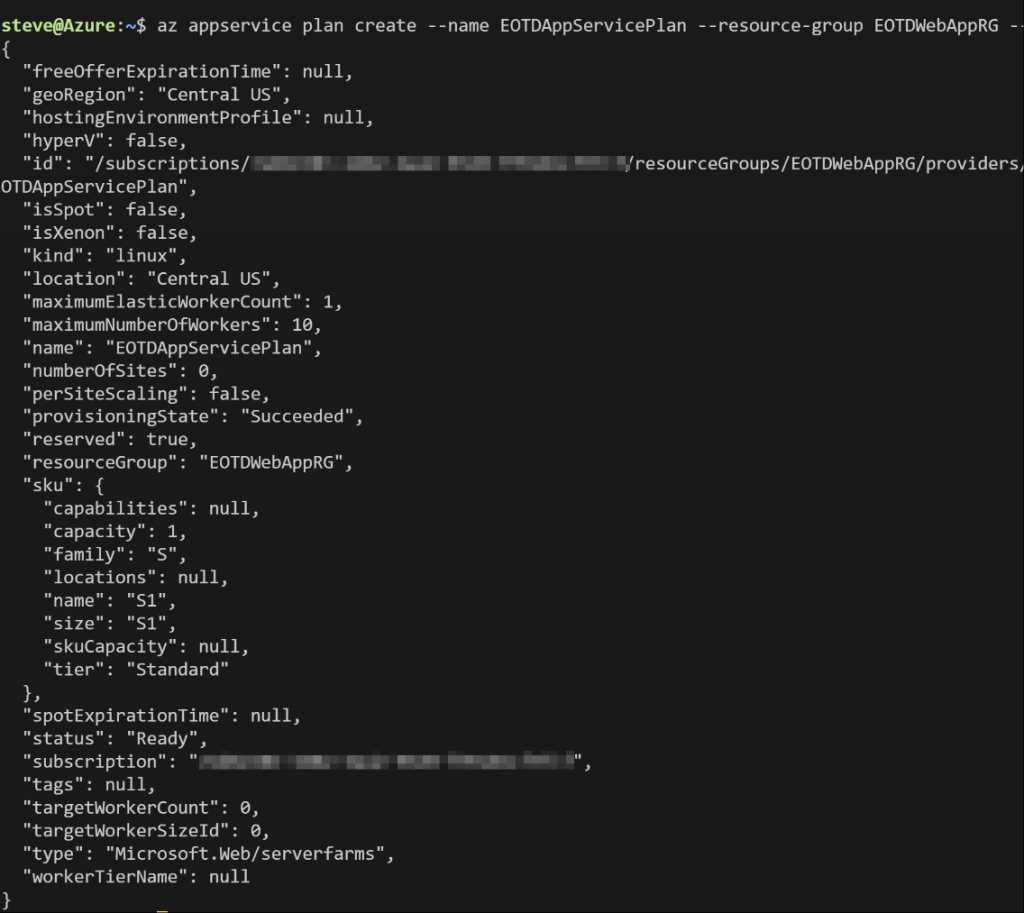
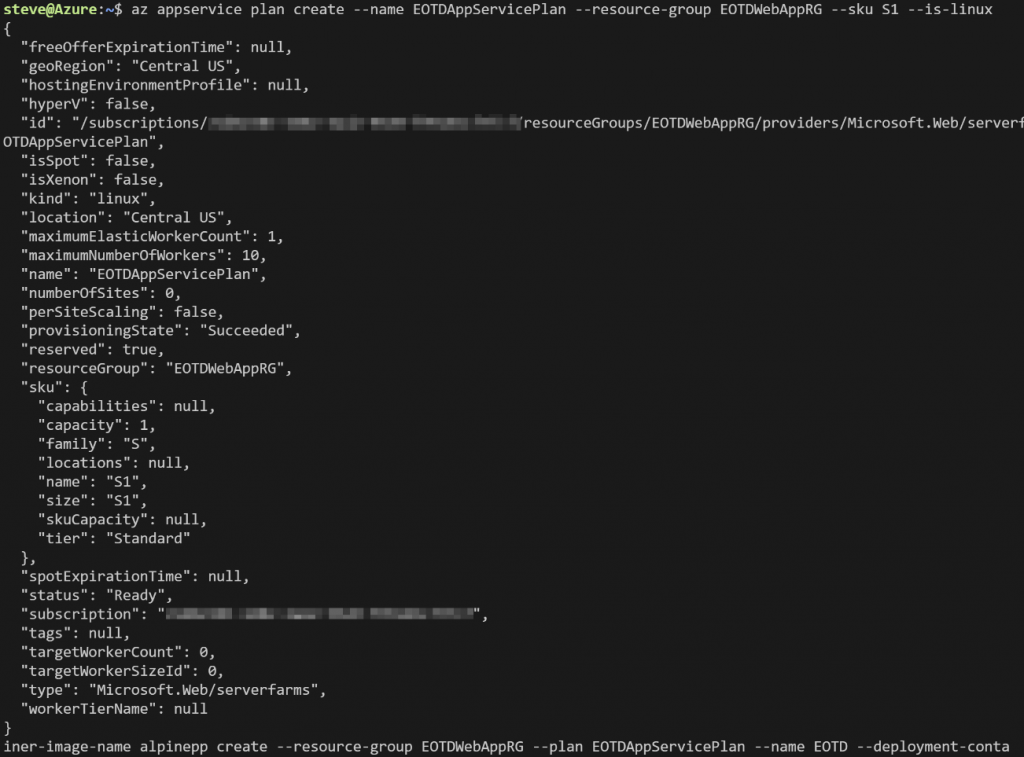
# Create an Azure App Service plan
az appservice plan create –name EOTDAppServicePlan –resource-group EOTDWebAppRG –sku S1 –is-linux
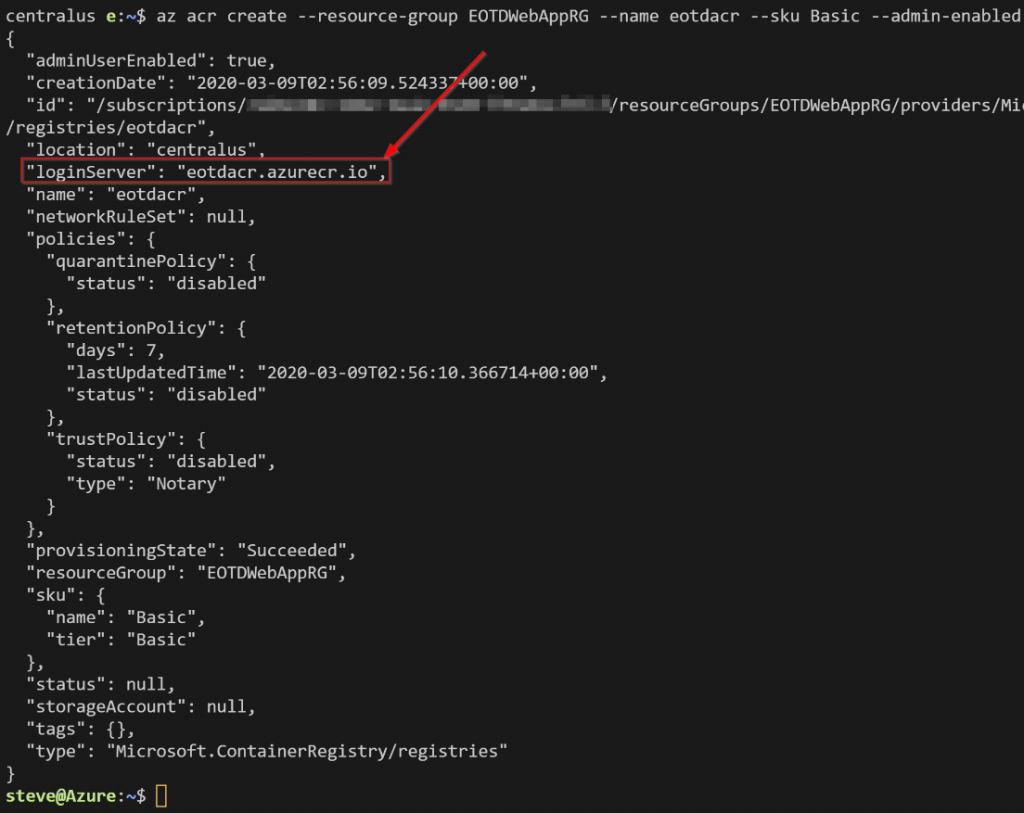
# Create an Azure App Service Web App for Containers
Note the loginServer from the output. This is the FQDN of the registry. Normally we would need this, admin enabled, and the password to log into the registry. In this scenario we won’t need admin enabled or the password because we will be adding a connection to Azure DevOps and the pipelines will handle pushing to and pulling the image from the registry.
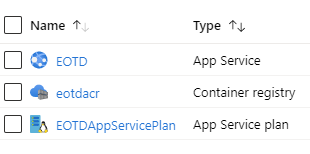
When it’s all done you should see the following resources in the new resource group:
Next, we will need to build an application and a container image.
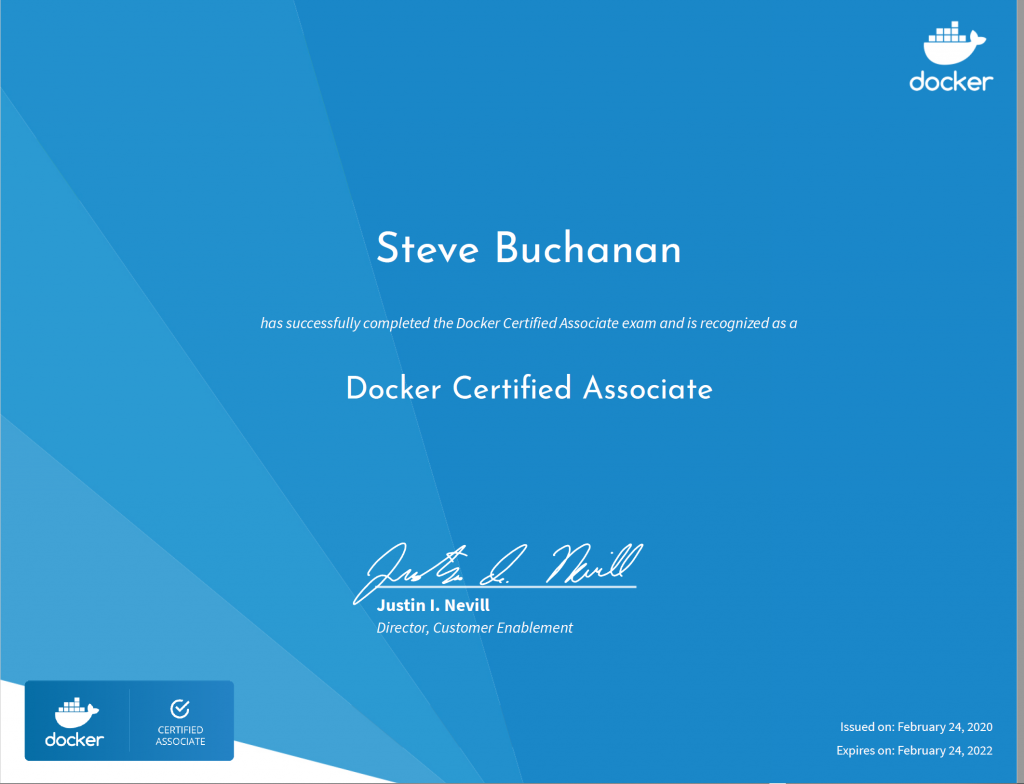
Today I passed the Docker Certified Associate exam! In this post, I will share some details about the exam and the resources I used to study for it.
The certification is good for 2 years after passing the exam. It demonstrates that you have foundational real-world Docker skills. It is multiple choice with 55 questions, you have 1.5 hours to finish it and costs $195 USD. It is recommended that you have 6 to 12 months of hands-on experience with Docker before taking the exam. You can read about and sign up for the exam here: https://success.docker.com/certification.
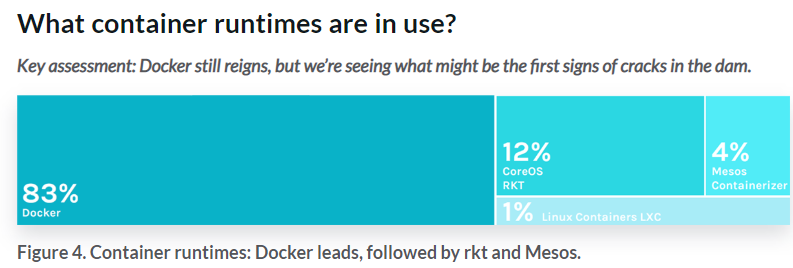
I have had some folks ask me why I would waste my time taking the Docker exam. They say to focus on Kubernetes and Open Shift instead of Docker. Lets talk about why I chose to pursue the Docker certification. First off you have to run containers on those orchestration platforms mentioned before and chances are you will run Docker containers on them. Therefore before diving into an orchestration platform it is important to be knowledgable on containers. Also, I have seen many scenarios in the cloud where it makes sense to run containers directly on the cloud platform itself and again chances are those will be Docker containers. Docker is still a leader in the container space. There are several reports and articles that point to this. Here are some of the reports and articles backing this up:
Docker listed as the leader in the “Container Tools Used” section of the RightScale 2019 State of the Cloud Report” here:
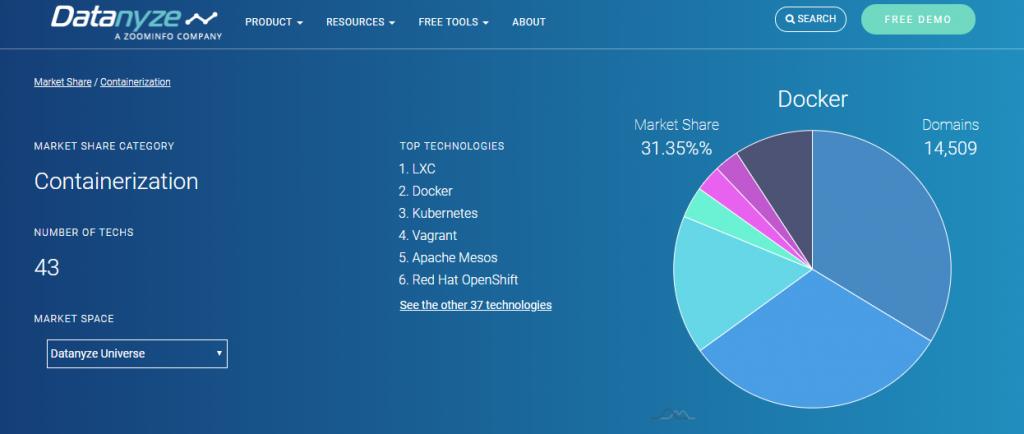
Docker is listed as #2 with 31.35% market share on Datanyze 2020 “Containerization Market Share Competitor Analysis Report” here:
I will call out that the Docker exam covers Swarm mode orchestration platform that is included with Docker. Swarm mode is a lot easier to learn and use compared to Kubernetes however, Kubernetes has won the orchestration platform war. It would be nice if Docker would revamp the exam reducing or removing Swarm and replace with some Kubernetes objectives. This would make more sense because there is a strong chance Swarm will not be used in the real world.
The Docker exam was not an easy exam and you definitely want to have some hands-on with Docker before taking it. There are a ton of resources out there that you can leverage beyond hands-on to assist in your study for this certification. There are many books available. You can do a quick search on Amazon and check the reviews for one that would be a good fit for you. I have read a couple of books on Docker and have co-authored a book on AKS with a chapter dedicated to Docker in it.
Here is the list of what I used to study.
Free Hands on Docker labs (This resource was huge for me. It gave me environments to use and scenarios for training with Docker and Docker Swarm mode.):
I attended a “Docker JumpStart Virtual Workshop” by Microsoft MVP Mike Pfeiffer and Microsoft MVP/Docker Captain Dan Wahlin (This workshop ocurred in the past but I beleive you can sign up and watch the recordings from the workshop.):
Free Docker Certification review questions here (This blogger has a bunch of review questions to help you get in the right mindset. They cover all the exam areas.):
Docker courses and learning checks on Pluralsight (The courses are great. I found the learning checks very useful becuase it was a good way to check my knowledge in all of the exam areas.):
Spent time working with Docker on some projects (self explanatory).
Overall the Docker certification is a good move for your career as an IT Pro, developer, if you work in DevOps, and with cloud. I definitely recommend getting this certification. If you decide to go after it good luck!
Stay tuned for more blog posts with insights on certifications in the future.